background image

SS-6601E & SS-6601R

 SAS Disk Array Systems

15

2


 B

a

s

ic

 C
o

n

fi

g

u

ra

tio

n

 –


M
a

k

in

g

 C

o

n

n

e

c

ti

o

n

s

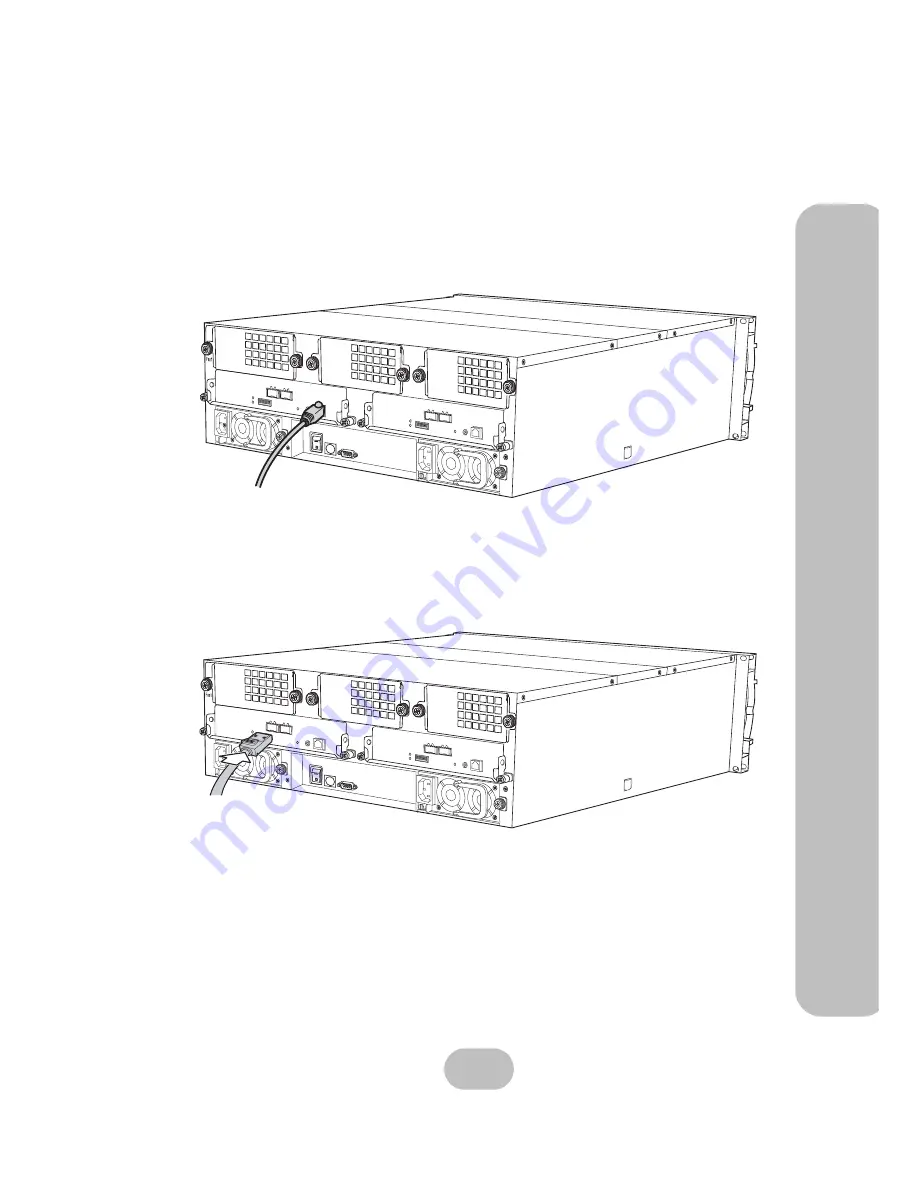
Connecting the GUI management port

Connecting the GUI management port by a Ethernet cable (standard RJ45) to LAN/

WAN environment, and open a web-browser with SS-6601E and SS-6601R IP address 

(Default is 192.168.0.1 or DHCP enabled) for easily monitoring/configuring RAID sys-

tem.

Connecting the JBOD enclosure

Connect a SAS (SFF-8088, miniSAS connector) external cable to JBOD enclosure.

LAN

COM

CTRL ready

EXP Access

EXP Link

LAN

COM

CTRL ready

EXP Access

EXP Link

Controller B

Controller A

CH 2

CH 1

CH 2

CH 1

Fan2

Fan3

Fan1

UPS

P/S

Chassis

ID

LAN

COM

CTRL ready

EXP Access

EXP Link

LAN

COM

CTRL ready

EXP Access

EXP Link

Controller B

Controller A

CH 2

CH 1

CH 2

CH 1

Fan2

Fan3

Fan1

UPS

P/S

Chassis

ID

Содержание SS-6601E

Страница 1: ...SS 6601E SS 6601R Hardware User Manual 42 30000 5122 4G Fibre Channel to SAS Disk Array Systems Version 1 0...

Страница 2: ......

Страница 3: ...SS 6601E SS 6601R 4G Fibre Channel to SAS Disk Array Systems Hardware User Manual...

Страница 4: ......

Страница 5: ...Front Panel 5 Open Front Panel 6 Disk Tray 7 SS 6601E Rear View 8 SS 6601R Rear View 9 Installing Disks 11 Upgrade to Redundant 13 Making Connections 14 Connecting the Host Interface 14 Connecting th...

Страница 6: ......

Страница 7: ...entation are protected by copyright and are distributed under licenses restricting their use copying and distribu tion No part of this documentation may be reproduced in any form by any means with out...

Страница 8: ...k array system on an unstable cart stand or table It may fall causing serious damage to the product Keep the disk array system away from magnetic forces Do not use the disk array system near water Kee...

Страница 9: ...openings since they may touch dangerous voltage points and cause a risk of fire or electric shock Unplug the power cord from the wall outlet before clean ing Keep the disk array system dry Do not use...

Страница 10: ...upply Safety Notes To avoid electric shocks do not use an extended power cord or an outlet that does not match the disk array system plug or leaves the plug exposed The disk array system has a 3 wire...

Страница 11: ...voltage power cables and motors etc no direct sunlight a flat stable surface capable of supporting the disk array system Host Interface 4G Fibre Channel SS 6601E and SS 6601R provide dual 4G fibre ch...

Страница 12: ...0 terminal settings Ethernet settings SS 6601E and SS 6601R support DHCP Dynamic Host Configuration Protocol to get a IP address or a default IP is 192 168 0 1 You could find it from LCD scrolling SS...

Страница 13: ...ng and moving it Item qty Disk Array System 1 pcs Hard Disk Tray 16 pcs Hardware and Software User Manual 1 set Rail 1 set Rail Extender 1 set Power P S Fail Access Enter ESC SS 660 1E SS 660 1R 4G Fi...

Страница 14: ...ems 2 Basic Configuration Unpacking Front Panel Key 2 pcs Power Cable 2 pcs Screw pack 3 pack Fix Screw pack M5 2 pack Fix Scwer pack M6 2 pack Fix Scwer pack UNC 10 32 2 pack RS 232 cable for SS 6601...

Страница 15: ...il indicator Indicate a failed power supply 4 Host computer access indicator Indicate data transfer between the disk array sys tem and the host computer 5 Up function button Move up in the LCD menus 6...

Страница 16: ...1 16 Removable hot swap disk trays 17 Front panel door Protect the disks and house the LCD panel Disk1 Disk2 Disk3 Disk4 Disk5 Disk6 Disk7 Disk8 Disk9 Disk10 Disk11 Disk12 Disk13 Disk14 Disk15 Disk16...

Страница 17: ...Disk Tray No Name Description 1 Power Error indicator LED Different colors indicate different disk states Green Disk online Red No disk or Disk fail 2 Access indicator LED This blue LED indicates that...

Страница 18: ...le For power supply removal 11 Power Supply AC In Connect to a 100 240 VAC power source 12 UPS port Data port for uninterruptable power supply 13 Chassis ID Only work in JBOD enclosure 14 Power Supply...

Страница 19: ...st server 10 Host Channel 2 Controller B Connect to the host server 11 Cooling fan 2 System cooling fan 12 RS 232 Port Connect to a VT100 terminal or equivalent 13 Ethernet Port Controller B Use for b...

Страница 20: ...y 1 Removable redundant power supply 1 22 Power Supply Handle For power supply removal 23 Expansion Port Controller A Use for JBOD expansion SFF 8088 24 Power Supply AC In Connect to a 100 240 VAC pow...

Страница 21: ...e button A to release the disk tray handle Pull the handle B to release the tray 3 Align the rear of the disk with the rear of the disk tray 4 Insert the disk into the disk tray and fix into place wit...

Страница 22: ...close the disk tray handle B 6 Repeat steps 2 to 5 until all of the required disks have been installed 7 Push the front panel door closed and lock it A B Disk1 Disk2 Disk3 Disk4 Disk5 Disk6 Disk7 Disk...

Страница 23: ...Lower the handle and tighten the retaining screws ControllerA LAN COM CTRLready EXPAccess EXPLink Fan2 Fan3 Fan1 UPS P S Chassis ID ControllerB CH2 CH1 ControllerA LAN COM CTRLready EXPAccess EXPLink...

Страница 24: ...o the following sections to make host interface connections The SS 6601E and SS 6601R have dual 4G fibre channel interfaces Each interface can be used with optical or copper transceivers and cables Fo...

Страница 25: ...ult is 192 168 0 1 or DHCP enabled for easily monitoring configuring RAID sys tem Connecting the JBOD enclosure Connect a SAS SFF 8088 miniSAS connector external cable to JBOD enclosure LAN COM CTRLre...

Страница 26: ...ear of the unit then plug the second power supply cable into the second power connector B 2 Switch on both power supply switch C Note The system is equipped with auto switching power supplies that can...

Страница 27: ...mounting points on the rails 2 Extend both of the rails so that they are the right length to fit in your rack 3 Bolt the rails into the rack using the rack bolts supplied with your rack You will need...

Страница 28: ...to fit the rail extenders if required 1 If required bolt the rail extenders into place as shown using the small bolts pro vided 2 Slide the disk array system into the rack and bolt it into place with...

Страница 29: ...he disk tray 4 Align the rear of the new disk with the rear of the disk tray 5 Insert the new disk into the disk tray 6 Attach the disk to the disk tray with the screws that came with the disk 7 Slide...

Страница 30: ...rear of the unit 3 Loosen the power supply retaining screw 4 Remove the faulty power supply by pulling the power supply handle A and pressing the release catch B at the same time 5 Insert a new power...

Страница 31: ...move the memory 3 Gently push the new memory into the socket then push the corners of the mem ory down The memory is secured by the memory retaining clips Push the con troller cage back in lower the h...

Страница 32: ...ining screws slide it out of chassis 2 Insert a new FAN module tighten the retaining screws Note Turn off the audible alert by pressing the Up and Down function buttons on the front panel twice simult...

Отзывы: