background image

47

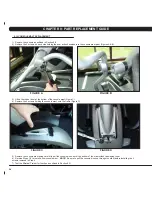
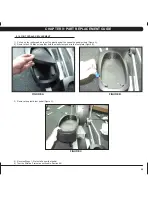
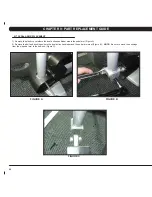
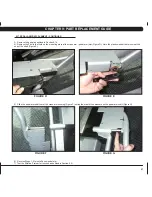
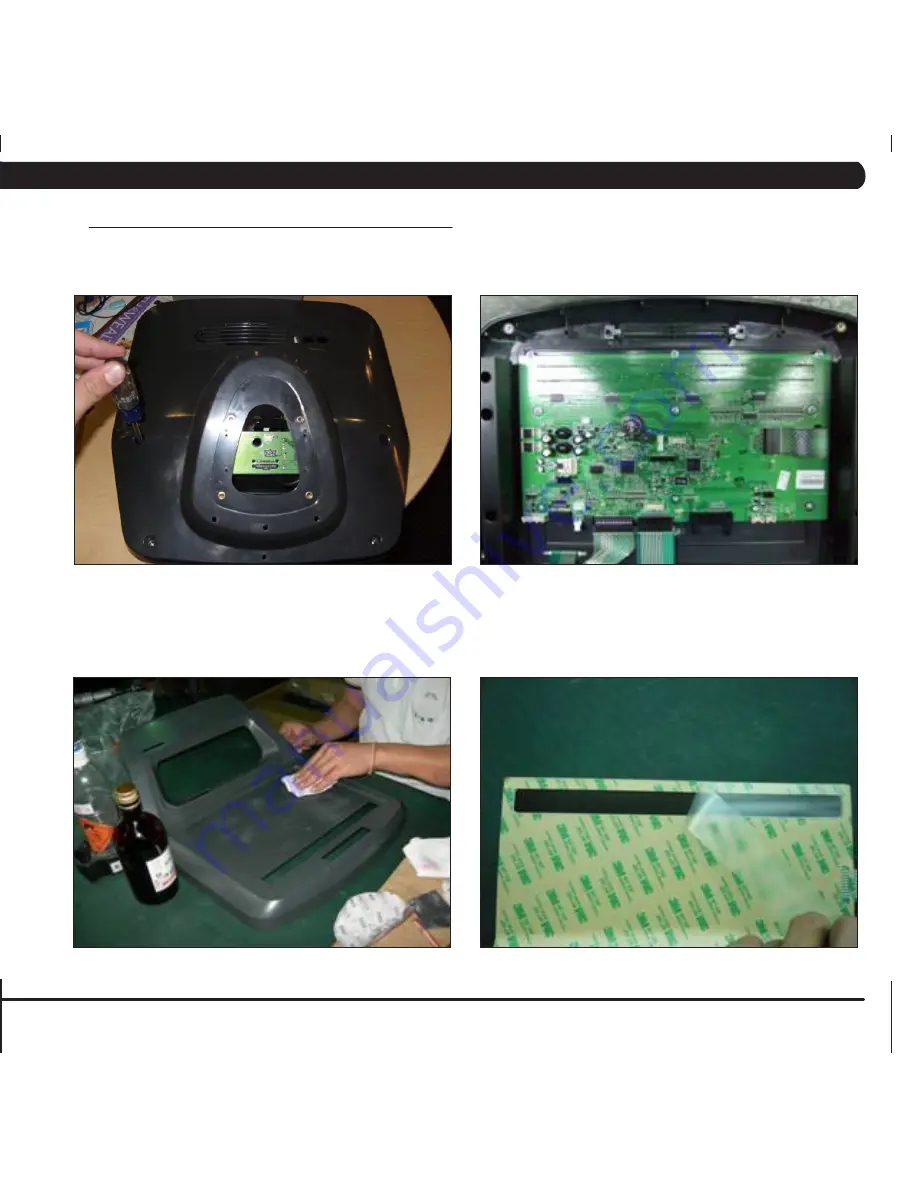
9.10 conSolE oVErlayS & kEypadS rEplacEMEnt

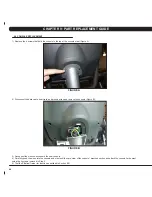
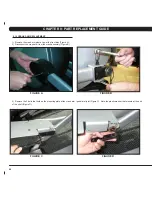
1)  Remove the console as outlined in Section 8.9.  

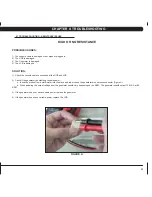
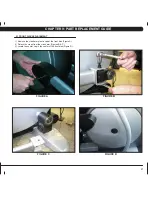
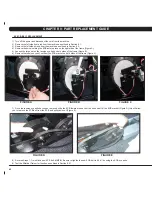
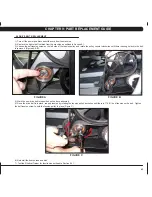
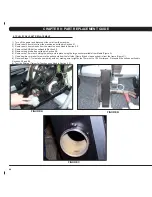
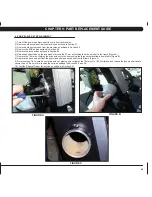
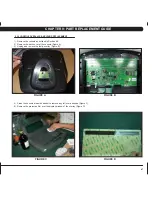
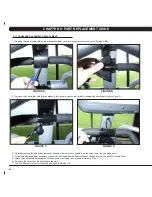
2)  Remove the back cover of the console (Figure A).  

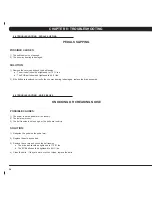
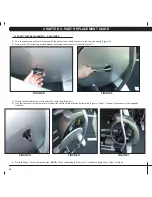
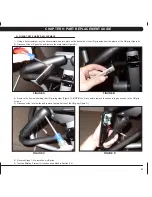
3)  Unplug and remove the faulty overlay (Figure B).  

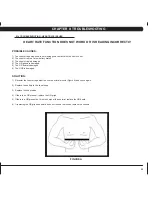
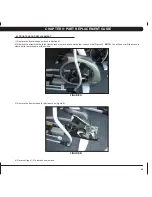
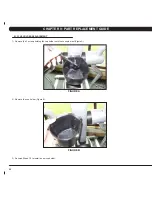
4)  Clean the console area with alcohol to remove any left over adhesive (Figure C).  

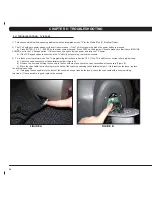
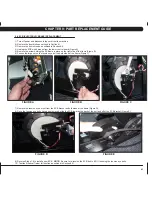
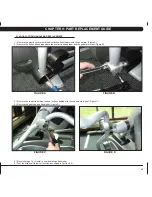
5)  Remove the protective film over the display window of the overlay (Figure D).  

figUrE a

figUrE b

figUrE c

figUrE d

cHaptEr 9: part rEplacEMEnt gUidE

Содержание E7XE-01

Страница 1: ...E 7 x E 0 1 e l l i p t i c a l T r a i n e r S E R V IC E M AN U A l...

Страница 2: ......

Страница 3: ...Tab 12 5 4 Manager Mode Defaults Tab 13 5 5 Manager Mode Language Tab 14 5 6 Manager Mode TV Tab 15 CHAPTER 6 ENGINEERING MODE 6 1 Engineering Mode Overview 16 6 2 Engineering Mode Calibration Tab 17...

Страница 4: ...le Set Replacement 45 9 9 Console Replacement 46 9 10 Overlay Keypad Replacement 47 9 11 Handlebar Assembly Replacement 50 9 12 Heart Rate Grips Replacement 51 9 13 Cup Holder Replacement 52 9 14 Dual...

Страница 5: ...1 1 1 SERIAL NUMBER LOCATION Chapter 1 serial number location...

Страница 6: ...2 universal console serial number location 1 1 SERIAL NUMBER LOCATION CONTINUED Chapter 1 serial number location...

Страница 7: ...ly cord or use the cord as a handle Close supervision is necessary when the Elliptical Trainer is used by or near children or disable persons Do not use outdoors Do not operate where aerosol spray pro...

Страница 8: ...ectric current to reduce the risk of electric shock The Elliptical Trainer is equipped with a cord having an equipment grounding conductor and a grounding plug The plug must be plugged into an appropr...

Страница 9: ...quipment free from dust and dirt DO NOT use any equipment that is damaged or has worn or broken parts Use only replacement parts supplied by Matrix Fitness Systems maintain labels and nameplates Do no...

Страница 10: ...ems that require specific attention the latest version will always be available on the Matrix web site www matrixfitness com DAILY MAINTENANCE ITEMS 1 Look and listen for loose fasteners unusual noise...

Страница 11: ...al on the touch screen Always dampen the cloth and clean the screen Do not spray the cleaning agent on the screen itself the drips can seep into the display or stain the bezel After cleaning make sure...

Страница 12: ...ill take the user directly to the iPod screen to allow for iPod control and play list selection VOLUME UP DOWN Adjusts the volume output through the headphone jack of either integrated console TV or i...

Страница 13: ...to the contact heart rate grips for this workout Locate the metal sensors on the handlebars of the Ascent Trainer Notice that there are two separate pieces of metal on each grip You must be making con...

Страница 14: ...Mode press ENTER 1 0 0 1 ENTER on the lower display Manager Mode will appear on the display Figure A 2 Follow the prompts to change the desired setting 3 Press the ENTER key once the desired setting i...

Страница 15: ...dit the serial numbers Cannot be modified Accumulated Distance Total distance on the unit since production Cannot be modified Accumulated Time Total time on the unit since production Cannot be modifie...

Страница 16: ...he maximum workout duration limits during peak and non peak hours Maximum 99 Minutes Minimum 5 Minutes Default Time Default 60 Minutes This option controls the default program time Maximum Max Time Se...

Страница 17: ...fault user s age used in the target HR calculations Maximum 100 Minimum 10 Default Weight Default 150 lbs 68 kg This option controls the default weight used in the calorie calculations Displayed in po...

Страница 18: ...default TV channel on start up Channels 1 999 Default Volume Default 1 This option controls the default TV volume on start up Maximum 17 Minimum 1 Tuner Available This option controls the default TV...

Страница 19: ...elect default language This option allows the user to select a flag for a specific language N A flag unit Mile Mile KM KM KM language English German flag unit km km km km km language Spanish Dutch Ita...

Страница 20: ...Elliptical Trainer 1 To enter Engineering Mode press ENTER 2 0 0 1 ENTER on the lower display Engineering Mode will appear on the display Figure A 2 Follow the prompts to change the desired setting 3...

Страница 21: ...function defaults descriptions modified RPM Low Limit Charge Default 10 This option controls the RPM low limit to iPod charge Range 0 255 RPM Low Limit Resistance Default 10 This option control the RP...

Страница 22: ...18 engineering mode function defaults descriptions modified Statistics This option displays the workout information for the unit N A 6 3 engineering mode statistics tab Chapter 6 engineering mode...

Страница 23: ...19 engineering mode function defaults descriptions modified Errors This option displays the error code history for the unit N A 6 4 engineering mode errors tab Chapter 6 engineering mode...

Страница 24: ...5 engineering mode clubs tab engineering mode function defaults descriptions modified Clubs Default MATRIX This option allows the club to select a screen header from a list N A Chapter 6 engineering...

Страница 25: ...21 6 6 engineering mode club id tab engineering mode function defaults descriptions modified Club ID This option records the Club ID of the fitness facility N A Chapter 6 engineering mode...

Страница 26: ...ervice Mode press ENTER 3 0 0 1 ENTER on the lower display Service Mode will appear on the display Figure A 2 Follow the prompts to change the desired setting 3 Press the ENTER key once the desired se...

Страница 27: ...displays the serial number of the console and frame Accumulated Distance This option displays the accumulated workout distance since production Accumulated Time This option displays the accumulated wo...

Страница 28: ...efaults descriptions Keypad This option is for a keypad test Touch Calibration This option starts a touch calibration Follow the cross mark moving across the screen and touch After testing 5 positions...

Страница 29: ...25 service mode function defaults descriptions Log This option records key components replacement history 7 4 service mode log tab Chapter 7 service mode...

Страница 30: ...26 7 5 service mode date Time tab function defaults descriptions Date Time This option sets the current date and time on the machine service mode Chapter 7 service mode...

Страница 31: ...27 8 1 Electrical Diagram Chapter 8 TROUBLESHOOTING...

Страница 32: ...8V or over 15V Check the wire connections at the battery Replace the battery 0x0441 b When the UCB implements a command the LCB is not receiving this command Check the machine type in Engineering Mod...

Страница 33: ...ration LED 7 Status 2 Resistance value in middle 1 2 VCC LED 8 Status 3 Digital Communication LED 9 12V Console Power WITHOUT AC PLUG Normal LED 2 LED 9 On LED 1 Off No AC plug detected LED 5 On Gener...

Страница 34: ...or has no RPM output Normal for a powered unit If unpowered and issue is still present replace the generator If LED 8 is OFF Bad communication between UCB and LCB Reconnect the console cable at the LC...

Страница 35: ...LED1 is OFF No AC power cord plugged in Normal for an unpowered unit If LED 8 is OFF Bad communication between UCB and LCB Reconnect the console cable at the LCB and UCB and check for kinks Solution i...

Страница 36: ...Mode a Press ENTER 3 0 0 1 ENTER on the lower number keypad b Press TEST on the display c Press TOUCH CALIBRATION on the display d Follow the cross mark moving across the screen and touch After testin...

Страница 37: ...ng variable power a Insert the probes from a multi meter into the black and red wires on the generator wire harness connector Figure A b When pedaling the output voltage from the generator should vary...

Страница 38: ...cking or creaking noise Possible causes 1 The pedal is on the pedal arm too loosely 2 The axle is worn out 3 The belt tension is not enough or the belts are too dirty SOLUTION 1 Retighten the pedal on...

Страница 39: ...maged 6 The UCB is damaged SOLUTION 1 Recenter the chest strap below the user s pectoral muscle Figure A and check again 2 Replace the battery in the chest strap 3 Replace the chest strap 4 If there i...

Страница 40: ...he console 3 For a fuzzy or unclear picture see the TV programming instructions in Section 10 5 If the TV is still fuzzy or unclear after programming a Check the coax connection at the entertainment p...

Страница 41: ...the crank arm plastic cap at the front disk Figure A 2 Detach the crank from the crank arm Figures B C 3 Locate the center cap in the center of the front disk Figure D figure a figure b figure c figu...

Страница 42: ...d washer by turning them counter clockwise Figure F 7 Thread the Matrix disk removal tool into the center hub Figure G 8 Turn the center bolt of the removal tool clockwise until the main disk can be r...

Страница 43: ...that hold the front shrouds in place and to each other on each side Figure A NOTE You will need to lift the console mast boot to remove some of the screws 3 Remove the front shrouds for frame access...

Страница 44: ...in Section 8 1 3 Remove the right side front shroud as outlined in Section 8 2 4 Disconnect all wires from the LCB Figure A 5 Remove the 2 screws holding the LCB to the frame and remove the LCB Figure...

Страница 45: ...sen the large nut on the tension eye bolt on both sides of the frame Figure C 7 Remove the tension eye bot nut from the ECB bracket on both sides of the frame Figure D 8 Once the tension eye bolts hav...

Страница 46: ...the frame Figure B 6 Remove the tension eye bot nut from the ECB bracket on both sides of the frame Figure C 7 Once the tension eye bolts have been removed slide the ECB towards the back of the unit...

Страница 47: ...enough slack in the belt to remove it Figures A B 4 Walk the new drive belt into position on the drive assembly 5 Once the drive belt is in place reapply tension by rotating the tension pulley clockwi...

Страница 48: ...9 6 6 Remove the 75 mm nut holding the pulley axle in place using the large socket available from Matrix Figure A 7 Use a hammer or mallet to remove the pulley axle from the left side Figure B and cl...

Страница 49: ...g the drive axle set to the frame Figure A 7 Remove the 75 mm nut holding the drive axle set to the frame using the large socket available from Matrix Figure B 8 Remove the drive axle set from the rig...

Страница 50: ...ve the console Figure B 3 Reconnect the wire connections to the new console 4 Carefully push the wires into the console and mast until they are clear of the console mast connection and attach the cons...

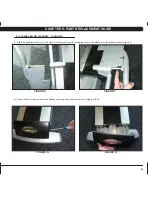
Страница 51: ...ack cover of the console Figure A 3 Unplug and remove the faulty overlay Figure B 4 Clean the console area with alcohol to remove any left over adhesive Figure C 5 Remove the protective film over the...

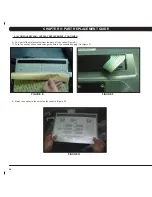
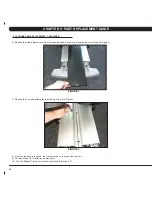
Страница 52: ...rom the back of the overlay Figure E 7 Push the overlay ribbon cable through the hole in the console and plug it in Figure F 8 Match the overlay to the cutout on the console Figure G 9 10 CONSOLE KEYP...

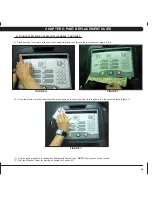
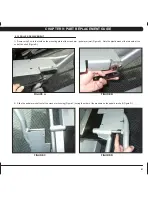
Страница 53: ...otective film Figure H I 10 Once the overlay is in the correct position press down on the overlay with a cloth to adhere it to the console plastic Figure J 11 Use the same procedure to replace any add...

Страница 54: ...om inside the console mast until the connectors on the ends come free and disconnect 4 To install a new handlebar assembly connect the new handlebar and carefully push the heart rate wires into the co...

Страница 55: ...e metal plate Figure B 3 Remove the 3 screws holding the HR grip together Figure C NOTE You may need to remove the console to give access to the HR grip screws 4 Disconnect the level button and remove...

Страница 56: ...REPLACEMENT 1 Remove the 2 screws holding the cup holder onto the console mast Figure A 2 Remove the cup holder Figure B 3 Reverse Steps 1 2 to install a new cup holder figure a figure b chapter 9 par...

Страница 57: ...n handlebar and the pedal arm meet Figure B 3 Remove the two bolts holding the dual action handlebar to the console mast pivot Figure C 4 Remove the pivot cap and handlebar Figure D 5 Reverse steps 1...

Страница 58: ...screws holding the console mast onto the frame Figure D 5 Remove the console mast being careful to pull the console wires out of the bottom of the mast without damaging them 6 Reverse Steps 1 5 to in...

Страница 59: ...pose the pedal screws Figure A 2 Remove the 4 Phillips screws that hold the plastic foot pedal to the foot plate Figure B 3 Remove the plastic foot pedal Figure C 4 Reverse Steps 1 3 to install a new...

Страница 60: ...n handlebar meets the pedal arm Figure A 2 Remove the bolt and bushings where the dual action handlebar and the pedal arm meet Figure B NOTE Be sure to move the bushings from the old pedal arm to the...

Страница 61: ...rank arm pedal arm joint Figure D Note the plastic washer that mounts at the end of the shaft Figure E 5 Slide the pedal arm shaft out of the crank arm housing Figure F noting the order of the washers...

Страница 62: ...2 Disconnect the crank arm from the crank assembly Figure B 3 Remove the 3 bolts that hold on the mounting plate at the crank arm pedal arm joint Figure C Note the plastic washer that mounts at the en...

Страница 63: ...ure E noting the order of the washers on the pedal arm shaft Figure F 5 Remove the 2 screws on each side holding on the rear end cap and remove it Figure G H figure e figure f figure g figure h 9 18 C...

Страница 64: ...wards the rear of the unit Figure I 7 Remove the 3 screws holding the top roller track in place Figure J 8 Once the top track is removed the crank arm can be removed from the unit 9 Reverse Steps 1 8...

Страница 65: ...m pedal arm joint Figure A Note the plastic washer that mounts at the end of the shaft Figure B 2 Slide the pedal arm shaft out of the crank arm housing Figure C noting the order of the washers on the...

Страница 66: ...rews on each side holding on the rear end cap and remove it Figure E F 4 Remove the middle plastic cover from between the pedals by pulling it towards the rear of the unit Figure G 9 19 Roller replace...

Страница 67: ...lace Figure H 6 Remove the screw holding the roller to the crank arm Figure I 7 Remove the roller from the crank arm using the roller puller available from Matrix Figure J 8 Reverse Steps 1 7 to insta...

Страница 68: ...arm pedal arm joint Figure A Note the plastic washer that mounts at the end of the shaft Figure B 2 Slide the pedal arm shaft out of the crank arm housing Figure C noting the order of the washers on...

Страница 69: ...he rear end cap and remove it Figure E F 4 Remove the middle plastic cover from between the pedals by pulling it towards the rear of the unit Figure G figure e figure f figure g 9 20 ROLLER TRACK REPL...

Страница 70: ...e Figure H 6 Move the crank arm to the side off of the roller track 7 Remove the 3 screws holding the bottom roller track to the frame Figure I and remove the roller track Figure J 8 Reverse Steps 1 7...

Страница 71: ...initiating movement to simulate exercising While moving listen for any odd noises or squeaks 2 After stopping movement press the green GO key and begin using the machine 3 Grasp the hand grips to chec...

Страница 72: ...eless Data Transmitter Yes FitTouch Technology Yes iPod Compatible Yes Nike iPod Compatible Yes Personal Fan Yes Technical data Resistance Technology JID Brushless ECB Power Requirements0 120V 60Hz AC...

Страница 73: ...ew M8 x 20L red 04 Z01 same as z31 Socket head cap screw M8 x 15L blue and orange 02 Z12 same as z31 Socket head cap screw M8 x 25L blue 02 Z02 wave washer 20 5 x 29 x 1 5t orange 02 Z08 same as z02 W...

Страница 74: ...70 10 3 ELLIPTICAL TRAINER ASSEMBLY STEPS Chapter 10 elliptical trainer specifications and assembly guide...

Страница 75: ...71 10 3 elliptical trainer assembly steps continued Chapter 10 elliptical trainer specifications and assembly guide...

Страница 76: ...72 10 3 elliptical trainer assembly steps continued Chapter 10 elliptical trainer specifications and assembly guide...

Страница 77: ...73 10 3 elliptical trainer assembly steps continued Chapter 10 elliptical trainer specifications and assembly guide...

Страница 78: ...74 10 3 elliptical trainer assembly steps continued Chapter 10 elliptical trainer specifications and assembly guide...

Страница 79: ...75 10 3 elliptical trainer assembly steps continued Chapter 10 elliptical trainer specifications and assembly guide...

Страница 80: ...76 step 7 10 3 elliptical trainer assembly steps continued Chapter 10 elliptical trainer specifications and assembly guide...

Страница 81: ...77 step 8 10 3 elliptical trainer assembly steps continued Chapter 10 elliptical trainer specifications and assembly guide...

Страница 82: ...78 10 3 elliptical trainer assembly steps continued final assembly Chapter 10 elliptical trainer specifications and assembly guide...

Страница 83: ...by attempting to shake it side to side Shaking or wobbling indicates that your elliptical trainer needs to be leveled Determine which leveler is not resting completely on the floor Loosen the nut wit...

Страница 84: ...mber keypad and a Menu will appear on the TV Figure C 5 Use the volume keys to move horizontally in the Menu and the channel keys to move up or down NOTE You must press buttons quickly in the Menu or...

Страница 85: ...coming in clearly press the HOME key to return to normal operation Figure G 10 If the channels still are not coming in or are showing in black and white return to CHANNEL SCAN and then change the CAB...

Страница 86: ...nsert the USB drive into the Reprogram Port in the back of the console back cover Figure B 4 The upgrade procedure will run automatically Figure C 5 When the update is complete the display will prompt...

Страница 87: ...83 notes...
Страница 88: ...84 MATrix Fitness systems corp 1610 Landmark Drive Cottage Grove wi 53527 USA TOLL FREE 866 693 4863 www matrixfitness com FAX 608 839 1717 REV 02 KO...

Отзывы: