Dimensions in Inches(millimeters) mate.com
Mate Precision Technologies • 1295 Lund Boulevard • Anoka, Minnesota 55303 USA • Phone +1.763.421.0230 • 800.328.4492 • Fax +1.763.421.0285 • 800.541.0285
The Mate Logo is a registered trademark of Mate Precision Technologies Inc.
© Mate Precison Technologies Inc.
LIT01374 Rev B
MATE MT6AU USE AND
MAINTE
N
A
NCE INSTRUCTIO
NS
MULTI TOOL ALIGNMENT PROCEDURE
This procedure is a continuation from step #5 or #7d of “Check Multi Tool
Alignment” section above.
1. Remove the Alignment Bar while still at the active punching station.
Do NOT rotate to the tool change position until after the next step.
2. Before rotating the turret to the tool change position, lift the Alignment
Punches while placing a piece of metal between the Alignment
Punches and the Die Carrier.
CAUTION: It is very important that the
Alignment Punches are NOT engaged with the Die Carrier when
rotating the turret. Damage to the Alignment Tool and/or turret is
possible.
3. Once the piece of metal is in place, dis-engage the machine turret
alignment pins and rotate the MT6AU back to the tool change position.
4. Flange Bolts: loosen to be just be slightly snug, the (12) M8 X 30
socket head cap screws, (6) on the Upper Assembly and (6) on the
Lower Subplate.
5. Rotate the MT6AU to the active punching station (under the machine
ram) and engage the machine turret alignment pins.
6. Slide out the piece of metal and slide the Alignment Punches
completely into the die pockets.
7. Bolt on the Alignment Bar as shown using the set of holes that match
up with the Alignment Punches. Please note that the Bar will not be
centered. Torque (2) M4 X 25 socket head cap screws (P/N SHC11914)
included to no more than 5.0 N-m or 44 in-lb.
8. Check the alignment by mounting a dial indicator to the rail or
mounting a dial indicator with a magnetic base to a sheet of mild steel
(0.074”(2mm) or thicker) clamped in the machine.
a. Position the dial indicator so the indicator touches the front
surface of the Alignment Bar near one end of the bar.
b. Set the indicator to “Zero” for reference.
c. Tram or move the indicator along the front surface of the Alignment Bar towards the opposite end of the bar, noting the change (if any) to
the indicator reading.
9. Adjust the Alignment Bar as needed per the indicator reading by gently tapping it by hand or with soft faced hammer and re-check with the
indicator.
a. Zero is best but in most cases .001”-.0015”(.025mm-.038mm) is good.
b. If additional adjustments are needed, proceed to re-adjust and re-check as many times as needed to achieve an acceptable alignment.
10. Tighten all accessible Flange Bolts up to a torque of 40 N-m, 29.5 Ft-lbf or 354 in-lbf on the Upper Assembly and Lower Subplate.
11. Re-check alignment by re-tramming the Alignment Bar with the Dial Indicator.
a. If an adjustment is still required, loosen bolts to just a snug fit and re-adjust accordingly with a soft hammer. Repeat steps #9 and #10 until
results are acceptable.
12. Remove the Alignment Bar while still at the active punching station.
Do NOT rotate to the tool change position until after the next step.
13. Lift up the Alignment Punches while sliding in a piece of metal on top of Die Carrier and under the Alignment Punches to disengage tools.
CAUTION: It is very important that the tools are NOT engaged when rotating the turret. Damage to the Alignment Tool and/or turret is possible.
14. Rotate machine to the tool change position and tighten all flange bolts to a torque of 40 N-m, 29.5 Ft-lbf or 354 in-lbf.
15. Remove the Alignment Punches and the piece of sheet metal.
16. The MT6AU is now aligned.
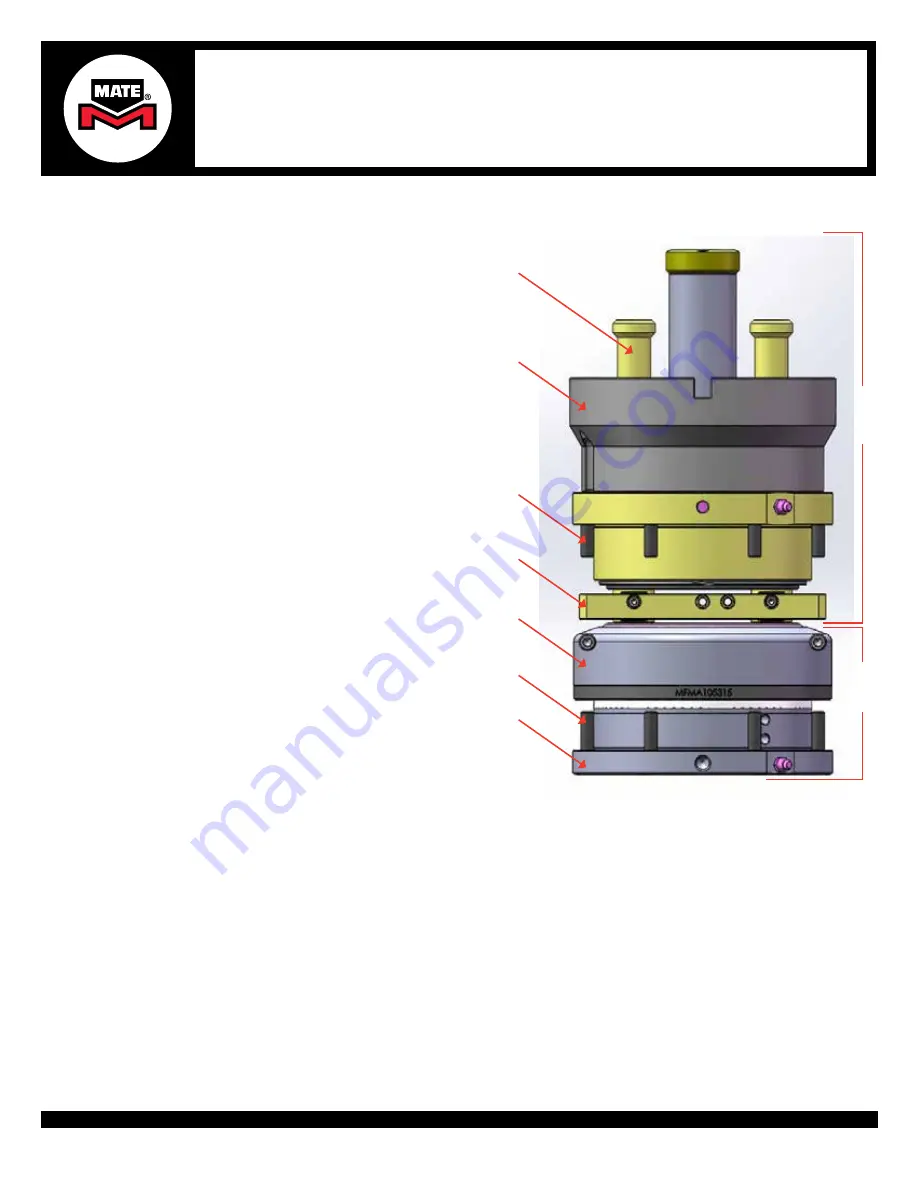
Alignment
Punches
Line-up
Tools
Lower
Assembly
Upper
Assembly
Alignment
Bar
Die
Carrier
Lower
Subplate
Flange
Bolts
Flange
Bolts


