background image

34

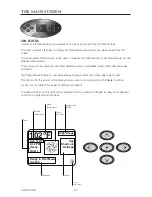
DO NOT DIVE.

Set: 

104°F

8:32 PM

Ozone

Filter 1

Spa

Shortcuts

Settings

High Range

102°F

Ready in Rest Mode

Heating

24

NAVIGATION

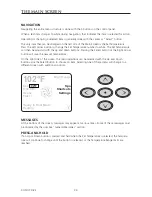
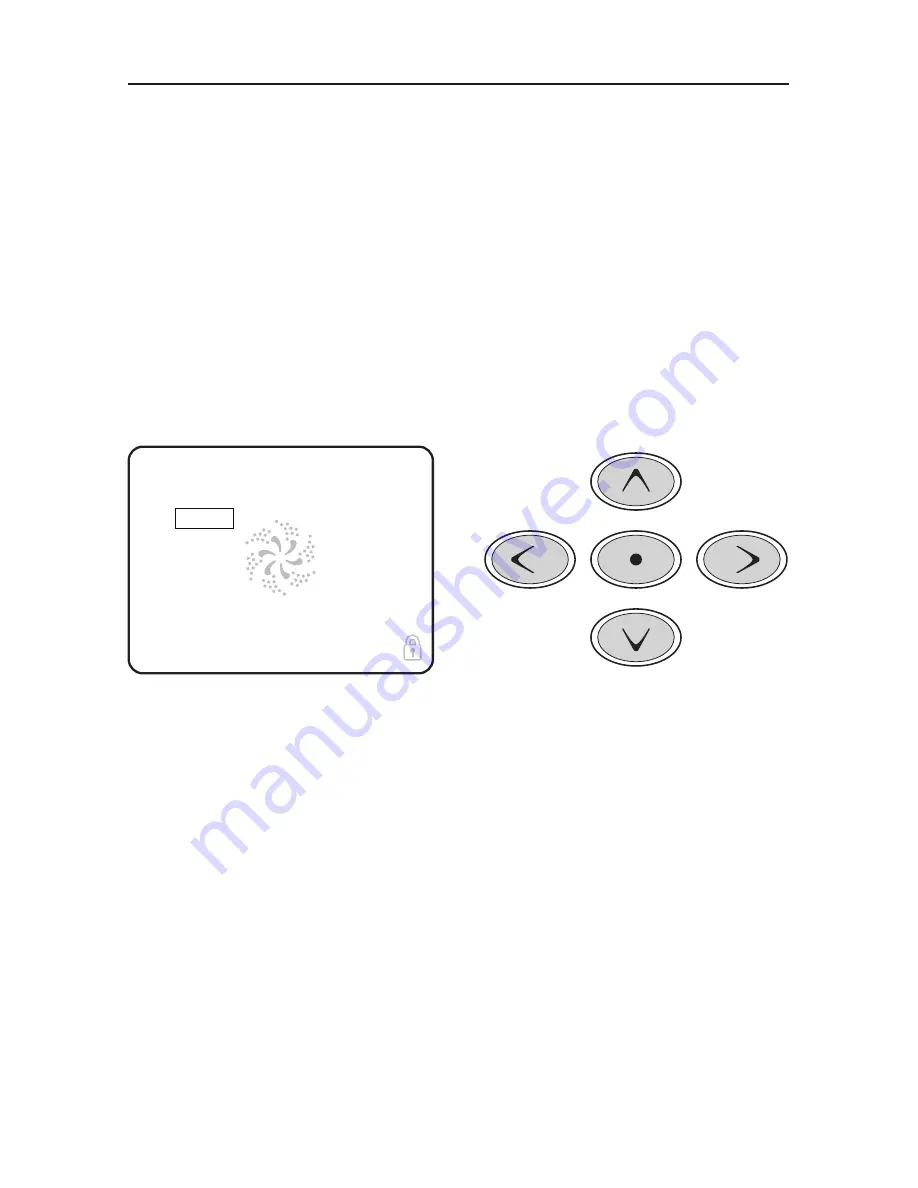
Navigating the entire menu structure is done with the 5 buttons on the control panel.

When a text item changes to white during navigation, that indicates the item is selected for action.

Operating or changing a selected item is generally done with the center or “Select” button.

The only item that can be changed on the left side of the Main Screen is the Set Temperature. 
Press the Left Arrow button to change the Set Temperature number to white. The Set Temperature 
can then be adjusted with the up and down buttons. Pressing the Select button or the Right Arrow 
button will save the new set temperature.

On the right side of the screen, the menu selections can be selected with the Up and Down 
Buttons. Use the Select Button to choose an item. Selecting one of these items will change to a 
different screen with additional controls. 

MESSAGES

At the bottom of the screen, messages may appear at various times. Some of these messages must 
be dismissed by the user See “General Messages” section. 

PRESS-AND-HOLD

If an Up or Down button is pressed and held when the Set Temperature is selected, the tempera-
ture will continue to change until the button is released, or the Temperature Range limits are 
reached. 

The Main Screen

DO NOT DIVE.

Содержание LEGEND LSX700

Страница 1: ...MICHAEL PHELPS LEGEND SERIES OWNERS MANUAL...

Страница 2: ......

Страница 3: ...t without prior notice To check on updates or for other informa tion please visit www masterspas com and follow the links to the customer service section Record Of Ownership Name Address City ________...

Страница 4: ...Guide 27 Why Chemicals are Important in a Spa 28 Maintenance Recommendations 29 30 Winterizing Your Spa 31 Spa Specifications 32 LSX Series Main Menu Screen 33 34 Spa and Shortcut Screen 35 Settings S...

Страница 5: ...e sign should be mounted with screws or another type of permanent fastener Additional or replacement signs can be obtained from your dealer or direct from the factory INTRODUCTION It s time to relax Y...

Страница 6: ...o connect a minimum 6 AWG 13 302mm2 solid copper conductor between this unit and any metal equipment metal enclosures of electrical equipment metal water pipe or conduit within 5 feet 1 5m of the unit...

Страница 7: ...re that children can not use this spa unless they are supervised at all times DANGER Risk of Injury The suction fittings in this spa are sized to match the spe cific water flow created by the pump Sho...

Страница 8: ...spa f Persons using medication should consult a physician before using a spa since some medication may induce drowsiness while other medication may affect heart rate blood pressure and circulation Fo...

Страница 9: ...y and injuries WARNING People with infections sores or the like should not use the spa Warm and hot water temperatures may allow the growth of infectious bacteria if not properly disinfected CAUTION S...

Страница 10: ...rovided in the electric supply service panel with a continuous copper wire equivalent in size to the circuit conductors supplying this equipment At least two lugs marked Bonding Lugs are provided on t...

Страница 11: ...TILISER UNE CUVE DE RELAXATION WARNING TO AVOID INJURY EXERCISE CARE WHEN ENTERING OR EXITING THE SPA OR HOT TUB AVERTISSEMENT POUR VITER DES BLESSURES USER DE PRUDENCE EN ENTRANT DANS UNE CUVE DE REL...

Страница 12: ...CORDANCE WITH MANUFACTURER S INSTRUCTION ATTENTION LA TENEUR DE L EAU EN MATI RES DISSOUTES DOIT TRE CONFORME AUX DIRECTIVES DU FABRICANT Hyperthermia occurs when the internal temperature of the body...

Страница 13: ...rought into the spa as they will cause the diverter to seize up It is best to turn the diverter valve only when the pump is turned off Your new Master Spa features a variety of jet styles All jets reg...

Страница 14: ...s by opening or closing the air control valves Typically one dial controls the air to water ratio and mix to one group of jets When not in use the air controls should be kept in the closed position as...

Страница 15: ...uired 12 DRAINING YOUR SPA The drain is located behind a removable corner panel This panel is on the right side of the spa as you are facing the topside control panel You can access the drain by unscr...

Страница 16: ...varies by model Should the high limit switch trip repeatedly contact your dealer or qualified service representative to diagnose the problem 17 SLICE VALVES These valves are used by service personnel...

Страница 17: ...r flow neces sary to actuate the ozone generator This fractional HP pump runs for 24 hours of efficient filtration and heating This pump is standard on all LSX Series spas 21 PUMP UNION These are used...

Страница 18: ...equipment pack to allow connection to local ground points The ground wire must be at least 8 AWG copper wire and must be con nected securely to a grounded metal structure such as a cold water pipe All...

Страница 19: ...eutral wire is not required between the G F C I and the system box GRN GRN GROUND RED HOT BLK HOT BLK HOT RED HOT RED HOT WHT NEUTRAL WHT WHT BLK HOT GRN GROUND TB1 IDF00007 mac 6 17 97 Actual wiring...

Страница 20: ...to confirm that your surface is adequate for sup porting a spa Be sure to locate your spa so that equipment remains above grade and is not subject to flooding The equipment side s of the spa must be a...

Страница 21: ...has 2 unions and the heater has 2 unions A newly delivered spa may have loose unions caused in transporting the spa Check that all slice valves are open in the up position The slice valves may become...

Страница 22: ...lling a spa This is not a service covered under warranty To relieve and airlock loosen the union on the discharge of the pump see arrow on picture of pump below Water should leak out Tighten the union...

Страница 23: ...or acrylic eye skin irritation rapid chlorine or bromine loss and total alkalinity destruction With high pH the results can be cloudy water eye skin irritation scale forma tion and poor chlorine or b...

Страница 24: ...what happens when you put sugar in coffee or tea 10 Useful life of water in days Water should be drained at least once every 180 days Useful life may vary by usage and bather load 11 Defoamer Foaming...

Страница 25: ...dge with a filter cleaner every 30 days and rinse the Eco Pur cartridge with a hose to remove any buildup of containments Do not soak the Eco Pur cartridge in filter cleaner If water appears to be vis...

Страница 26: ...ted chlorinating granules sodium Dichlor s triazinetreone on initial start up to begin sanitizing the spa water Always refer to the chemical manu factures dosage recommendations listed on the containe...

Страница 27: ...r spa with fresh water install a new Eco Pur filter element clean the regular filter and repeat start up procedure The regular filter should be replaced at least once every year aFter eaCH use Add 1 o...

Страница 28: ...es that whatever is put into it have a pH as close to neutral as possible That is why only chemicals made for spas should be used Always refer to the chemical manufactures dosage rec ommendations list...

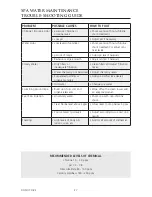
Страница 29: ...ssary Bacteria or algae growth Adjust sanitizer if necessary Cloudy Water Dirty filters or inadequate filtration Clean filters and adjust filtration times Water chemistry not balanced Adjust chemistry...

Страница 30: ...r cloudy water and possible corrosion of plumbing and fittings may also occur 2 Heat Heat causes much quicker evaporation and also will cause minerals and metals to precipitate out of solution 3 Air D...

Страница 31: ...e they essential for clean water but they also extend the life of the spa equipment Your filter elements should be cleaned on a regular basis once a month on average with normal usage With heavy use t...

Страница 32: ...her cleaning materials that are abrasive Chlorine salts sulfides or other rusting metals can also erode this thin coating exposing the metal to corrosion The best defense to combat corrosion on stainl...

Страница 33: ...ing water out of your unit 3 Remove access panels from equipment area 4 Loosen all pump unions 5 Remove winterizing plug from face of the pump s where applicable 6 Using your shop vac in a blowing mod...

Страница 34: ...mensions Electrical Requirements Water Capacity gallons Weight Dry Full lbs Number of Pumps Jet Count LSX 700 84 x 84 x 38 240V 50 Amp 335 785 3 732 4 62 LSX 800 94 x 94 x 38 240V 50 Amp 415 835 4 280...

Страница 35: ...ted and the screen will change to show more detailed controls or programming functions DO NOT DIVE The Main Screen Water Temperature Messages Desired Temperature Temperature Range Pump and Heat Menus...

Страница 36: ...Set Temperature can then be adjusted with the up and down buttons Pressing the Select button or the Right Arrow button will save the new set temperature On the right side of the screen the menu selec...

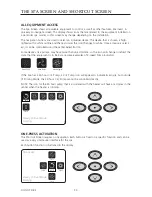
Страница 37: ...is select ed it can be controlled using the center Select Button Some devices like pumps may have more than one ON state so the icon will change to reflect the state that the equipment is in Below are...

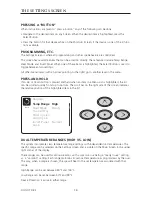
Страница 38: ...ight go to another level in the menu PRESS AND HOLD If an Up or Down button is pressed and held when an item in a Menu List is highlighted the list can be scrolled quickly from top to bottom The scrol...

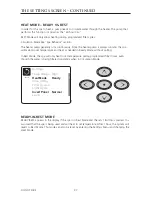
Страница 39: ...nerally runs continuously Since the heater pump is always running the spa will maintain set temperature and heat as needed in Ready Mode without polling In Rest Mode the spa will only heat to set temp...

Страница 40: ...select the other pumps to turn them on The pumps should be running in high speed to facilitate priming If the pumps have not primed after 2 minutes and water is not flowing from the jets in the spa d...

Страница 41: ...art of each filter cycle the pumps will run briefly to purge the plumbing to maintain good water quality On spas equipped with 24 hour circulation systems the filter cycles cannot be set See adjusting...

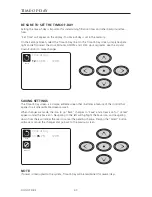
Страница 42: ...12 24 Hour segments Use the Up and Down Buttons to make changes SAVING SETTINGS The Time of Day screen is a simple editable screen that illustrates a feature of the control that applies to all other...

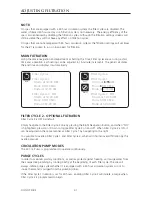
Страница 43: ...start time and a duration Each setting can be adjusted in 15 minute increments The panel calculates the end time and displays it automatically FILTER CYCLE 2 OPTIONAL FILTRATION Filter Cycle 2 is OFF...

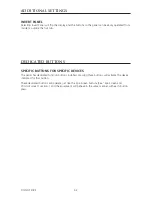
Страница 44: ...tside the hot tub SPECIFIC BUTTONS FOR SPECIFIC DEVICES The panel has dedicated function buttons installed pressing those buttons will activate the device indicated for that button These dedicated but...

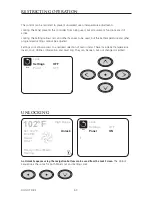
Страница 45: ...are still active Locking the Settings allows Jets and other features to be used but the Set Temperature and other programmed settings cannot be adjusted Settings Lock allows access to a reduced select...

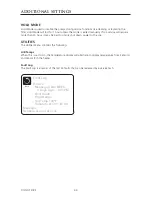
Страница 46: ...ld Mode will last for 1 hour unless the mode is exited manually If spa service will require more than an hour it may be best to simply shut down power to the spa UTILITIES The Utilities Menu contains...

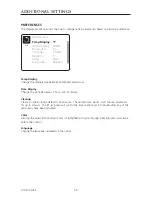
Страница 47: ...rature between Fahrenheit and Celsius Time Display Change the clock between 12 hr and 24 hr display Cleanup Cleanup Cycle Duration default is 30 minutes The duration can be set in 30 minute increments...

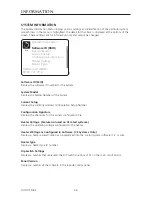
Страница 48: ...number for the System System Model Displays the Model Number of the System Current Setup Displays the currently selected Configuration Setup Number Configuration Signature Displays the checksum for th...

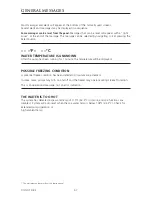
Страница 49: ...running for 1 minute the temperature will be displayed POSSIBLE FREEZING CONDITION A potential freeze condition has been detected All pumps are activated In some cases pumps may turn on and off and th...

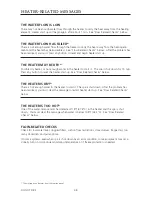
Страница 50: ...tart up See Flow Related Checks below THE HEATER IS DRY There is not enough water in the heater to start it The spa is shut down After the problem has been resolved you must clear the message to resta...

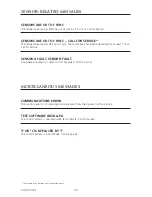
Страница 51: ...NSOR A FAULT SENOR B FAULT A temperature sensor or sensor circuit has failed Call for Service COMMUNICATIONS ERROR The control panel is not receiving communication from the System Call for Service TES...

Страница 52: ...r up THE CLOCK HAS FAILED Contact your dealer or service organization CONFIGURATION ERROR SPA WILL NOT START UP Contact your dealer or service organization A PUMP MAY BE STUCK ON Water may be overheat...

Страница 53: ...ED When the unit is in the standby position the red LED will be lit Remote Synchronizing Press and hold MODE button on the remote The display will then show pair Keep pressing this key Then press the...

Страница 54: ...scanning Press once toggle mute Press and hold toggle mute Press once seek up Press and hold change to manual scanning Press once Volume DOWN a value Press and hold Fast volume down Press once Volume...

Страница 55: ...the spa does not respond contact your local service company PUMP S DO NOT OPERATE 1 Press the Jets button on your control panel If you hear the pumps trying to operate A Check that all the slice valve...

Страница 56: ...ndicator see controls section of manual If the indicator is on the spa should be heating Wait a reasonable amount of time approximately 1 hour to see if the water temperature is changing 6 Check to ma...

Страница 57: ...mineral deposits and grit sand that may get into the internal parts of the diverter valve it may become hard to turn or freeze up completely In this case it is necessary to remove the handle and cap o...

Страница 58: ...water Attach a garden hose if desired Draining times may vary by model using the external hose bib A sump pump may also be used to drain the spa quickly NOTE When pushing or pulling the assembly in or...

Страница 59: ...R AND SPA THIS ALLOWS FOR ADEQUATE VENTILATION OF COVER AND SPA NOTE The cover warranty is provided through the cover manufacturer and not through Master Spas You will need to mail the cover warranty...

Страница 60: ...her cleaning materials that are abrasive Chlorine salts sulfides or other rusting metals can also erode this thin coating exposing the metal to corrosion The best defense to combat corrosion on stainl...

Страница 61: ...connector plug attached to the end of the uV Lamp and place the upper enclosure assembly in a safe place iv slowly pull the uV Lamp out of the Quartz tube by the white ceramic prong end DO NOT TOUCH...

Страница 62: ...n the water removed from the spa and that the uV Lamp and Quartz tube have cooled before performing maintenance on the Quartz tube ii remove the upper enclosure assembly and uV Lamp as described in se...

Страница 63: ...the threads on the uV reactor iii screw the compression nut into the threads till it is finger tight do not oVertighten iv after spa is refilled turn the spa on and check the seal around the Quartz t...

Страница 64: ...ow you to connect the spa to your phone and home network when installed This accessory Wi Fi module is available thru your dealer This module will need to be connected to the spa control pack located...

Страница 65: ...E AND MAINTENANCE RECORD DATE Drain Clean Spa Clean Filter Cartridge Test GFCI Soak Filter Cartridge in Solution Clean and Condition Spa Cover Miscellaneous Service Miscellaneous Service DATE DATE DAT...

Страница 66: ...E AND MAINTENANCE RECORD DATE Drain Clean Spa Clean Filter Cartridge Test GFCI Soak Filter Cartridge in Solution Clean and Condition Spa Cover Miscellaneous Service Miscellaneous Service DATE DATE DAT...

Страница 67: ......

Страница 68: ...POP14MPLSOM Rev 20140903 6927 Lincoln Parkway Fort Wayne IN 46804 260 436 9100 www MasterSpas com FIND US ON...

Отзывы: