19
OPERATING INSTRUCTIONS
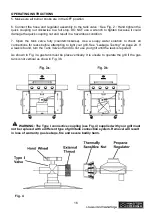
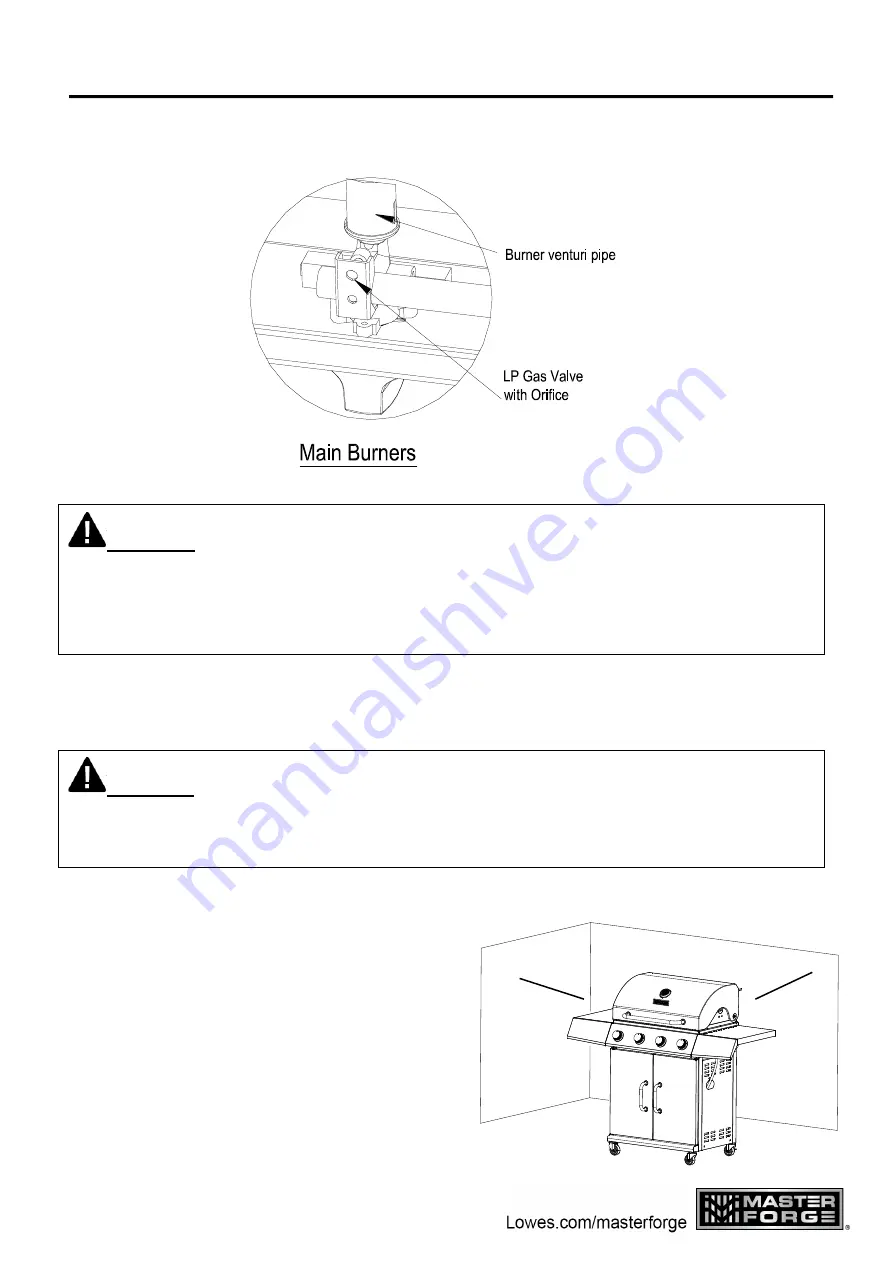
Please refer to diagram for proper installation (see Fig. 8). Visually check the connection
between the burner venture pipe and orifice. Make sure the burner venture pipe fits over the
orifice.
If you cannot stop a gas leak, turn off the gas supply and call your local gas company. If
necessary, replace the faulty part with the manufacturer’s recommended replacement part. A
slight leak could cause a fire.
NOTE: The grill will operate best if it is not facing directly into the wind.
WARNING
When leak testing this appliance, make sure to test and tighten all loose
connections. A slight leak in the system can result in a low flame or hazardous condition. Most
L.P. gas tanks now come equipped with a leak detector mechanism internal to the tank. When
gas is allowed to escape rapidly, it shuts off the gas supply. A leak may significantly reduce the
gas flow, making the grill difficult to light or causing low flames.
WARNING
Do not use the grill in garages, breezeways, sheds or any enclosed area.
Never operate the grill in enclosed areas as this could lead to a carbon monoxide buildup,
which could result in injury or death. Place the grill on a level surface. Avoid moving the grill
while it is in operation.
Clearance to combustible construction:
A minimum of 36 in. from the sides and back
must be maintained from the gas grill above
and below the cooking surface to adjacent
vertical combustible construction.
Clearance to non-combustible construction:
A minimum of 36 in. clearance from the back
of the grill to non-combustible construction
is
required for the lid to fully open.
Fig. 8
36"
36"
36 in.
36 in.


