background image

-  9   -

 13) CAM TITLE  : Make a Camera’s name

                                ※
                    ○○○○○○○○ : 

0

~9,A~Z

                     U  ,  D -  CHAR  SELECT
                     L  ,  R -  POSITION
  14) LVDS DELAY : Adjusted to LVDS delay the time 
       

< 0~12 steps, 

12 

>

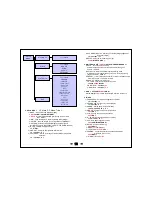
12. EXIT

11. SYSTEM : OFF/ON

    1) VERSION : display the version of camera software
        

< V4.07.24-G >

    2) COM.


CAM ID : Set to Camera’s ID

        < 0~255 steps, 

>


BAUDRATE : A measure of the Data transmission speed


< (2400,4800,9600,57600,115200),

115200 

>

    3) IMAGE RANGE :  Setting a range of screen
         

FULL

/COMP/USER  >


FULL : SDI FULL Range output


COMP : SDI compression Range output


 USER : OFFSET(0~32 steps, 

16

)

    4) COLOR SPACE : 

HD-CrCb

, YUV, HD-CrCb

    5) GELOCK : 

Disable

 / Master / Slave >


Disable : No Input / No Output


Master : Menu setup to “Back Panel : Sync Out” 


 Slave : Menu setup to “Back Panel : Sync In” 

    6) FREQ : select AC type power frequency


60Hz

, 50Hz, 59.9Hz >

    7) FRAME RATE : Select the SDI output resolution and frame


50HZ    

: < 1080-25P,1080-30P,1080-50i > 

                        < 720-50P >


59.9HZ 

: < 1080-29.9P,1080-59.9P,1080-59.9i >

                        < 720-59.9P >


 60HZ    

: <

 1080-30P

,1080-60P,1080-60i >

                        < 720-60P >

    8) SHADING-EDT  : Compensate for differences in the screen 

                                      brightness by Lens bending. Llluminate the full 
                                      screen in white paper with ON, compensated 
                                      date is stored. Using the “SHADING” ON, 
                                      the stored data is running
        

< □□□□□□□□ >

    9) EDFECT-DET  : Compensate sensor’s (White dot) dead cell 

                                     defect. After cover the lens to make the screen
                                     dark, press right key (ON)
         

< THRS---0000000000 >

         < CNT----0000000000 >

  10) COLOR BAR : Print out COLOR BAR pattern.
                               SDI and CVBS output simultaneously
        

OFF

/ON >

  11) CVBS : ON/OFF for Composite Video Signal


<

 OFF

/ON >

  12) LANGUAGE : Supported 

ENG

,KOR,JAN,CHN(S),CHN >

Содержание CV360-CGB

Страница 1: ... 1 2014 08 20 VER Marshall Electronics CV360 CGB 2MP HDSDI HDMI Broadcast Camera GenLock in 1920x1080p User s Manual ...

Страница 2: ... camera loss and to protect user safety The following symbols explain the damage or loss if not used properly WARNING Indicates that there may be cause of injury or loss if user violates the notice CAUTION Indicates that there may be cause of death or critical injury if the user violates the notice ...

Страница 3: ...om power source during cleaning and use dry cloth to clean camera or lens components If material is hard to remove please use furniture cleaner or unabrasiv e material to clean camera housing When cleaning LENS please use lens blower or lens cleaning tissue If you have further questions about cleaning please consult your local c amera dealer or supplier 10 Exposure to the light source In case of a...

Страница 4: ...a better understanding of this products functio ns and capabilities please read the user manual carefully before using this product Keep this User s Guide for future reference If a problem occurs during the use please contact Marshall Electronics 3 Genlock Description 11 4 Precautions of Installment 12 ...

Страница 5: ...nlock SYNC Output b Slave mode Genlock SYNC Input c Disable mode Genlock Signal No Input No Output OSD control Automatic gain control Electronic Level control or Auto level control level of maximum accumulation level adjustment WDR BLC HLC Genlock mode Default title and camera ID settings OSD arbitrary adjustments White balance mode WB AUTO AUTOEXT PRESET MANUAL R Gain B Gain Back light compensati...

Страница 6: ... menu Selected menu item is illuminated in yellow color when on specific feature c Press right button to increase data value or left button to decrease it d Press right button in OSD MENU to move into the sub menu bar right away User can choose 1 12 menu And vise versa when you press left button 2 1 OSD Menu Location MENU IRIS FOCUS ADJUST EXPOSUER BACKLIGHT DAY NIGHT WHITE BAL AUTO DNR IMAGE DIS ...

Страница 7: ...UTDOOR OUTDOOR2 DEBLUR 1 INDOOR It just iris without rolling effect in indoor 2 OUTDOOR It is solution mode for low quality display because of closed iris at outdoor 3 OUTDOOR 2 It improve losing focus in strong sum beam at Outdoor 4 DEBLUR Correct to Developing Attraction by Automatic MANUAL Control shutter Speed to adjust brightness SPEED 1 30 25 1 60 50 1 120 100 1 250 1 500 1 1000 1 1600 1 250...

Страница 8: ...ght and left 0 60 steps 12 4 V POS The Select box move to the up and down 0 40 steps 2 5 H SIZE The size of the selected box is adjusted to the right and left 0 40 steps 3 6 Y SIZE The size of the selected box is adjusted to the up and down 0 40 steps 3 7 Y LEVEL The value of the box is between black and white 0 is black and 20 is white 0 20 steps 10 8 CB LEVEL The value of the box is between gree...

Страница 9: ...Out Slave Menu setup to Back Panel Sync In 6 FREQ select AC type power frequency 60Hz 50Hz 59 9Hz 7 FRAME RATE Select the SDI output resolution and frame 50HZ 1080 25P 1080 30P 1080 50i 720 50P 59 9HZ 1080 29 9P 1080 59 9P 1080 59 9i 720 59 9P 60HZ 1080 30P 1080 60P 1080 60i 720 60P 8 SHADING EDT Compensate for differences in the screen brightness by Lens bending Llluminate the full screen in whit...

Страница 10: ... 0 55 4 MIRROR Change the left and right position OFF ON 5 FLIP Change the up and down position OFF ON 6 D ZOOM Set the magnification of display 1 0X 16 0X 1 0X 7 ACE Auto adjust brightness mode OFF LOW MIDDLE HIGH 8 DEFOG Compensate the fog OFF ON MODE AUTO MANUAL LEVEL LOW MIDDLE HIGH 9 SHADING Correct the differences between the display brightness in lens curve OFF ON WEIGHT 0 100 100 SETUP MEN...

Страница 11: ...NK Genlock Sync not Supported Not Supported Resoltuion or other signal TEST Oper 1 Setup No 1 Camera to Genlock Master in Menu Back Panel Sync Out Resolution setup Oper 2 Setup No 2 Camera to Genlock Slave in Menu Back Panel Sync In Oper 3 No 1 Camera a LED ON No 2 Camera LED OFF Oper 4 Connection of Sync Line with No 1 and NO 2 Cameras Oper 5 No 2 Camera a LED ON in 5 seconds Caution on Setup Ref...

Страница 12: ...d the HD SDI connections Please use 75 Ω BNC adapters for extension cable HD SDI CABLE s limited range 5C HFBT Maximum up to 100m 3 There is cross line breaking and disconnection On HD SDI display If HD SDI out BNC s connection is bad Cause is that the short circuit of cable not proper cable or excess the limited range Please check for proper cable for HD SDI and Cable distance is optimal Please c...

Отзывы: