- 6 -
2. OSD Menu manipulation explanation
2.1 How to display On-Screen-Display (OSD) Menu
a. User can activate OSD menu by pressing “set button”. If
no other commands are given, OSD menu will disappear.
b. Activation of OSD Menu disappear without camera title.
If you don’t want to show camera title, please change inner
OSD in camera. (optional for use with RS-232
communication control.)
c. User can change camera title (ID) locations
.
2.2 Activate “OSD MENU”
a. Press “set button” to Move to the Menu setting
display on monitor.
b. Press “Up button” to move upper menu or “Down
button” to move bottom menu. Selected menu item is
illuminated in yellow color when on specific feature.
c. Press “right button” to increase data value “or “left
button” to decrease it.
d. Press right button in “OSD < MENU>” to move into
the sub menu bar right away. User can choose 1~12
menu. And vise versa when you press “left button.”
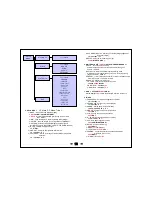
<2-1. OSD Menu Location >
< MENU >
IRIS
FOCUS ADJUST
EXPOSUER
BACKLIGHT
DAY & NIGHT
WHITE BAL AUTO
DNR
IMAGE
DIS
MOTION
SYSTEM
EXIT
<2-2. Setting start menu display>
Press OSD Menu button on back of camera for 3 seconds, This will start OSD menu on screen.
Press “set button” again to move into the “SUB menu” in OSD " " menu.
↲
Press the button for more than 3 seconds to activate “push menus”.
☞
Caution
<
MENU
>
IRIS
FOCUS ADJUST
EXPOSUER
BACKLIGHT
DAY & NIGHT
WHITE BAL AUTO
DNR
IMAGE
DIS
MOTION
SYSTEM
EXIT


