Marmitek LWM1 Скачать руководство пользователя страница 1

LWM1

LWM1

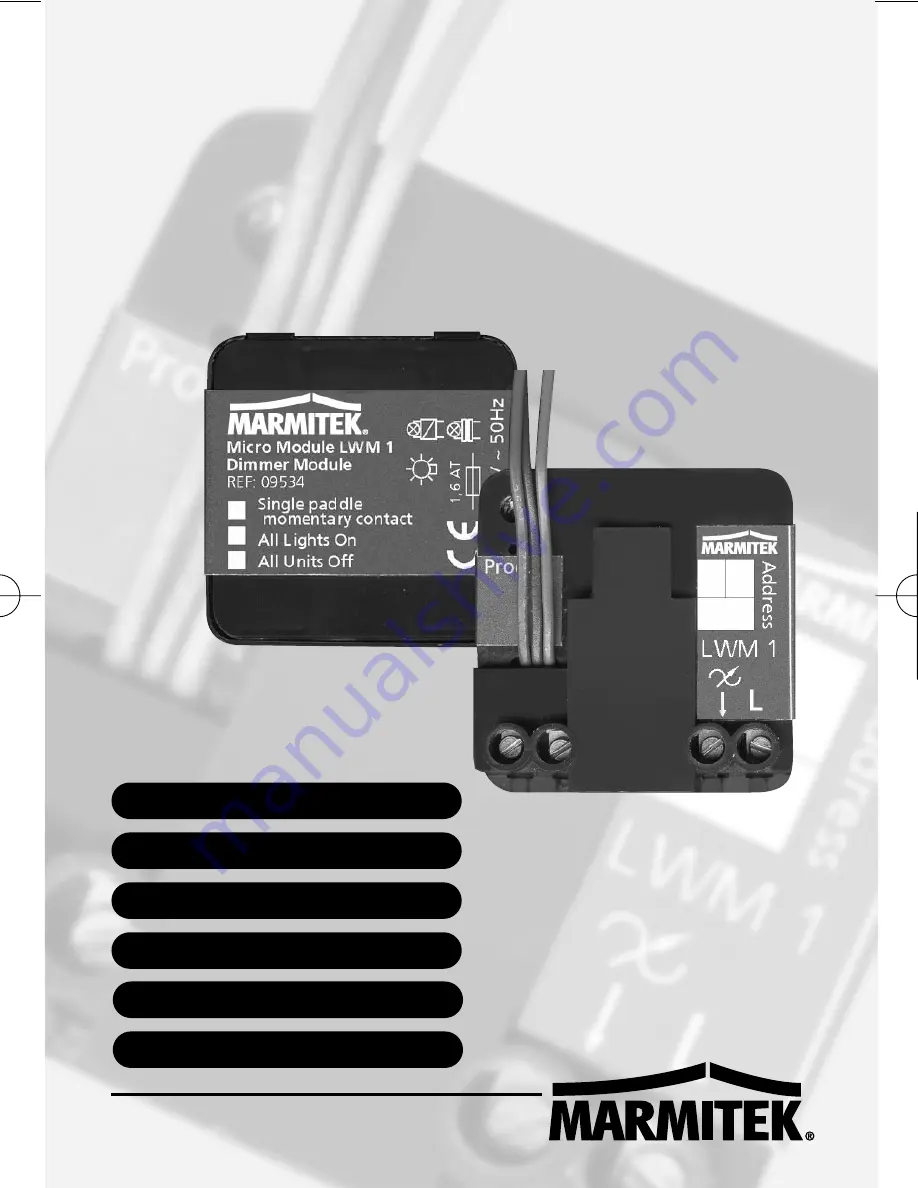
MICRO MODULE WITH DIMMER

LWM1™ MICROMODULE WITH DIMMER 

20160 / 20070423 © ALL RIGHTS RESERVED MARMITEK ® 2007

USER MANUAL

3

GEBRAUCHSANLEITUNG 19

GUIDE UTILISATEUR

35

MODO DE EMPLEO 

51

MANUALE D’ISTRUZIONI 

67

GEBRUIKSAANWIJZING

85

20160_20070423_UG_LWM1  26-04-2007  16:28  Pagina 1

Содержание LWM1

Страница 1: ...ODULE WITH DIMMER LWM1 MICROMODULE WITH DIMMER 20160 20070423 ALL RIGHTS RESERVED MARMITEK 2007 USER MANUAL 3 GEBRAUCHSANLEITUNG 19 GUIDE UTILISATEUR 35 MODO DE EMPLEO 51 MANUALE D ISTRUZIONI 67 GEBRU...

Страница 2: ...r DEL 5 Programmateur 6 Fils de raccordement pour interrupteur ESPA OL 1 Conexi n de fase 230V 2 Conexi n por carga 3 Conexi n neutra 4 Indicador de diodo emisor de infrarrojos LED 5 Bot n de programa...

Страница 3: ...ight sources Do not open the product the device contains live parts The product should only be repaired or serviced by a qualified repairman In case of improper usage or if you have opened altered and...

Страница 4: ...10 signals You can build a complete system using the three different kind of components of the Marmitek X 10 System 1 Modules These components will receive Marmitek X 10 signals and will switch or di...

Страница 5: ...fficulties with the range of your Marmitek X 10 signals please pay attention to the following facts 1 When several phases are used in the house it can be necessary to couple these phases for Marmitek...

Страница 6: ...protocol has several mechanism to avoid modules to be switched on or off by other sources than your Marmitek X 10 Controllers However it is possible that the Marmitek X 10 signals are disturbed by e...

Страница 7: ...ic transformer suitable for phase ingate up to 120 Watt The module can be controlled by Momentary switches connected to the module or at a distance making use of the Marmitek X 10 plc signal through t...

Страница 8: ...Push to make switch without intermediate setting 1 short press is ON keeping the button pressed is DIM second press is OFF When connecting this type of switch the brown and red wires are connected to...

Страница 9: ...M When connecting this type of switch the brown wire is connected to the contact for the top part of the switch ON BRIGHTER and the red wire to the contact for the bottom part of the switch OFF DIM Th...

Страница 10: ...sing Connect the phase neutral and load wire to the terminals of the MicroModule LWM1 Connect the thin wires of the built in module to the wall switch See Explanation about connecting switches for mor...

Страница 11: ...Press the setup prog button for at least 3 seconds The LED should stay on after releasing the setup button Warning The MicroModule will leave the setup mode if it doesn t receive any commands within 6...

Страница 12: ...tion we used a Marmitek 8 in 1 remote control to program the preferred settings when you use an RF remote control like the Marmitek 8 in 1 then a TM13 Plug in Transceiver is required to convert the RF...

Страница 13: ...ters of the MicroModules transmit the command only once for use in the phase of which they are connected When you want to receive the commands on your other phases as well you will need to install the...

Страница 14: ...Radial Lead Micro Fuse BK ETF1 6 ELU Sub miniature fuse links 166050 1 6AT Wickmann Subminiatur fuse No 372 TR5 372 1160 041 Bel fuse Time Lag Radial Lead Micro Fuse MTR1 6 short leads NEVER CONNECT...

Страница 15: ...for all remotes and sensors set to the same House Code Am I able to increase the range of my remotes by using more Transceivers Yes you can use more than one TM13 Transceiver in your home when the ran...

Страница 16: ...ady be altered with the second on command Can I connect a two way switch to the LWM1 No you can only connect a Momentary switch to the LWM1 For two way switches you can use the AWM2 although you canno...

Страница 17: ...ironment temperature 10 C to 35 C operation 20 C to 70 C storage Dimensions 46x46x16mm Environmental Information for Customers in the European Union European Directive 2002 96 EC requires that the equ...

Страница 18: ...18 MARMITEK...

Страница 19: ...ichtquellen aus Das Produkt niemals ffnen Das Ger t enth lt Bestandteile mit lebensgef hrlicher Stromspannung berlassen Sie Reparaturen oder Wartung nur Fachleuten Bei einer zweckwidrigen Verwendung s...

Страница 20: ...timent besteht aus drei Teilen 1 Module Diese empfangen die Marmitek X 10 Signale und schalten oder dimmen die angeschlossene Belastung 2 Empf nger Diese senden die Marmitek X 10 Signale und steuern s...

Страница 21: ...ichweite von Marmitek X 10 Signalen sind folgende Faktoren wichtig 1 Falls mehrere Phasen im Haus benutzt werden kann es notwendig sein diese Phasen f r die Marmitek X 10 Signale an einander zu kuppel...

Страница 22: ...Marmitek X 10 System als Sendefrequenz verwendet um digitale Information ber das Lichtnetz zu schicken Ger te die diese Art Signale senden k nnen mit einem FM10 Steckerfilter versehen werden Hierdurc...

Страница 23: ...Minimum Einbaubuchsentiefe 40mm Empfehlung 50 mm F r das Einbauen in Leuchtarmaturen und Unter bringen in engen R umen wie z B niedrig gezogenen Decken ist das Modul bestens geeignet Universell verwe...

Страница 24: ...len entstammend Vermag auf All Lights On und All Off regelbar zu reagieren Wahlm glichkeit aus 1 Fl chen Pulsschaltern oder 2 Fl chen Pulsschaltern Erl uterung f r anzuschlie ende Schalter ACHTUNG In...

Страница 25: ...te dr cken ist AN lang dr cken Oberseite ist heller Kurz dr cken der Unterseite ist AUS lang dr cken ist Dimmen F r den Anschluss dieser Art Schalter wird das braune Kabel an den Kontakt f r den obers...

Страница 26: ...ter aus der Buchse falls vorhanden L sen Sie die Verkabelung des Schalters Ziehen Sie ein Nullkabel falls dieses nicht vorhanden ist Verbinden Sie Phase Null und Schaltkabel mit den Anschlusspunkten d...

Страница 27: ...ieren Programmierstand Um das MicroModul programmieren zu k nnen muss dieses erst in den Programmierstand gebracht werden Dies geschieht wie folgt Dr cken sie minimal 3 Sekunden lang den Programmierkn...

Страница 28: ...ng Programmierbar Befehl LED blinkt Adresse A1 Adresse A2 P16 2x Adresse 2x Reagiert nicht auf Reagiert auf All Lights On 2x All Lights On 6x All Lights On Reagiert nicht auf Reagiert auf All Units Of...

Страница 29: ...nd auf die Zifferntaste 4 Dr cken Sie 2x auf die ON Taste Das MicroModul reagiert mit zweimaligem Blinken der LED Anzeige Die E4 Adresse ist nun programmiert Sollten Sie andere Programmierm glichkeite...

Страница 30: ...aber nicht als Phasenkuppler in Kombination mit dem LWM 1 benutzen DAS TESTEN DER SICHERUNG Funktionstest der Sicherung Typ TR5 1 6 AT Entkoppeln Sie das LWM 1 vom Verbraucher Lampe Transformator Nac...

Страница 31: ...AMPEN Das LWM 1 k nnen Sie nur mit einem phase anschnitt geeignetem elektronischem Transformator verwenden Sie d rfen das LWM 1 nicht ankuppeln an einen phase abschnitt geeigneten elektronischen Trans...

Страница 32: ...mit sog Kollisionserkennern ausgestattet die verhindern dass die Signale gest rt werden wenn beide TM13 Module gleichzeitig auf dem Lichtnetz senden Um Ihr Marmitek X 10 System nicht unn tig zu verz...

Страница 33: ...k nnen Sie nur einen Pulsschalter anschliessen Bei einem Wechselschalter k nnen Sie das AWM2 verwenden Damit k nnen Sie aber nicht dimmen Kann man mehrere Schalter benutzen um das LWM 1 zu bedienen J...

Страница 34: ...tinformation f r Kunden innerhalb der Europ ischen Union Die Europ ische Richtlinie 2002 96 EC verlangt dass technische Ausr stung die direkt am Ger t und oder an der Verpackung mit diesem Symbol vers...

Страница 35: ...qui sont sous tension tr s dangereuse Les r parations ou l entretien ne doivent tre effectu s que par des personnes comp tentes Toute utilisation impropre toute modification ou r paration effectu e vo...

Страница 36: ...tilisant les signaux courants porteurs Marmitek X 10 Vous pouvez construire un syst me complet en utilisant 3 types diff rents de composants Marmitek X 10 1 Modules Ces composant re oivent les signaux...

Страница 37: ...50Hz La port de ces signaux d pend beaucoup des conditions locales La moyenne n anmoins de cette port est de 80 m tres Si vous avez des probl mes avec la port de vos signaux Marmitek X 10 v rifiez les...

Страница 38: ...de 120 kHz seul le bruit sur ou autour de cette fr quence aura une influence sur la port Le cas ch ant branchez cet appareil dans un filtre FM10 de mani re liminer ce bruit 4 Le protocole Marmitek X 1...

Страница 39: ...rage ainsi que pour le montage dans des espaces r duits comme par exemple des plafonds abaiss s Universellement applicable libert compl te du choix de la marque de la couleur et du mod le des mat riel...

Страница 40: ...t d autres modules LWM1 Peut r agir sur All Lights On et All Off r glable Option pour raccordement de boutons poussoirs impulsion 1 face ou 2 faces Explication sur les interrupteurs raccorder Attentio...

Страница 41: ...le c t inf rieur de l interrupteur peuvent tre enfonc s MARCHE pousser bri vement sur le c t sup rieur PLUS CLAIRE pousser plus longtemps sur le c t sup rieur ARRET pousser bri vement sur le c t inf...

Страница 42: ...IGHT PLUS CLAIRE Rouge OFF ARRET DIM GRADATION Bleu COMMON fil commun ENCASTREMENT MONTAGE ATTENTION IL FAUT COUPER LA TENSION AVANT D ENTAMER LE MONTAGE POUR LE BRANCHEMENT DU LWM1 IL VOUS FAUT LE CA...

Страница 43: ...i re de la bo te d encastrement Maintenant le module peut tre programm voir chapitre programmation Apr s la programmation poser l interrupteur dans la bo te d encastrement PROGRAMMATION ATTENTION BRAN...

Страница 44: ...es pour l annulation automatique de la position de programmation Activer et annuler la position de programmation Programmer l adresse et les options Le tableau ci dessous montre les r glages possibles...

Страница 45: ...puyer sur la touche Marmitek X10 maison de la t l commande 8 en 1 et appuyer ensuite sur la touche num rique 4 Appuyer 2x sur la touche ON Le MicroModule r agit par le double clignotement de la DEL L...

Страница 46: ...rs phase FD10 peuvent tre utilis s comme coupleurs r seau mais pas comme coupleurs de phase TESTER LE FUSIBLE Tester le fonctionnement du fusible type TR5 1 6 AT D brancher le LWM 1 de la charge de la...

Страница 47: ...NTERNE L CLAIRAGE HALOG NE BASSE TENSION Le LWM1 ne peut tre utilis qu en combinaison avec un transformateur lectronique apte au gradateurs par attaque du d but de phase Le LWM1 ne doit pas tre connec...

Страница 48: ...ue le r seau soit libre avant de transmettre ses donn es Pour viter que votre syst me Marmitek X 10 ne devienne lent ou que la variation de lumi re ne devienne trop saccad e placez vos TM13 aussi loig...

Страница 49: ...t vous pouvez utiliser l AWM2 Mais dans ce cas vous ne pouvez pas utiliser la fonction gradation Puis je utiliser plusieurs interrupteurs pour commander le LWM1 Oui vous pouvez connecter plusieurs int...

Страница 50: ...10 C 35 C service 20 C 70 C stockage Dimensions 46x46x16mm Informations environnementales pour les clients de l Union europ enne La directive europ enne 2002 96 CE exige que l quipement sur lequel est...

Страница 51: ...ducto el equipo contiene piezas con un voltaje mortal Deja las reparaciones o servicios a personal experto En caso de uso indebido o modificaciones y reparaciones montados por su mismo la garant a se...

Страница 52: ...do ya existente por medio de se ales X 10 de Marmitek El programa contiene tres tipos de piezas 1 M dulos Los m dulos reciben las se ales X 10 de Marmitek y conectan o amortiguan la carga conectada 2...

Страница 53: ...ngitud de cable de 80 metros En caso de problemas con el alcance de las se ales X 10 de Marmitek tenga en cuenta los siguientes factores de importancia 1 Cuando distintas fases son utilizadas en una c...

Страница 54: ...trav s de la red de alumbrado Para evitar dichas interferencias puede simplemente proveer los aparatos que transmiten estas se ales con un filtro FM 10 Plug In El filtro impide que las se ales interfe...

Страница 55: ...aje en soportes de iluminaci n y para su colocaci n en espacios peque os por ejemplo techos rebajados Aplicable universalmente libertad completa en la elecci n de la marca color y modelo del interrupt...

Страница 56: ...reaccionar a Encender todas las luces y Apagar todas configurable Posibilidad de elecci n para conectar interruptores de presi n de 1 fases o de 2 fases Explicaci n concerniente a los interruptores qu...

Страница 57: ...puede pulsar tanto en la parte superior como en la inferior del interruptor Pulsar brevemente en la parte superior es ENCENDIDO si se pulsa durante m s tiempo aumenta la intensidad Pulsar brevemente e...

Страница 58: ...rr n ENCENDIDO BRILLANTE Rojo APAGADO TENUE Azul el compartido COM N EMPOTRAMIENTO MONTAJE ATENCI N DESCONECTE PRIMERO LA CORRIENTE ANTES DE QUE USTED COMIENCE CON EL MONTAJE Para la conexi n del LWM1...

Страница 59: ...la parte trasera de la caja empotrada El m dulo puede ser programado vea cap tulo Programar Despu s de programar coloque el interruptor en la caja empotrada PROGRAMAR ATENCI N CONECTE PRIMERO LA CORR...

Страница 60: ...a realizado ninguna configuraci n el m dulo sale autom ticamente del modo de programaci n Eliminar el modo de programaci n Presione brevemente el bot n de programaci n o espere 60 segundos hasta que e...

Страница 61: ...cualquier controlador X10 o mando a distancia con la excepci n de la interfaz ordenador CM11 En el ejemplo siguiente nos basamos en la programaci n con ayuda del mando a distancia EasyControl8 de Mar...

Страница 62: ...uraci n de f brica FUNCIONAMIENTO DE LOS MICROM DULOS EN INSTALACIONES TRIF SICAS Los emisores X10 de los MicroM dulos env an rdenes una vez para su utilizaci n en su propia fase Cuando usted quiera q...

Страница 63: ...ad Micro Fuse BK ETF1 6 ELU Sub miniature fuse links 166050 1 6AT Wickmann Subminiature fuse No 372 TR5 372 1160 041 Bel fuse Time Lag Radial Lead Micro Fuse MTR1 6 short leads NUNCA CONECTE UN TRANSF...

Страница 64: ...Los m dulos no reaccionan al mando a distancia o al sensor Si utiliza un mando a distancia o un sensor hay que usar el m dulo de transceptor TM13 o un central de un sistema de alarma de Marmitek stos...

Страница 65: ...De 2 veces la orden de encendido Cierre con el bot n 2 Esta ltima acci n s lo es necesaria cuando se utiliza el IRRF7243 Cuando se utiliza un TM13 o una central de alarma la direcci n habr cambiado c...

Страница 66: ...m2 Temperatura ambiental 10 C hasta 35 C en funcionamiento 20 C hasta 70 C almacenado Dimensiones 46x46x16 mm Informaci n medioambiental para clientes de la Uni n Europea La Directiva 2002 96 CE de la...

Страница 67: ...ecchio ci sono parti che potrebbero provocare pericolose scosse elettriche Lasciare fare riparazioni o modifiche esclusivamente a personale esperto In caso di utilizzo scorretto di riparazioni o modif...

Страница 68: ...i segnali Marmitek X 10 e commutano o smorzano il carico collegato 2 Controller elementi che inviano i segnali Marmitek X 10 e controllano i Moduli 3 Sender componenti senza fili per esempio telecoma...

Страница 69: ...pu fare unendo le fasi con un ripetitore CAT 3000 Art N 09304 quando le prese fisse e i punti luce sono effettivamente divisi su pi fasi Pi gruppi non creano nessun problema per il segnale Marmitex X...

Страница 70: ...per l invio di informazioni digitali lungo la rete d illuminazione Gli apparecchi che inviano questo tipo di segnali possono essere provvisti di un Filtro Plug in FM10 Grazie a questo filtro i segnal...

Страница 71: ...e veramente piccole il modulo pu essere montato dietro ad interruttori ad incasso e prese fisse profondit minima d incasso 40 mm consigliato 50 mm Il modulo anche ideale per il montaggio in apparecchi...

Страница 72: ...teso livello di regolazione proveniente da altri moduli LWM1 Pu rispondere a Tutte le Luci Accese e Tutte le Luci Spente aggiustabile Scelta per collegamento di un interruttore a pulsante o a due vie...

Страница 73: ...di tempo il lato superiore vuole dire ACCENDERE Premere a lungo vuole dire INTENSIFICARE Premere brevemente il lato inferiore vuole dire SPEGNERE Premere per molto tempo il lato inferiore vuole dire...

Страница 74: ...GLIERE LA CORRENTE Per il collegamento del LWM1 serve il seguente cablaggio nel posto dove Lei vuole collegare il modulo Togliere l interruttore eventualmente esistente dalla scatola a muro Staccare i...

Страница 75: ...nella scatola a muro PROGRAMMAZIONE ATTENZIONE ATTACCARE LA TENSIONE PRIMA DELLA PROGRAMMAZIONE Attivazione posizione di programmazione Per poter programmare il MicroModulo bisogna metterlo nella posi...

Страница 76: ...ni del LWM1 Impostazione Programmabile Comando LED dal produttore lampeggia Indirizzo 1 Indirizzo A2 P16 2x Indirizzo 2x Non risponde a Risponde a 2x Tutte le luci accese Tutte le luci accese Tutte le...

Страница 77: ...nella posizione di programmazione Premere sul tasto casetta del Marmitek X10 del telecomando EasyControl8 e poi sul tasto 4 Premere due volte il tasto ON tasto ON Il MicroModulo reagisce facendo lampe...

Страница 78: ...tori di fasi in abbinamento con il LWM1 TEST DEL FUSIBILE Test del funzionamento del fusibile tipo TR5 1 6 AT Staccare il LWM1 dal carico lampadario trasformatore quindi misurare la tensione Se non c...

Страница 79: ...llegamento a tale tipo di trasformatore causer un rumore rombante e potr danneggiare il regolatore d intensit della luce Questo fa scadere la garanzia DOMANDE FREQUENTI Perch alcuni moduli si accendon...

Страница 80: ...ungo la rete d illuminazione Per non rallentare senza necessit il proprio Sistema Marmitek X 10 e per evitare effetti simili ad urti e strattoni in caso di smorzamento indispensabile collocare le unit...

Страница 81: ...bisogna usare l AWM2 Con questo per non possibile regolare l intensit della luce Posso utilizzare pi interruttori per gestire il LWM1 Si si pu collegare pi di un interruttore in parallela al primo in...

Страница 82: ...namento prima di montare il sistema Softstart Softdim Avvio soft attenuazione soft Posizione della memoria per il livello di regolazione della luce Codici X 10 Key Tutte le unit spente Tutte le unit a...

Страница 83: ...smaltire sia questi prodotti sia le altre apparecchiature elettriche ed elettroniche mediante le specifi che strutture di raccolta indicate dal governo o dagli enti pubblici locali Il corretto smaltim...

Страница 84: ...84 MARMITEK...

Страница 85: ...bronnen Het product nooit openmaken de apparatuur bevat onderdelen waarop levensgevaarlijke spanning staat Laat reparatie of service alleen over aan deskundig personeel Bij oneigenlijk gebruik zelf aa...

Страница 86: ...itek X 10 signalen Het programma bestaat uit drie soorten onderdelen 1 Modules Deze ontvangen de Marmitek X 10 signalen en schakelen of dimmen de aangesloten belasting 2 Controllers Deze zenden de Mar...

Страница 87: ...deze fasen te koppelen voor Marmitek X 10 signalen Dit koppelen kunt u doen door het gebruik van een CAT 3000 actieve 3 fasenkoppelaar repeater Art No 09304 en is nodig als wandcontactdozen en verlic...

Страница 88: ...et langer het lichtnet bereiken 4 Door de opbouw van het signaal kunnen andere stoor bronnen de modules uit het Marmitek X 10 Systeem nooit activeren of deactiveren Wel kan het signaal worden gedempt...

Страница 89: ...schikt voor fase aansnijding schakelen en dimmen tot 120 Watt De module kan bestuurd worden door op de module aangesloten pulsdrukschakelaars of op afstand gebruik makend van het Marmitek X 10 plc sig...

Страница 90: ...t er een 2 vlaks Pulsdrukschakelaar is aangesloten 1 vlaks Pulsdrukschakelaar Terugverende schakelaar zonder middenstand 1 keer kort drukken is AAN ingedrukt houden is dimmen 2e keer kort drukken is U...

Страница 91: ...et aansluiten van dit soort schakelaars wordt de bruine draad aangesloten op het contact voor het bovenste deel van de schakelaar aan helderder en de rode draad op het contact voor onderste deel van d...

Страница 92: ...aad bij indien deze ontbreekt Monteer de fase nul en schakeldraad aan de aansluitpunten van de MicroModule LWM1 Monteer de dunne draden van de MicroModule aan de schakelaar Zie hoofdstuk Uitleg omtren...

Страница 93: ...mmeerknopje minimaal drie seconden in waarna de rode LED bij het loslaten blijft branden LET OP Indien binnen 60 seconden geen instelcommando ontvangen wordt gaat de module automatisch uit de programm...

Страница 94: ...beeld gaan we uit van het programmeren met behulp van de Marmitek EasyControl8 afstandsbediening wanneer u gaat programmeren met een HF afstandsbediening zoals de EasyControl8 vergeet dan niet om ook...

Страница 95: ...de MicroModules versturen de commando s eenmalig voor gebruik op de eigen fase Wanneer u wilt dat de commando s welke verstuurd worden door de MicroModules ook op andere fasen gebruikt kunnen worden d...

Страница 96: ...ead Micro Fuse BK ETF1 6 ELU Sub miniature fuse links 166050 1 6AT Wickmann Subminiatur fuse No 372 TR5 372 1160 041 Bel fuse Time Lag Radial Lead Micro Fuse MTR1 6 short leads SLUIT NOOIT EEN GEWIKKE...

Страница 97: ...een centrale van een Marmitek Alarmsysteem Deze zetten de signalen van de afstandsbedieningen en sensoren om naar het Marmitek X 10 lichtnetprotocol Ook bij meerdere afstands bedieningen en sensoren...

Страница 98: ...van de IRRF7243 Bij gebruik van een TM13 of een alarmcentrale zal het adres reeds gewijzigd worden bij het 2e aan commando Kan ik een wisselschakelaar op de LWM1 aansluiten Nee op de LWM1 kunt u alle...

Страница 99: ...m2 Omgevingstemperatuur 10 C tot 35 C bedrijf 20 C tot 70 C opslag Afmetingen 46x46x16mm Milieu informatie voor klanten in de Europese Unie De Europese Richtlijn 2002 96 EC schrijft voor dat apparatuu...

Страница 100: ...r Angleichung der Rechtsvorschriften der Mitgliedstaaten ber die elektromagnetische Vertr glichkeit Richtlinie 73 23 EWG des Rates vom 19 Februar 1973 zur Angleichung der Rechtsvorschriften der Mitgli...

Страница 101: ...namento delle legislazioni degli Stati Membri relative alla compatibilit elettromagnetica Direttiva 73 23 CEE del Consiglio del 19 febbraio 1973 concernente il ravvicinamento delle legislazioni degli...

Страница 102: ...g but not limited to model numbers software audio video text and photographs rests with Marmitek B V Any use of the Content but without limitation distribution reproduction modification display or tra...

Страница 103: ......

Отзывы: