background image

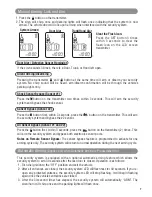
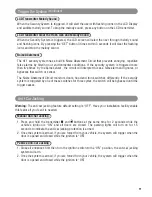
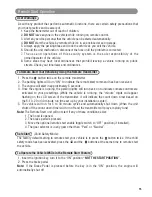
1. Press the      button twice on the remote transmitter.

2. The parking lights will turn “ON” to indicate the remote start command has been received.

3. The engine will start in approximately 5 seconds.

4. Once the engine is running, the parking lights will turn back on to indicate climate controls are

activated to your presettings (While the vehicle is running, the “minute” digits will appear

flashing on the LCD screen of the transmitter. It will indicate the count down timer based on

the 5, 10, 20 or 30 minute run time set up by your installation center).

5. The vehicle will run for 5 to 30 minute cycles and automatically shut down (When the unit

shuts off the count down timer will turn off and the transmitter will play a melody tune).

Note: The Remote Start unit will not start if any of these conditions exist:

1. The hood is opened.

2. The brake pedal is pressed.

3. Move the optional remote start enable toggle switch to “OFF” position (if installed).

4. The gear selector is in any gear other than “Park” or “Neutral”.

(Child Safety Mode):

The factory default setting to remote start your vehicle is to press the     button twice. If the child

safety mode has been activated, press the      and the       buttons at the same time to remote start

the vehicle.

1. Insert the Ignition key, turn it to the “ON” position “NOT THE START POSITION”.

2. Press the brake pedal.

Note: If the Brake Pedal is pressed before the key is in the “ON” position, the engine will

automatically shut off.

Remote Start Operation

To Remote Start Your Vehicle by Using the Remote Transmitter

To Operate the Vehicle While in the Remote Start Feature

Safe Start

15

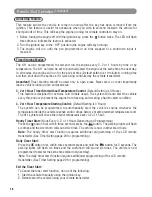
As with any product that performs automatic functions, there are certain safety precautions that

you must practice and be aware of.

1. Keep the transmitter out of reach of children.

2. DO NOT leave anyone in the vehicle while running on remote control.

3. Alert any service personal that the vehicle can be started automatically.

4. DO NOT start the vehicle by remote while it’s in an enclosed area or garage.

5. Always apply the parking brake and lock the vehicle as you exit the vehicle.

6. Should the unit malfunction, disconnect the fuse until the problem is corrected.

7. The use and operations of this security system is the sole responsibility of the

owner/operator of the vehicle.

8. Some areas may have local ordinances that prohibit leaving a vehicle running on public

streets. Check your local laws and ordinances.

User Warnings


Содержание MARKSMAN X11

Страница 1: ...Owner s Manual Model X11 For Technical Assistance please call 800 638 3600 or visit www magnadyne com...

Страница 2: ...System Status Check 12 Driver LCD Transmitter Paging 13 Dome Light Supervision 13 Ignition Controlled Door Locks 13 Channel 3 Trunk Release Output 13 Channel 4 Output 13 Channel 5 Output 14 Channel 6...

Страница 3: ...y a 1 5V type AAA high power digital camera battery When the power of the battery weakens 3 things will happen to indicate a low battery 1 All the LCD icons on the display will turn off and only the b...

Страница 4: ...ming Remote Panic Function Press and Hold for 3 Seconds Hold for 3 Seconds Hold for 2 Seconds Unlock Doors Disarm Alarm Two Step Door Unlock Disarm Alarm Press Unlock Twice within 3 Seconds Trunk Rele...

Страница 5: ...is Disarmed 3 Chirps Defective Sensor of Open Door Reminder 4 Chirps Disarm Previously Triggered 2 3 6 Chirps Car Locator Parking Light Chirp Indicators LCD Display Transmitter Operations Transmitter...

Страница 6: ...Car Jacking Alarming Flashing Disabled Flashes LED Function OFF System is Disarmed Slow Flashing System is Armed Fast Flashing System in Passive Arming On Solid System in Valet Mode 1 Flash Pause Zon...

Страница 7: ...tem to arm 30 seconds after the last door is closed Operation is as follows 1 Turn the ignition to the OFF position and exit the vehicle 2 After all entrances are closed the security system LED will f...

Страница 8: ...rp twice and parking lights will flash twice indicating that the system is now disarmed The vehicle door will unlock and the dome light will turn on for 30 seconds upon disarming when interfaced with...

Страница 9: ...ransmitter The valet switch allows you to temporarily bypass all alarm functions eliminating the need to hand your transmitter to parking attendants or garage mechanics When the system is in valet mod...

Страница 10: ...rable The transmitter and buttons can be used to lock and unlock the door if the option is installed however once the button is pressed the vehicle s starter disable device will be enabled allowing th...

Страница 11: ...hese switches for three cycles the switch will be bypassed until the trigger ceases Warning The anti car jacking feature default setting is OFF Have your installation facility enable this feature if y...

Страница 12: ...il the vehicles battery power is exhausted Turn the ignition switch from OFF to ON and within 10 seconds push the valet switch The siren will stop sounding and the security system is now disarmed 12 A...

Страница 13: ...system the system will automatically lock the vehicle s doors when the ignition key is turned to the ON position and or unlock the doors when ignition key is turned to the OFF position The doors must...

Страница 14: ...he same time to activate the Channel 6 output Press and hold the and button at the same time to activate the Channel 7 output Note If Channel 7 has been programmed for defrost operation it will not fu...

Страница 15: ...the child safety mode has been activated press the and the buttons at the same time to remote start the vehicle 1 Insert the Ignition key turn it to the ON position NOT THE START POSITION 2 Press the...

Страница 16: ...hicle every three hours to prevent the engine from freezing and creating a hard to start condition 3 2 or 1 Hour Temperature Starting Control Default Setting is 3 Hours The system can be programmed to...

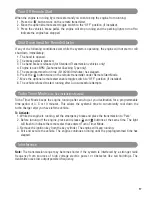
Страница 17: ...grammed time has elapsed When the engine is running by remote start and you wish to stop the engine from running 1 Press the button twice on the remote transmitter 2 Move the optional remote start tog...

Страница 18: ...You are transmitting the signal to the control unit Door Open Warning Doors are illegally opened Zone 3 Ignition Trigger Ignition switch is illegally turned on Zone 5 Engine Cranking Your vehicle s en...

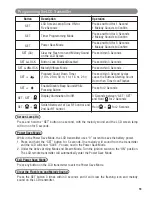
Страница 19: ...nds between SET SET and Hold for 2 Seconds SET Switch Between 1st Car RF Control and Hold for 2 Seconds 2nd Car RF Control 19 Programming the LCD Transmitter Screen Lamp On Press and hold the SET butt...

Страница 20: ...irst within 3 seconds press the button for 2 seconds to select the mode of vibrate melody The icon will be displayed on the LCD screen to show mode Press the SET button first then within 3 seconds pre...

Страница 21: ...Hour Flash Digit for Adjusting Max 19 Hrs 59 Min for and 7 Press the SET Button Once Count Down Timer Setting Min Flash Digit for Adjusting for and 8 Press the SET Button Once Count Down Timer Setting...

Страница 22: ...1RF LCD 139 95 ea TRANSMITTERS DESCRIPTION MODEL PRICE BATTERIES 1 5 Volt AAA Lithium Battery Highly Recommended 1 5 Volt AAA High Capacity Digital Camera Battery Suggested 1 5 Volt AAA Alkaline Batte...

Страница 23: ...orders please allow 4 5 weeks for delivery Please give a shipping address where this order may be delivered between the hours of 9 am and 5 pm weekdays If UPS is unable to deliver your order will be...

Страница 24: ...resulting from improper installation alteration accident misuse abuse or acts of nature This Limited Life Time Warranty applies only to the receiver section of the security system Neither the siren t...

Отзывы: