2
1)
O
C/
O
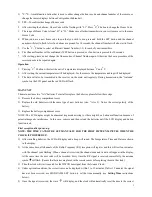
F---A multifunction button that is used to either change the house code and channel number of the remote, or
change the remote displays between Centigrade or Fahrenheit
2)
SET---To confirm the change of house code
2.
After inserting the batteries, House Code will be flashing with “01”. Press
O
C/
O
F button to change the House Code.
3.
The range of House Code is from “01” to “30”. Make sure all other transmitters in your system are set to the same
House Code.
4.
When you have a new house code shown that you wish to use, press and hold the SET button and the channel
number will start to flash. Also if no buttons are pressed for 10 seconds, the channel Number will also start to flash.
5.
Use the
O
C/
O
F button to select a different Channel Number (1-3) for each of your transmitters.
6.
The Channel Number will be confirmed if SET button is pressed, or if no button is pressed for 10 seconds.
7.
After setting, please do not change the House code or Channel Number again. Otherwise the Learn procedure of the
receiver needs to be repeated again.
Operation
1.
Pressing
O
C/
O
F button will select the unit of temperature displayed between
O
C and
O
F.
2.
After setting, the current temperature will be displayed. For the remote, the temperature reading will be displayed.
3.
The data will also be transmitted to the receiver on the main unit regularly. During transmission, the “Antenna”
symbol on the LCD panel and the red LED will flash.
MAIN UNIT
The main unit uses two “AA” batteries. To install or replace the batteries, please follow these steps:
1)
Remove the battery compartment cover.
2)
Replace the old batteries with the same type of new batteries (size: “AA x 2). Notice the correct polarity of the
battery.
3)
Replace the battery compartment cover.
NOTE: The LCD display might be abnormal (segments missing) or there might be a button malfunction because of
potential magnetic interference. In this case, remove and then reload the batteries until the LCD display and button
function is ok.
First reception after power-up
NOTE: THE TIME CANNOT BE SET MANUALLY FOR THE FIRST FIFTEEN MINUTES WHEN THE
CLOCK IS POWERED UP.
1)
After installing batteries, the LCD will display and a beep will sound. The Temperature, Time and Date are shown
in the display.
2)
At the same time, all channels of the Radio Frequency (RF) reception will register and this will last four minutes,
with the channel code flashing. When a channel is received, the channel code and its data will appear in the display.
At the same time the user code will be recorded. Every time the RF signal is received successfully, the antenna
symbol
will flash. (Ensure that batteries are placed in the remote sensor before placing them in the clock.)
3)
Then the clock will start to search for the WWVB time signal from the Atomic Clock.
4)
Under optimal conditions, the correct time can be displayed within 3 to 15 minutes. If after 15 minutes the signal
has not been received, use MODE/ALM SET button to set the time manually (see
Setting Time
instructions
below).
5)
Once the signal is received, the wave
will display, and the clock will automatically reset the time to the correct


