


22
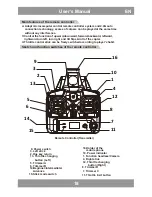
U
ser’s Manual
EN
How to charge the quad-copter
NOTE:Battery should be full charged before storing.
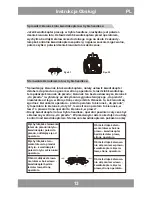
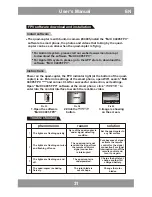
Preparation for flight
Turn on the quad-copter;the flash light will keep flashing quickly, the
gyro of quad-copter will be in signal detecting condition. Set the quad-
copter to flat surface, about 4 seconds later, the flash light will keep
constant “ON”. It means that signal connection is finished and the quad-
copter is ready for flight.
To ensure steady flight, please set the value of the Trimmer to the midpoint.
Push up the throttle stick slowly and the quad-copter takes off.
To avoid any misunderstanding, we have defined the orientation of the
quad-copter as follows:The quad-copter is set to be copter nose right
ahead and tail facing the player .The copter nose direction is named as
“forward”, the tail direction is named as “backward”. The copter flies up to
the sky is name as “upward”; the copter flies down to the ground is named
as “downward”. Player’s left side is named as “left”, player’s right side is
names as “right”. All the directions we are talking about in this manual are
subject to the definition above.
Make sure that the battery (at the bottom of the quad-copter)is well
installed and connected with power wire of quad-copter. The quad-
copter is OFF.
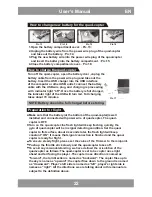
Turn off the quad-copter, open the battery door ,unplug the
battery cable from the power wire plug and take out the
battery. Insert the USB charger into the USB interface
of the computer or other USB outlet; connect the battery
cable with the USB wire plug, and charging is proceeding
with indicator light "off". Once the battery is full charged,
the indicator light of the USB will turn red. Full charging
takes about 70 minutes.
Pic.13
Pic.14
Pic.15
Pic.16
Pic.17
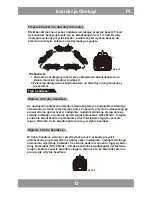
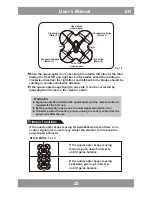
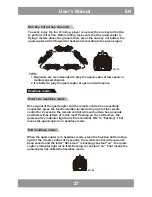
How to change new battery for the quad-copter
1.Open the battery compartment cover.
(
Pic.13
)
2.Unplug the battery wire from the power wire plug of the quad-copter
and take out the battery.
(
Pic.14
)
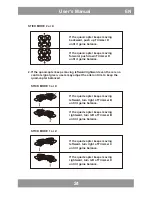
3.Plug the new battery wire into the power wire plug of the quad-copter
and insert the battery into the battery compartment.
(
Pic.15
)
4.Close the battery compartment cover.
(
Pic.16
)