23
5. Initialization of LUBA
Preparation:
1. Already done the MAMMOTION account sign up, the LUBA activation and add LUBA to your accout;
2. Make sure that both LUBA and APP has the newest version & firmware;
3. Already installed the charging station and RTK reference station on the right place;
4. Check your lawn, make sure that there are not water filled holes in the lawn which can cause damage to the
product.
5. Give an overview of your house, your lawn and include all obstacles, and then decide where to set the virtual
boundaries of task area and no go zone.
6. Fill in large holes in the lawn
;
7. When LUBA is working, make sure that there are nor people, children, pets or other moving things in your lawn;
8. We highly recommend you to set the area with obvious holes, gullies, roots of the tree and with obstacles as no go
zone.
9. DO NOT use LUBA when it
’s raining, or when the lawn is still wet.
10. If you currently recharge the RTK reference station, you need to re-do the initialization.
Map Page
:
The map page is the fundamental of LUBA control and mission planning.
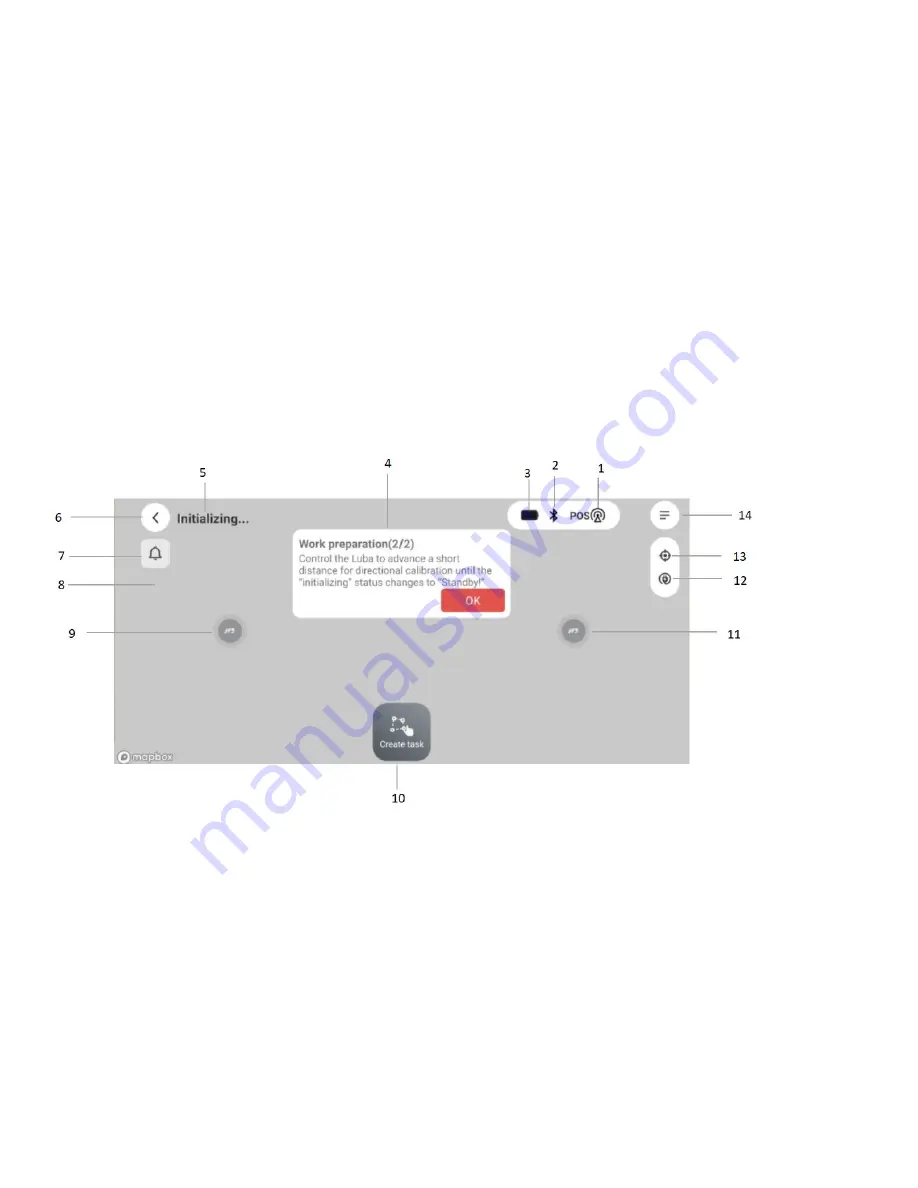
As shown in the following figure, the meanings of each icon are listed below
:
1
:
Positioning status.
2
:
Bluetooth connecting status. If the Bluetooth is connected successfully, it will light up to be black.If not, then gray.
3
:
Mower battery power.
4
:
Guide message box.
5
:
LUBA status. There are five status: Initializing, Charging, Standby, Task planning, Working and Task suspended.
6: return button.
7
:
Notice and warning.
8
:
Background map.
9
:
Manually drive forward/backward button.
10
:
Create task. Click here to create a new map with mowing task.
11
:
Manually drive steering clockwise/ anti-clockwise button.
Содержание LUBA
Страница 1: ...LUBA Robotic LawnMower User Manual V1 1...
Страница 29: ...27...
Страница 31: ...29...


