background image

7 ENGLISH

NOTE:

 If the driver bit is not inserted deep enough 

into the sleeve, the sleeve will not return to its original 

position and the driver bit will not be secured. In this 

case, try re-inserting the bit according to the instruc-

tions above.

NOTE:

 When it is difficult to insert the driver bit, pull 

the sleeve and insert it into the sleeve as far as it will 

go.

NOTE:

 After inserting the driver bit, make sure that it 

is firmly secured. If it comes out, do not use it.

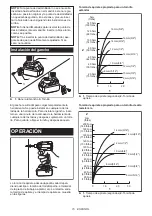
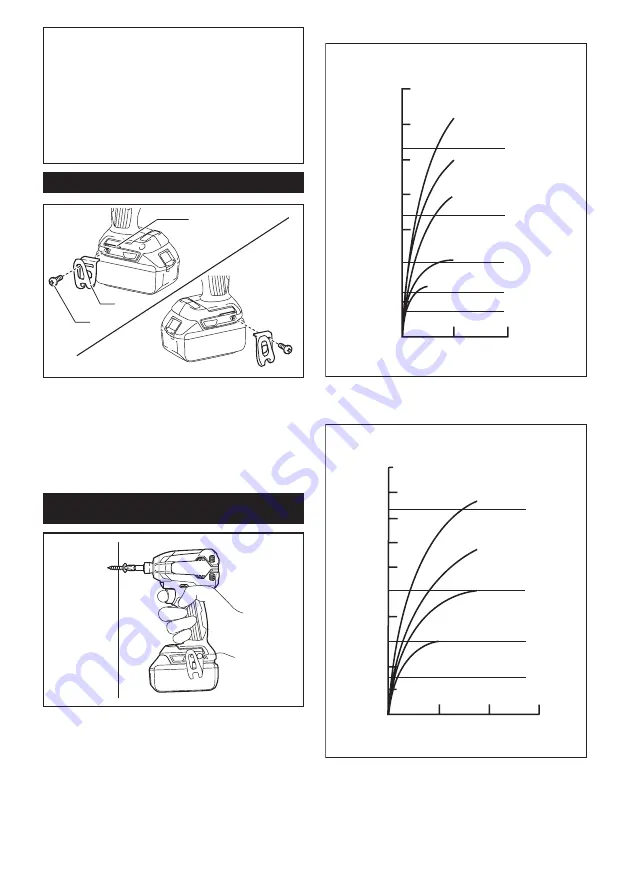
Installing hook

1

3

2

►    

1.

 Groove 

2.

 Hook 

3.

 Screw

The hook is convenient for temporarily hanging the tool. 

This can be installed on either side of the tool. To install 

the hook, insert it into a groove in the tool housing on 

either side and then secure it with a screw. To remove, 

loosen the screw and then take it out.

OPERATION

The proper fastening torque may differ depending upon 

the kind or size of the screw/bolt, the material of the 

workpiece to be fastened, etc. The relation between fas

-

tening torque and fastening time is shown in the figures.

Proper fastening torque for standard bolt

140

(103)

120

(89)

100

(74)

80

(59)

60

(44)

40

(30)

20

(15)

0

M16(5/8")

M10(3/8")

M8(5/16")

M14(9/16")

M12(1/2")

2

1

2.0

1.0

M16(5/8")

M14(9/16")

M12(1/2")

M10(3/8")
M8(5/16")

N•m

(ft•lbs)

►    

1.

 Fastening time (second) 

2.

 Fastening torque

Proper fastening torque for high tensile bolt

2

1

200

(148)

180

(133)

160

(118)

140

(103)

120

(89)

100

(74)

80

(59)

60

(44)

40

(30)

20

(15)

0

M14(9/16")

M12(1/2")

M10(3/8")

M8(5/16")

2.0

3.0

1.0

N•m

(ft•lbs)

M14(9/16")

M12(1/2")

M10(3/8")

M8(5/16")

►    

1.

 Fastening time (second) 

2.

 Fastening torque

Hold the tool firmly and place the point of the driver bit 

in the screw head. Apply forward pressure to the tool to 

the extent that the bit will not slip off the screw and turn 

the tool on to start operation.

Содержание XT267T

Страница 1: ...TRUCTION MANUAL DE INSTRUCCIONES IMPORTANT Read Before Using IMPORTANT Lire avant usage IMPORTANTE Leer antes de usar Cordless Hammer Driver Drill Perceuse Percussion Visseuse sans Fil Rotomartillo Atornillador Inalámbrico XPH07 014695 ...

Страница 2: ...g a power tool Distractions can cause you to lose control Electrical Safety 4 Power tool plugs must match the outlet Never modify the plug in any way Do not use any adapter plugs with earthed grounded power tools Unmodified plugs and matching outlets will reduce risk of electric shock 5 Avoid body contact with earthed or grounded surfaces such as pipes radiators ranges and refrigerators There is a...

Страница 3: ... and clean Properly maintained cutting tools with sharp cutting edges are less likely to bind and are easier to control 23 Use the power tool accessories and tool bits etc in accordance with these instructions taking into account the working conditions and the work to be performed Use of the power tool for operations different from those intended could result in a hazardous situation Battery tool ...

Страница 4: ...eating possible burns and even an explosion 4 If electrolyte gets into your eyes rinse them out with clear water and seek medical attention right away It may result in loss of your eyesight 5 Do not short the battery cartridge 1 Do not touch the terminals with any conductive material 2 Avoid storing battery cartridge in a container with other metal objects such as nails coins etc 3 Do not expose b...

Страница 5: ...s not being inserted correctly Battery protection system Lithium ion battery with star marking 1 012128 Lithium ion batteries with a star marking are equipped with a protection system This system automatically cuts off power to the tool to extend battery life The tool will automatically stop during operation if the tool and or battery are placed under one of the following conditions Overloaded The...

Страница 6: ...of lamp or it may lower the illumination Reversing switch action CAUTION Always check the direction of rotation before operation Use the reversing switch only after the tool comes to a complete stop Changing the direction of rotation before the tool stops may damage the tool When not operating the tool always set the reversing switch lever to the neutral position 1 A B 014703 This tool has a rever...

Страница 7: ...into your material or a piece of duplicate material to determine which torque level is required for a particular application NOTE The adjusting ring does not lock when the pointer is positioned only halfway between the graduations ASSEMBLY CAUTION Always be sure that the tool is switched off and the battery cartridge is removed before carrying out any work on the tool Installing side grip auxiliar...

Страница 8: ...n pull the switch trigger Do not force the tool Light pressure gives best results Keep the tool in position and prevent it from slipping away from the hole Do not apply more pressure when the hole becomes clogged with chips or particles Instead run the tool at an idle then remove the bit partially from the hole By repeating this several times the hole will be cleaned out and normal drilling may be...

Страница 9: ...om slipping when starting a hole make an indentation with a center punch and hammer at the point to be drilled Place the point of the bit in the indentation and start drilling Use a cutting lubricant when drilling metals The exceptions are iron and brass which should be drilled dry MAINTENANCE CAUTION Always be sure that the tool is switched off and the battery cartridge is removed before attempti...

Страница 10: ...GES FROM THE SALE OR USE OF THE PRODUCT THIS DISCLAIMER APPLIES BOTH DURING AND AFTER THE TERM OF THIS WARRANTY MAKITA DISCLAIMS LIABILITY FOR ANY IMPLIED WARRANTIES INCLUDING IMPLIED WARRANTIES OF MERCHANTABILITY AND FITNESS FOR A SPECIFIC PURPOSE AFTER THE ONE YEAR TERM OF THIS WARRANTY This Warranty gives you specific legal rights and you may also have other rights which vary from state to stat...

Страница 11: ...lisez pas les outils électriques dans les atmosphères explosives par exemple en présence de liquides gaz ou poussières inflammables Les outils électriques produisent des étincelles au contact desquelles la poussière ou les vapeurs peuvent s enflammer 3 Assurez vous qu aucun enfant ou curieux ne s approche pendant que vous utilisez un outil électrique Vous risquez de perdre la maîtrise de l outil s...

Страница 12: ...outil électrique adéquat suivant le type de travail à effectuer Si vous utilisez l outil électrique adéquat et respectez le régime pour lequel il a été conçu il effectuera un travail de meilleure qualité et de façon plus sécuritaire 18 N utilisez pas l outil électrique s il n est pas possible de mettre sa gâchette en position de marche et d arrêt Un outil électrique dont l interrupteur est défectu...

Страница 13: ...ces de prise isolées pendant toute opération où l accessoire de fixation pourrait venir en contact avec un câblage dissimulé En cas de contact avec un conducteur sous tension les pièces métalliques à découvert de l outil pourraient devenir sous tension et risqueraient de transmettre une décharge électrique à l utilisateur 5 Adoptez toujours une position de travail vous assurant d un bon équilibre ...

Страница 14: ...hargée La surcharge réduit la durée de service de la batterie 3 Rechargez la batterie à une température ambiante comprise entre 10 ゚ C et 40 ゚ C 50 ゚ F 104 ゚ F Si la batterie est chaude laissez la refroidir avant de la recharger 4 Rechargez la batterie tous les six mois si l appareil n est pas utilisé pendant de longues périodes DESCRIPTION DU FONCTIONNEMENT ATTENTION Assurez vous toujours que l o...

Страница 15: ...rgez la batterie Affiche la capacité restante de la batterie 1 014696 Lorsque la gâchette est actionnée l affichage DEL affiche la capacité restante de la batterie comme représenté dans le tableau suivant État du voyant DEL Puissance restante de la batterie Environ 50 ou plus De 20 à 50 environ Environ 20 013980 NOTE L affichage DEL s éteint environ une minute après avoir relâché la gâchette pour ...

Страница 16: ...ue le levier inverseur se trouve en position neutre Changement de vitesse ATTENTION Engagez toujours entièrement le levier de changement de vitesse dans la position correcte Si vous utilisez l outil alors que le levier de changement de vitesse se trouve à mi chemin entre le côté 1 et le côté 2 l outil risque d être endommagé Ne modifiez pas la position du levier de changement de vitesse pendant qu...

Страница 17: ... retirée avant d effectuer tout travail dessus Installation de la poignée latérale poignée auxiliaire 1 2 3 4 5 014697 Utilisez toujours la poignée latérale pour assurer votre sécurité Insérez la poignée latérale de façon à ce que la rainure sur le bras s engage dans une des rainures sur l outil Serrez ensuite la poignée en la tournant dans le sens des aiguilles d une montre Vous pouvez installer ...

Страница 18: ...ez pas davantage de pression lorsque le trou est bouché par les copeaux et particules Faites plutôt tourner l outil au ralenti puis retirez partiellement le foret du trou En répétant cette opération quelques fois le trou se débouchera et vous pourrez poursuivre le perçage normalement Poire soufflante accessoire en option 1 002449 Une fois le trou percé utilisez la poire soufflante pour retirer la ...

Страница 19: ...IEN ATTENTION Assurez vous toujours que l outil est hors tension et que la batterie est retirée avant d y effectuer tout travail d inspection ou d entretien N utilisez jamais d essence de benzine de solvant d alcool ou d autres produits similaires Une décoloration une déformation ou la formation de fissures peuvent en découler Pour maintenir la SÉCURITÉ et la FIABILITÉ du produit les réparations t...

Страница 20: ...IT CET AVIS DE NON RESPONSABILITÉ S APPLIQUE À LA FOIS PENDANT ET APRÈS LA PÉRIODE COUVERTE PAR CETTE GARANTIE MAKITA DÉCLINE TOUTE RESPONSABILITÉ QUANT À TOUTE GARANTIE TACITE INCLUANT LES GARANTIES TACITES DE QUALITÉ MARCHANDE ET ADÉQUATION À UN USAGE PARTICULIER APRÈS LA PÉRIODE D UN AN COUVERTE PAR CETTE GARANTIE Cette garantie vous donne des droits spécifiques reconnus par la loi et possiblem...

Страница 21: ...ca Seguridad en el área de trabajo 1 Mantenga el área de trabajo limpia y bien iluminada Las áreas oscuras o desordenadas son propensas a accidentes 2 No utilice las herramientas eléctricas en atmósferas explosivas tal como en la presencia de líquidos gases o polvo inflamables Las herramientas eléctricas crean chispas que pueden prender fuego al polvo o los humos 3 Mantenga a los niños y curiosos ...

Страница 22: ...izarlos debidamente La utilización de estos dispositivos reduce los riesgos relacionados con el polvo Mantenimiento y uso de la herramienta eléctrica 17 No fuerce la herramienta eléctrica Utilice la herramienta eléctrica correcta para su aplicación La herramienta eléctrica adecuada hará un trabajo mejor a la velocidad para la que ha sido fabricada 18 No utilice la herramienta eléctrica si el inter...

Страница 23: ...rficies de agarre aisladas al realizar una operación en la que el porta útil pueda entrar en contacto con cables ocultos Si el porta útil entra en contacto con un cable con corriente las piezas metálicas expuestas de la herramienta eléctrica se cargarán también de corriente y el operario puede recibir una descarga 5 Asegúrese siempre de que pisa sobre suelo firme Asegúrese de que no haya nadie deb...

Страница 24: ...ía 3 Cargue el cartucho de batería a temperatura ambiente de 10 ゚ C 40 ゚ C 50 ゚ F 104 ゚ F Si un cartucho de batería está caliente déjelo enfriar antes de cargarlo 4 Recargue el cartucho de la batería una vez cada seis meses si no se va a usar por un periodo extenso DESCRIPCIÓN DEL FUNCIONAMIENTO PRECAUCIÓN Asegúrese siempre de que la herramienta esté apagada y el cartucho de batería extraído antes...

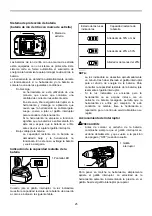
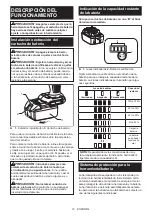
Страница 25: ...arla Indicación de la capacidad restante de la batería 1 014696 Cuando jale el gatillo interruptor la luz indicadora muestra la capacidad restante de la batería de acuerdo a como se indica en la siguiente tabla Estado de las luces indicadoras Capacidad restante de la batería Alrededor de 50 o más Alrededor de 20 a 50 Alrededor de menos del 20 013980 NOTA La luz indicadora se desactiva aproximadame...

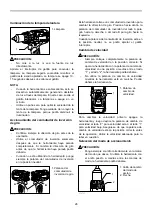
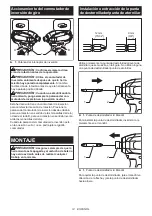
Страница 26: ...ar la dirección de giro Presione hacia dentro la palanca del conmutador de inversión del lado A para giro hacia la derecha o del lado B para giro hacia la izquierda Cuando la palanca del conmutador de inversión esté en la posición neutral no se podrá apretar el gatillo interruptor Cambio de velocidad PRECAUCIÓN Siempre coloque completamente la palanca de cambio de velocidad en la posición correcta...

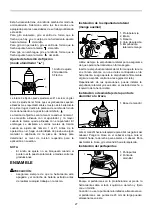
Страница 27: ...oqueará cuando el puntero esté puesto solamente a medias entre las graduaciones ENSAMBLE PRECAUCIÓN Asegúrese siempre de que la herramienta esté apagada y el cartucho de batería extraído antes de realizar cualquier trabajo en la misma Instalación de la empuñadura lateral mango auxiliar 1 2 3 4 5 014697 Utilice siempre la empuñadura lateral para asegurarse de que opera la herramienta en forma segur...

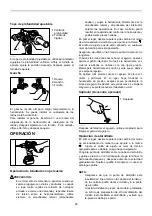
Страница 28: ...de punta de carburo de tungsteno Posicione la broca donde desee hacer el agujero después apriete el gatillo interruptor No fuerce la herramienta Los mejores resultados se obtienen con una ligera presión Mantenga la herramienta en posición y evite que se deslice y se salga del agujero No aplique más presión cuando el agujero se atore con virutas y partículas En su lugar haga funcionar la herramient...

Страница 29: ...a pieza de trabajo Taladrado en metal Para evitar que la broca resbale al empezar a hacer el agujero haga una mella con punzón y un martillo en el punto a taladrar Coloque la punta de la broca en la mella y comience a taladrar Emplee un lubricante para operaciones de corte cuando taladre metales Las excepciones son hierro y latón que deberán ser taladrados en seco MANTENIMIENTO PRECAUCIÓN Asegúres...

Страница 30: ...VENTA O USO DEL PRODUCTO ESTA RENUNCIA SERÁ APLICABLE TANTO DURANTE COMO DESPUÉS DEL TÉRMINO DE ESTA GARANTÍA MAKITA RENUNCIA LA RESPONSABILIDAD POR CUALQUIER GARANTÍA IMPLÍCITA INCLUYENDO GARANTÍAS IMPLÍCITAS DE COMERCIALIDAD E IDONEIDAD PARA UN FIN ESPECÍFICO DESPUÉS DEL TÉRMINO DE UN AÑO DE ESTA GARANTÍA Esta garantía le concede a usted derechos legales específicos y usted podrá tener también o...

Страница 31: ...31 ...

Страница 32: ...polvos creados por el lijado aserrado esmerilado taladrado y otras actividades de la construcción contienen sustancias químicas reconocidas por el Estado de California como causantes de cáncer defectos de nacimiento y otros peligros de reproducción Algunos ejemplos de estos productos químicos son plomo de pinturas a base de plomo sílice cristalino de ladrillos y cemento y otros productos de albañi...

Страница 33: ...INSTRUCTION MANUAL MANUAL DE INSTRUCCIONES Cordless Impact Driver Atornillador de Impacto Inalámbrico XDT13 IMPORTANT Read Before Using IMPORTANTE Lea antes de usar ...

Страница 34: ...ill reduce risk of electric shock 2 Avoid body contact with earthed or grounded surfaces such as pipes radiators ranges and refrigerators There is an increased risk of elec tric shock if your body is earthed or grounded 3 Do not expose power tools to rain or wet con ditions Water entering a power tool will increase the risk of electric shock 4 Do not abuse the cord Never use the cord for carrying ...

Страница 35: ...r A charger that is suitable for one type of battery pack may create a risk of fire when used with another battery pack 2 Use power tools only with specifically desig nated battery packs Use of any other battery packs may create a risk of injury and fire 3 When battery pack is not in use keep it away from other metal objects like paper clips coins keys nails screws or other small metal objects tha...

Страница 36: ...rsonal injury and damage It will also void the Makita warranty for the Makita tool and charger Tips for maintaining maximum battery life 1 Charge the battery cartridge before completely discharged Always stop tool operation and charge the battery cartridge when you notice less tool power 2 Never recharge a fully charged battery car tridge Overcharging shortens the battery service life 3 Charge the...

Страница 37: ... high current the tool automat ically stops without any indication In this situation turn the tool off and stop the application that caused the tool to become overloaded Then turn the tool on to restart Overheat protection When the tool battery is overheated the tool stops automatically In this situation let the battery cool before turning the tool on again Overdischarge protection When the batter...

Страница 38: ...ol CAUTION When not operating the tool always set the reversing switch lever to the neu tral position This tool has a reversing switch to change the direction of rotation Depress the reversing switch lever from the A side for clockwise rotation or from the B side for coun terclockwise rotation When the reversing switch lever is in the neutral posi tion the switch trigger cannot be pulled ASSEMBLY ...

Страница 39: ...w and then take it out OPERATION The proper fastening torque may differ depending upon the kind or size of the screw bolt the material of the workpiece to be fastened etc The relation between fas tening torque and fastening time is shown in the figures Proper fastening torque for standard bolt 140 103 120 89 100 74 80 59 60 44 40 30 20 15 0 M16 5 8 M10 3 8 M8 5 16 M14 9 16 M12 1 2 2 1 2 0 1 0 M16 ...

Страница 40: ...ta replacement parts OPTIONAL ACCESSORIES CAUTION These accessories or attachments are recommended for use with your Makita tool specified in this manual The use of any other accessories or attachments might present a risk of injury to persons Only use accessory or attachment for its stated purpose If you need any assistance for more details regarding these accessories ask your local Makita Servic...

Страница 41: ...ientas eléctricas crean chispas que pueden prender fuego al polvo o los humos 3 Mantenga a los niños y curiosos alejados mientras utiliza una herramienta eléctrica Las distracciones le pueden hacer perder el control Seguridad eléctrica 1 Las clavijas de conexión de las herramientas eléctricas deberán encajar perfectamente en la toma de corriente No modifique nunca la cla vija de conexión de ningun...

Страница 42: ...léctrica que no use fuera del alcance de los niños y no permita que las personas que no están familiarizadas con ella o con las instrucciones la operen Las herramientas eléctricas son peligrosas en manos de personas que no saben operarlas 5 Realice el mantenimiento a las herramientas eléctricas Compruebe que no haya partes móvi les desalineadas o estancadas piezas rotas y cualquier otra condición ...

Страница 43: ...ar un flujo grande de corriente sobrecalenta miento posibles quemaduras e incluso una descompostura 6 No guarde la herramienta ni el cartucho de batería en lugares donde la temperatura pueda alcanzar o exceder los 50 C 122 F 7 Nunca incinere el cartucho de batería incluso en el caso de que esté dañado seriamente o ya no sirva en absoluto El cartucho de batería puede explotar si se tira al fuego 8 ...

Страница 44: ...com pletamente el cartucho de batería hasta que el indicador rojo no pueda verse Si no podría accidentalmente salirse de la herramienta y caer al suelo causando una lesión a usted o alguien a su alrededor PRECAUCIÓN No instale el cartucho de batería a la fuerza Si el cartucho no se desliza al interior fácilmente se debe a que no está siendo insertado correctamente Indicación de la capacidad restan...

Страница 45: ...PRECAUCIÓN Antes de insertar el cartucho de batería en la herramienta compruebe siem pre y cerciórese de que el gatillo interruptor se acciona debidamente y que vuelve a la posición OFF apagado cuando lo suelta Para poner en marcha la herramienta simplemente apriete el gatillo interruptor La velocidad de la herra mienta aumenta incrementando la presión en el gatillo Para detenerla suelte el gatill...

Страница 46: ...l reloj o desde el lado B para una rotación en sentido inverso al de las manecillas del reloj Cuando la palanca del conmutador de inversión esté en la posición neutral no se podrá jalar el gatillo conmutador MONTAJE PRECAUCIÓN Asegúrese siempre de que la herramienta esté apagada y el cartucho de batería haya sido extraído antes de realizar cualquier trabajo en la misma Instalación o extracción de ...

Страница 47: ...ara quitarlo afloje el tornillo y después sáquelo OPERACIÓN La torsión de apriete adecuada podrá variar depen diendo del tipo o tamaño del tornillo perno el material de la pieza de trabajo a apretar etc La relación entre la torsión de apriete y el tiempo de apriete se muestra en las figuras Torsión de apriete apropiada para un tornillo estándar 140 N m 103 ft lbs 120 N m 89 ft lbs 100 N m 74 ft lb...

Страница 48: ... PRECAUCIÓN Asegúrese siempre de que la herramienta esté apagada y el cartucho de batería extraído antes de intentar realizar una inspección o mantenimiento AVISO Nunca use gasolina bencina diluyente tíner alcohol o sustancias similares Puede que esto ocasione grietas o descoloramiento Para mantener la SEGURIDAD y FIABILIDAD del pro ducto las reparaciones y cualquier otra tarea de man tenimiento o...

Страница 49: ...N PARA UN PROPÓSITO ESPECÍFICO DESPUÉS DEL PLAZO DE UN AÑO DE ESTA GARANTÍA Esta garantía le concede derechos legales específicos y usted podrá tener también otros derechos que varían de un estado a otro Algunos estados no permiten la exclusión o limitación de daños incidentales o con secuentes por lo que la limitación o exclusión arriba mencionada podría no aplicar para usted Algunos estados no p...

Страница 50: ...18 ...

Страница 51: ...19 ...

Страница 52: ...ados por el lijado aserrado esmerilado taladrado y otras actividades de la construcción contienen sustancias químicas reconocidas por el Estado de California como causantes de cáncer defectos de nacimiento y otros peligros de reproducción Algunos ejemplos de estos productos químicos son plomo de pinturas a base de plomo sílice cristalino de ladrillos y cemento y otros productos de albañilería y ar...

Отзывы: