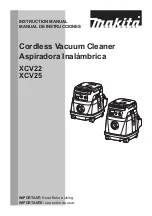
background image

INSTRUCTION MANUAL

MANUAL DE INSTRUCCIONES

Cordless Vacuum Cleaner

Aspiradora Inalámbrica

XCV22 

XCV25

IMPORTANT:

 Read Before Using.

IMPORTANTE:

 Lea antes de usar.

Содержание XCV22

Страница 1: ...INSTRUCTION MANUAL MANUAL DE INSTRUCCIONES Cordless Vacuum Cleaner Aspiradora Inalámbrica XCV22 XCV25 IMPORTANT Read Before Using IMPORTANTE Lea antes de usar ...

Страница 2: ...B BL1840B BL1850B BL1860B Charger DC18RC DC18RD DC18RE DC18SD DC18SE DC18SF DC18SH Some of the battery cartridges and chargers listed above may not be available depending on your region of residence WARNING Only use the battery cartridges and chargers listed above Use of any other battery cartridges and chargers may cause injury and or fire SAFETY WARNINGS IMPORTANT SAFETY INSTRUCTIONS When using ...

Страница 3: ...od splinter metal stone nail razor push pin etc Solidifying and conductive fine powder metal or carbon powder Dehumidifier Large amount of powder flour fire extinguisher powder etc Substances that cause toxic symptoms Aggressive chemicals acid leach etc Liquid or damp garbage includ ing vomit and excreta Asbestos Pesticides Such action may cause fire injury and or property damage To reduce your ex...

Страница 4: ...e the battery and increase the risk of fire 10 Have servicing performed by a qualified repair person using only identical replacement parts This will ensure that the safety of the product is maintained 11 Do not modify or attempt to repair the appliance or the battery pack except as indicated in the instruc tions for use and care SAVE THESE INSTRUCTIONS This appliance is intended for commer cial u...

Страница 5: ...charged battery car tridge Overcharging shortens the battery service life 3 Charge the battery cartridge with room tem perature at 10 C 40 C 50 F 104 F Let a hot battery cartridge cool down before charging it 4 Charge the battery cartridge if you do not use it for a long period more than six months Important safety instructions for wireless unit 1 Do not disassemble or tamper with the wire less un...

Страница 6: ...mes off from the tool 29 Replace the lid of the slot if it is lost or damaged SAVE THESE INSTRUCTIONS PARTS DESCRIPTION 1 2 3 4 5 1 Tank cover 2 Powder filter HEPA 3 Damper 4 Prefilter 5 Tank FUNCTIONAL DESCRIPTION CAUTION Always be sure that the tool is switched off and the battery cartridge is removed before adjusting or checking function on the tool Installing or removing battery cartridge CAUT...

Страница 7: ... the check button on the battery cartridge to indi cate the remaining battery capacity The indicator lamps light up for a few seconds Indicator lamps Remaining capacity Lighted Off Blinking 75 to 100 50 to 75 25 to 50 0 to 25 Charge the battery The battery may have malfunctioned NOTE Depending on the conditions of use and the ambient temperature the indication may differ slightly from the actual c...

Страница 8: ... force adjusting knob To start the cleaner 1 Set the stand by switch to the I side The cleaner gets into stand by state 2 Press the power button To make the cleaner get into stand by mode press the power button again To turn off the cleaner set the stand by switch to the O side The suction power can be adjusted according to your work need Suction power can be increased by turning the suc tion forc...

Страница 9: ...e sure that prefilter and damper are used together It is not allowed to install powder filter alone Installing the paper pack Optional accessory WARNING When using the paper pack also use the prefilter together that is preinstalled on the tool Failure to use the prefilter together may cause unusual noise and heat resulting in a fire CAUTION Before using the paper pack make sure that powder filter ...

Страница 10: ...he hook to break Unhook and lift up the tank cover Shake off the dust from the prefilter and then take the polyethylene bag out of the tank NOTE Take the polyethylene bag carefully out of the tank so that the polyethylene bag cannot be caught and torn by the protrusion inside the tank when emp tying it NOTE Empty the polyethylene bag before it becomes full Too much dust in the tank may cause the p...

Страница 11: ... using the suction inlet with lock function 1 2 3 1 Attachment with lock function 2 Suction inlet with lock function 3 Suction inlet without lock function Adjusting the length of the slide type extension wand Optional accessory With pressing the slide button adjust the wand length The length is locked when releasing the slide button 1 1 Slide button WIRELESS ACTIVATION FUNCTION What you can do wit...

Страница 12: ...be cancelled automatically NOTE The position of the wireless activation button varies depending on the tool NOTE The cleaner also starts by pressing the power button when the stand by switch is set to AUTO However the power button will not actuate when the wireless activation function is used Installing the wireless unit CAUTION Place the cleaner on a flat and stable surface when installing the wi...

Страница 13: ...l the wireless activation lamp blinks in green And then press the wireless activation button on the tool in the same way 2 1 2 1 1 Wireless activation button 2 Wireless activation lamp If the cleaner and the tool are linked successfully the wireless activation lamps will light up in green for 2 seconds and start blinking in blue NOTE The wireless activation lamps finish blinking in green after 20 ...

Страница 14: ... blue when there is no operation for 2 hours In this case set the stand by switch on the cleaner to AUTO and press the wireless activation button on the tool again NOTE The cleaner starts stops with a delay There is a time lag when the cleaner detects a switch opera tion of the tool NOTE The transmission distance of the wireless unit may vary depending on the location and surrounding circumstances...

Страница 15: ...ons You can erase all tool registrations from the cleaner as follows 3 2 1 1 Stand by switch 2 Wireless activation button 3 Wireless activation lamp 1 Install the wireless unit to the cleaner 2 Install the batteries to the cleaner 3 Set the stand by switch to AUTO 4 Hold down the wireless activation button for about 6 seconds until the wireless activation lamp blinks in red about twice per one sec...

Страница 16: ...eration is performed for 2 hours When the tool is running The wireless activation of the cleaner is available and the tool is running Tool registration Green 20 seconds Ready for the tool registration Searching the tool to be registered 2 seconds The tool registration has been finished The wireless activation lamp will start blinking in blue Cancelling erasing tool registration Red slow 2 times se...

Страница 17: ... distance is approxi mately 10 m however it may vary according to the circumstances Before finishing the tool registration cancellation the switch trigger on the tool is pulled or the power button on the cleaner is turned on Push the wireless activation button briefly and perform the tool registration cancellation procedures again The tool registration procedures for the tool or the cleaner has no...

Страница 18: ...ore than 6 seconds again until the wireless activation button rapidly blinks in red and then release the button MAINTENANCE CAUTION Always be sure that the tool is switched off and the battery cartridge is removed before attempt ing to perform inspection or maintenance NOTICE Never use gasoline benzine thinner alcohol or the like Discoloration deformation or cracks may result To maintain product S...

Страница 19: ...purpose If you need any assistance for more details regard ing these accessories ask your local Makita Service Center Hose Front cuff 22 24 38 Straight pipe Extension wand Corner nozzle Round brush Powder filter HEPA for dry dust Damper Prefilter Nozzle assembly Bent pipe Polyethylene bag Paper pack Holder set Makita genuine battery and charger NOTE Some items in the list may be included in the to...

Страница 20: ...C DC18RD DC18RE DC18SD DC18SE DC18SF DC18SH Algunos de los cartuchos de batería y cargadores enumerados arriba podrían no estar disponibles depen diendo de su área de residencia ADVERTENCIA Use únicamente los cartuchos de batería y los cargadores indicados arriba El uso de cualquier otro cartucho de batería y cargador podría ocasionar una lesión y o un incendio ADVERTENCIAS DE SEGURIDAD INSTRUCCIO...

Страница 21: ...cendios Sustancias explosivas o pirofó ricas nitroglicerina aluminio magnesio titanio zinc fósforo rojo fósforo amarillo celuloide etc y su polvo gases o vapores Objetos afilados cristal cubier tos astillas de madera meta les piedras clavos cuchillas tachuelas etc Polvo fino conductor y solidificante polvo metálico o de carbono Deshumidificador Grandes cantidades de polvo harina polvo de extintor ...

Страница 22: ...dios 6 En condiciones abusivas podrá escapar líquido de la batería evite tocarlo Si lo toca accidentalmente enjuague con agua Si hay contacto del líquido con los ojos busque asistencia médica Puede que el líquido expulsado de la batería cause irritación o quemaduras 7 No utilice un paquete de baterías o aparato que esté dañado o haya sido modificado Las baterías daña das o modificadas podrían com ...

Страница 23: ...n tomar en cuenta los requisitos especiales relativos al empaque y el etiquetado Para efectuar los preparativos del artí culo que se va a enviar se requiere con sultar a un experto en materiales peligro sos Si es posible consulte además otras regulaciones nacionales más detalladas Pegue o cubra con cinta adhesiva los contactos abiertos y empaque la batería de manera que ésta no pueda moverse dentr...

Страница 24: ...lámbrica demasiado fuerte ni lo haga con ningún objeto que tenga un borde filoso 16 Cierre siempre la tapa de la ranura durante la operación 17 No retire la unidad inalámbrica de la ranura mientras se esté suministrando energía a la herramienta El hacerlo podría causar una avería de la unidad inalámbrica 18 No retire la etiqueta en la unidad inalámbrica 19 No coloque ninguna etiqueta en la unidad ...

Страница 25: ...e quede asegurado en su lugar haciendo un pequeño clic Luego cierre con el seguro la cubierta de la batería 1 1 Cartucho de batería Para quitar el cartucho de batería sáquelo de la herra mienta mientras desliza el botón enfrente del cartucho PRECAUCIÓN Siempre introduzca comple tamente el cartucho de batería hasta que el indi cador rojo no pueda verse De lo contrario podría salirse accidentalmente...

Страница 26: ...rramienta se está utilizando de manera que causa que consuma una cantidad de corriente inusualmente alta la herramienta se detiene auto máticamente sin que haya indicación alguna En este caso apague la herramienta y detenga la aplicación que causó que la herramienta se sobrecargara Luego encienda la herramienta para reiniciarla Protección contra sobrecalentamiento Encendido Parpadeando Cuando la h...

Страница 27: ...spi radora con la rueda en la posición bloqueada podría causar daños a la rueda Mango de transporte Cuando transporte la aspiradora sosténgala del mango ubicado en la cabeza El mango en la cabeza es retrác til para guardarse cuando no se utilice MONTAJE PRECAUCIÓN Asegúrese siempre de que la herramienta esté apagada y el cartucho de batería haya sido extraído antes de realizar cualquier trabajo en...

Страница 28: ...n el extremo más allá de la protuberancia del tope 1 2 1 Bolsa de papel para polvo 2 Sujetador Instalación de la bolsa de polietileno La aspiradora también se puede utilizar sin la bolsa de polietileno Sin embargo con el uso de la bolsa de polietileno resulta más fácil vaciar el tanque sin ensu ciarse las manos Extienda la bolsa de polietileno en el tanque Insértela entre la placa del sujetador y ...

Страница 29: ...el interior del tanque al vaciarla NOTA Vacíe la bolsa de polietileno antes de que se llene Demasiado polvo en el tanque podría causar que la bolsa de polietileno se rompa Instalación de la caja de herramientas 1 Libere el seguro de la cubierta de la batería y ábrala 2 Coloque los rieles en la caja de herramientas a lo largo de las ranuras en la carcasa 3 Cierre la cubierta de la batería y ponga e...

Страница 30: ...3 1 Aditamento con la función de bloqueo 2 Entrada de succión con la función de bloqueo 3 Entrada de succión sin la función de bloqueo Ajuste de la longitud del tubo de extensión de tipo corredera Accesorio opcional Ajuste la longitud del tubo mientras presiona el botón deslizable La longitud se bloquea cuando se suelta el botón deslizable 1 1 Botón deslizable FUNCIÓN DE ACTIVACIÓN INALÁMBRICA Lo ...

Страница 31: ...ación inalám brica varía en función de la herramienta NOTA La aspiradora también puede ponerse en marcha oprimiendo el botón de encendido apagado cuando el interruptor de modo en espera está ajus tado en AUTO Sin embargo el botón de encendido apagado no se activará cuando la función de activación inalámbrica se esté utilizando Instalación de la unidad inalámbrica PRECAUCIÓN Coloque la aspiradora s...

Страница 32: ...ndido apagado en la aspiradora NOTA Consulte también el manual de instrucciones de la herramienta Si desea activar la aspiradora junto con el interruptor de activación de la herramienta termine antes con el registro de la herramienta 1 Instale las unidades inalámbricas en la aspiradora y en la herramienta respectivamente 2 Instale las baterías en la aspiradora y en la herramienta 3 Ajuste el inter...

Страница 33: ...UTO 1 1 Interruptor de modo en espera 5 Oprima el botón de activación inalámbrica en la herramienta durante un lapso breve La luz indicadora de activación inalámbrica parpadeará en azul 2 1 1 Botón de activación inalámbrica 2 Luz indica dora de activación inalámbrica 6 Jale el gatillo interruptor de la herramienta Verifique que la aspiradora funcione mientras jala el gatillo interruptor en la herr...

Страница 34: ...ón inalámbrica no parpadea en rojo oprima el botón de activación inalámbrica durante un lapso breve y vuelva a mantenerlo oprimido Borrado de todos los registros de herramientas Usted puede borrar todos los registros de herramientas de la aspiradora como se indica a continuación 3 2 1 1 Interruptor de modo en espera 2 Botón de acti vación inalámbrica 3 Luz indicadora de activación inalámbrica 1 In...

Страница 35: ...ealiza ninguna operación durante 2 horas Cuando la herra mienta está funcionando La activación inalámbrica de la aspiradora está disponible y la herramienta está funcionando Registro de la herramienta Verde 20 segundos Ya se puede realizar el registro de la herramienta Se está bus cando la herramienta que se va a registrar 2 segundos El registro de la herramienta ha terminado La luz indicadora de ...

Страница 36: ...instalada incorrectamente en la aspiradora y o la herramienta Instale la unidad inalámbrica correctamente La terminal de la unidad inalámbrica y o la ranura está sucia Retire con cuidado el polvo y la suciedad en la terminal de la unidad inalámbrica y limpie la ranura de la aspiradora y o de la herramienta El interruptor de modo en espera en la aspiradora no está ajustado en AUTO Ajuste el interru...

Страница 37: ...tenga la herramienta y la aspiradora lejos de aparatos tales como dispositivos Wi Fi y hornos de microondas La aspiradora funciona aun cuando el gatillo interruptor de la herra mienta no ha sido jalado Otros usuarios están usando la activa ción inalámbrica de la aspiradora con sus herramientas Apague el botón de activación inalámbrica de las demás herramientas o cancele el registro de dichas herra...

Страница 38: ...iempo Se recomienda contar con piezas de repuesto ACCESORIOS OPCIONALES PRECAUCIÓN Estos accesorios o aditamen tos están recomendados para utilizarse con su herramienta Makita especificada en este manual El empleo de cualquier otro accesorio o aditamento puede conllevar el riesgo de lesiones personales Utilice los accesorios o aditamentos solamente para su fin establecido Si necesita cualquier ayu...

Страница 39: ...s términos más vigentes de la garantía aplicable a este producto En caso de no disponer de esta hoja de garantía anexa consulte los detalles sobre la garantía descritos en el sitio web de su país respectivo indicado a continuación Estados Unidos de América www makitatools com Canadá www makita ca Otros países www makita com ...

Страница 40: ...ados por el lijado aserrado esmerilado taladrado y otras actividades de la construcción contienen sustancias químicas reconocidas por el Estado de California como causantes de cáncer defectos de nacimiento y otros peligros de reproducción Algunos ejemplos de estos productos químicos son plomo de pinturas a base de plomo sílice cristalino de ladrillos y cemento y otros productos de albañilería y ar...

Отзывы: