10 ENGLISH
●
Never pull and/or drag the cord of the adapter. If
not, the radio may accidentally fall down, causing
injury to you or someone around you.
IMPORTANT:
●
The mains adapter is used as the means of
connecting the radio to the mains supply. The mains
socket used for the radio must remain accessible
during normal use.
●
In order to disconnect the radio, the mains adapter
should be removed from the mains outlet completely.
●
Use the AC power adapter supplied with the product
or specified by Makita only.
●
Do not hold the power supply cable and plug by your
mouth. Doing so might cause an electric shock.
●
Do not touch the power plug with wet or greasy
hands.
●
Damaged or entangled cords increase the risk
of electric shock. If the cord is damaged, have it
replaced by our authorized service center in order to
avoid a safety hazard. Do not use it before repair.
●
After use, always store AC power adapter out of the
reach of children. If Children play with the cord, they
may suffer injury.
Charging with USB power supply port
There is the USB port at the front side of the radio. You
can charge USB device trough the USB port.
1. Press the Power button to switch on your radio.
2. Connect the USB device, such as a mobile phone,
with USB cable available in the market.
3. No matter if the radio is AC powered or battery
powered, the radio can charge the USB device when
the radio is switched on and in DAB/FM radio mode,
or BT mode, or AUX mode, which is appeared when
an external audio source is connected.
NOTE:
●
The maximum volume of the output power speaker
will decrease when your USB is charging.
●
The USB socket can provide max 5V/2.4A of
electrical current.
IMPORTANT:
●
Before connecting USB device to the charger, always
backup your data of USB device. Otherwise your data
may lose by any possibility.
●
The charger may not supply power to some USB
devices.
●
When not using or after charging, remove the USB
cable and close the cover.
●
Do not connect power source to USB port. Otherwise
there is risk of fire. The USB port is only intended
for charging lower voltage device. Always place the
cover onto the USB port when not charging the lower
voltage device.
●
Do not insert a nail, wire, etc. into USB power supply
port. Otherwise a circuit short may cause smoke and
fire.
●
Do not connect this USB socket with your PC
USB port, as it is highly possible that it may cause
breakdown of the units.
LISTENING TO THE RADIO
This radio has three tuning methods- Scan tuning,
Manual tuning and Memory presets recall.
Selecting a station – DAB
Note:
The DAB antenna is built into the handle. When
operating the radio, please straighten the handle
properly above the radio to get better reception.
1. Press the Power button to switch on your radio.
2. Select the DAB mode by pressing the Band button.
3. Press the Tuning Control knob to enter the list of the
stations. Or you can also press the Advanced setting
button and then rotate the Tuning Control knob to
select “Station List”. Press the Tuning Control knob to
enter the list of the stations.
4. Rotate the Tuning Control knob to scroll through the
list of available stations. Press the Tuning Control
knob to select the station.
5. Adjust the desired volume by rotating the Volume
knob.
Display modes – DAB
Your radio has a range of display options in the DAB
mode.
Press the Info button to cycle through the different
options.
a. Dynamic Label
Segment
Supplementary data services in text
form (up to 128 characters) running
alongside the DAB or DAB+ radio
programme. Displays scrolling
text messages such as artist/track
name, phone in number, etc.
b. Program type
Displays the type of station being
listened to such as Pop, Classic,
News etc.
c. Multiplex name Displays the name of the DAB
multiplex to which the current
station belongs.
d. Frequency and
channel
Displays the frequency and channel
number for the currently tuned DAB
station.
Содержание MR007G
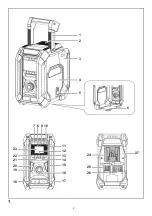
Страница 2: ...2 1 1 2 5 4 3 7 8 9 10 11 27 13 24 25 26 14 12 16 15 17 18 20 21 19 22 23 6 ...
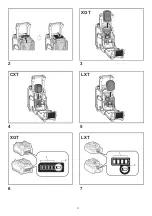
Страница 3: ...3 1 2 1 2 2 4 6 7 3 5 XGT LXT LXT CXT XGT ...
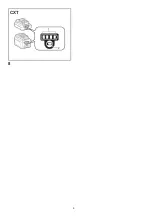
Страница 4: ...4 1 2 8 CXT ...

