

R
epair
P 6 / 8
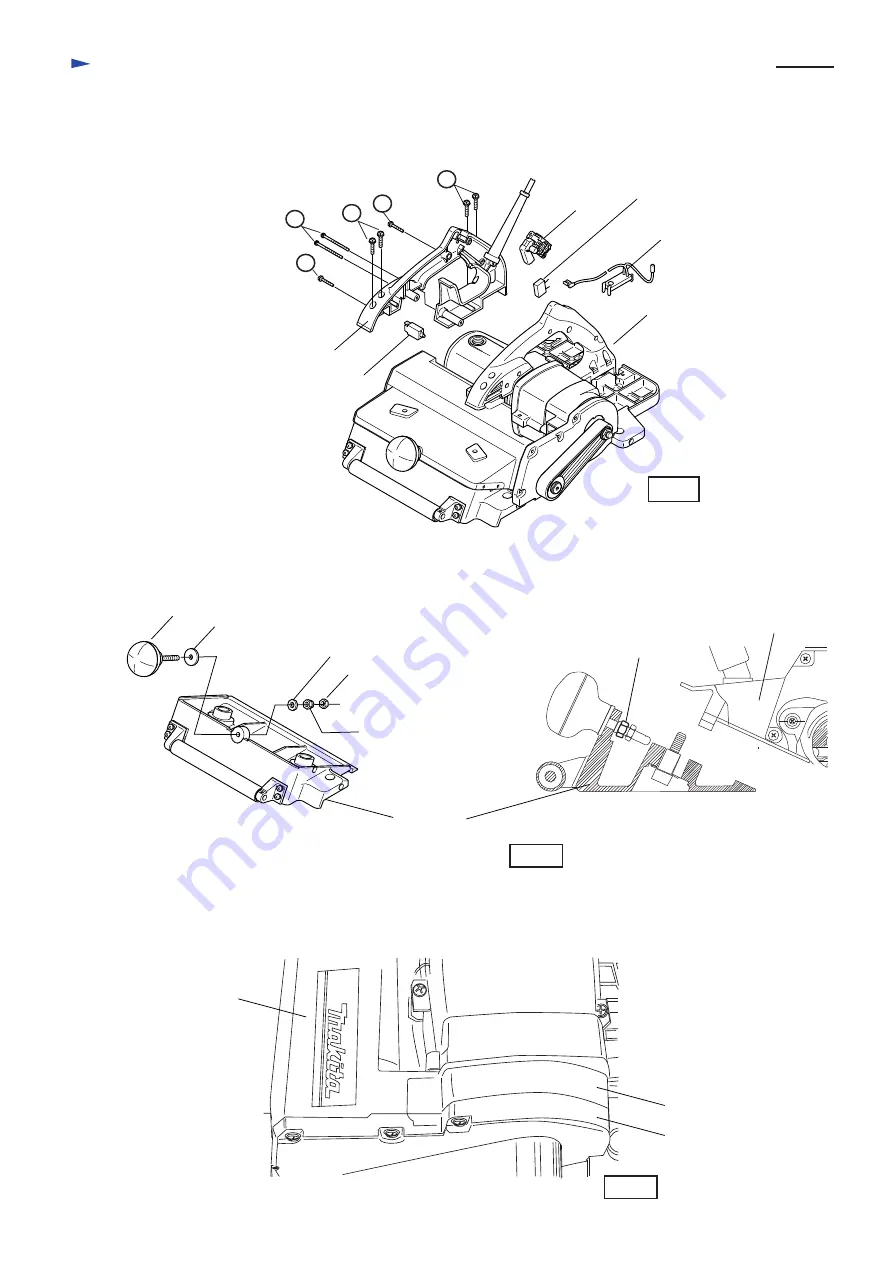
< 8 > Replacement of the electrical parts in handle
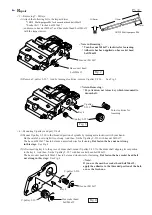
< 9 > Mounting and adjustment of knob
Before mounting knob to front base, adjust it with hex lock nut M8-13, so that the knob can be turned smoothly, but
without wobbling. See Fig. 14.
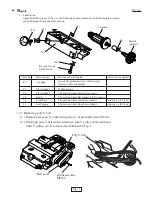
( 1 ) Remove the following screws.
1. Pan head screw M5x28 : 4 pcs.
2. Pan head screw M4x28 : 2 pcs.
3. Pan head screw M4x60 : 2 pcs.
See Fig. 13.
( 2 ) Removed handle R. The electrical parts can be replaced.
See Fig.13.
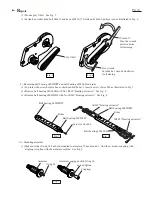
< 10 > Mounting bracket cove and main bracket
Main bracket has to be closely mounted to bracket cover. And both of them has to be mounted to main base firmly
and closely. See Fig. 15.
< 11 >
< 12 >
< 13 >
< 14 >
< 15 >
< 16 >
< 17 >
< 18 >
< 19 >
< 20 >
< 21 >
< 22 >
< 23 >
< 24 >
< 25 >
< 26 >
Fig. 13
Fig. 14
Fig. 15
Fig. 16
Fig. 17
Fig. 18
Fig. 19
Fig. 20
Fig. 21
Fig. 22
Fig. 23
Fig. 24
Fig. 25
Fig. 26
Handle R
Handle L
Switch
Soft start circuit
1
1
2
2
3
Over current relay
Noise suppressor
Knob
Flat washer 8 (large)
Flat washer 8 (small)
Hex nut M8
Hex lock nut M8-13
Hex lock
nut M8-13
Front base
Main base
Bracket cover
Main bracket
Main base


