background image

P 2/ 14 

R

epair

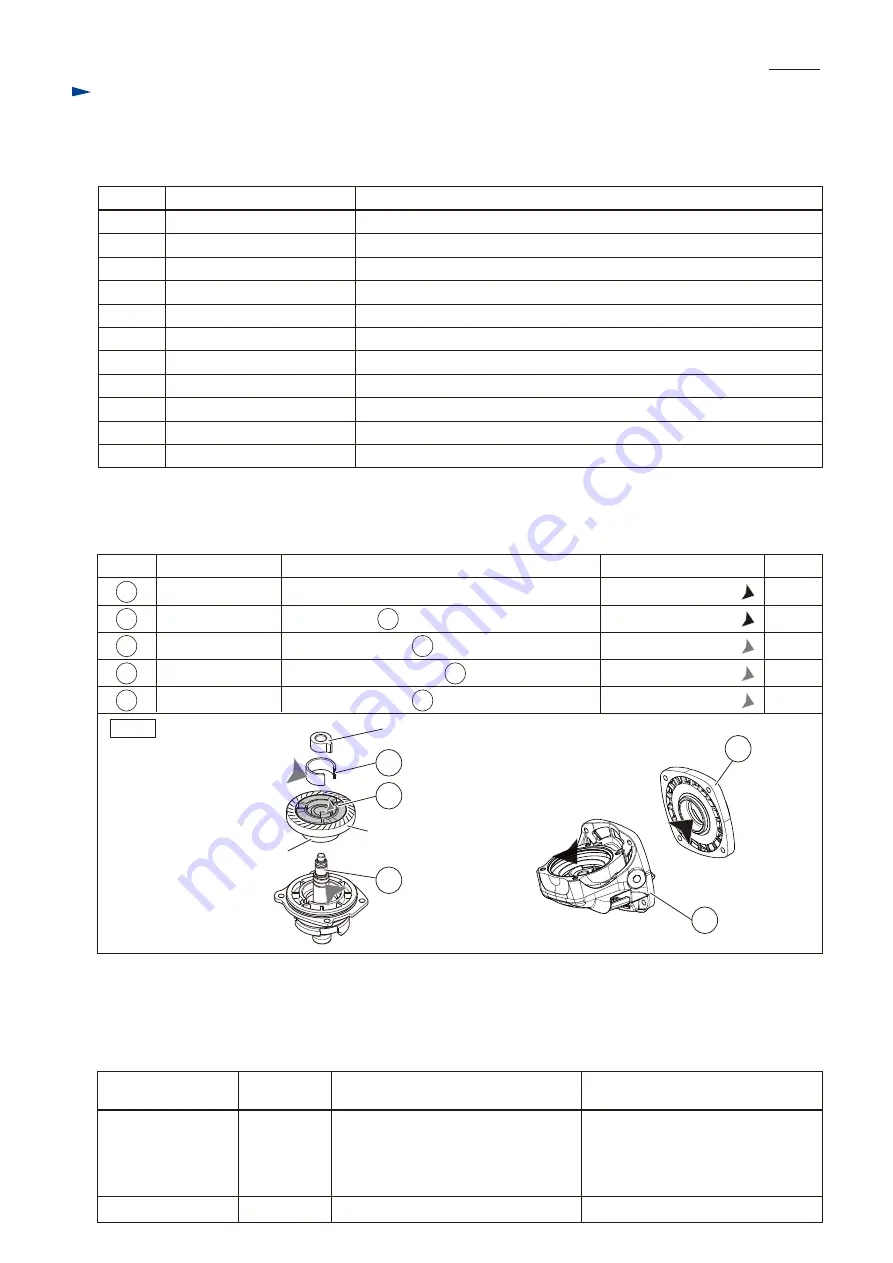
Apply Makita grease to the following portions designated with the black triangle and the gray triangle to protect parts

and product from unusual abrasion.

[1] NECESSARY REPAIRING TOOLS

CAUTION: Repair the machine in accordance with “Instruction  manual” or “Safety instructions”.

Code No.

Description

Use for

1R028

Bearing setting pipe 20-12.2

mounting Gear housing cover to Armature

1R045

Gear extractor (Large)

separate Armature from Gear housing cover

1R232

Pipe 30

removing Coupling and Ball bearing 6903ZZ from large Spiral bevel gear

1R258

V block

supporting Armature and Bearing box

1R268

Spring pin extractor M3

disassembling Shaft lock mechanism

1R269

Bearing extractor

removing Ball bearings 627DDW/ 696ZZ from Armature

1R281

Round bar for Arbor 7-50

removing Switch knob from Switch lever

1R286

Round bar for Arbor 12-50

removing large Spiral bevel gear section from Bearing box

1R291

Retaining ring S & R pliers

removing Retaining ring S-9

1R340

Bearing retainer wrench

removing Bearing retainer 20-33 from Bearing box

1R350

Ring 60

supporting Gear housing when disassembling Shaft lock mechanism 

[2] LUBRICATION

Fig. 1

Item No.

Description

Gear housing
Gear housing cover

Lubricant

Amount

Portion to lubricate

Coupling
Spindle

Model No.

GA4041    GA4541C

GA4541    GA5041C

GA5041    GA4543C

GA4041C  GA5043C

GA4043C

GA6041

Smaller spiral bevel gear

(on armature shaft)

Larger spiral bevel gear

(on spindle)

10 teeth

38 teeth

9 teeth

41 teeth

Gear room

17g

a little

a little
a little

70

56

Joint sleeve

Note

: As listed below, the grinders use different spiral bevel gears, and they are not interchangeable.

          Referring to this list, therefore, be sure to use correct gears for replacement.

Spiral bevel gear (large)

Ball bearing 6903ZZ

6

58

58

O-ring 27.5 of   6   Gear housing cover

Drum portion where  58  Coupling contacts

Cylindrical portion where  56  C-type plate contacts 

C-type plate

a little

56

Outer surface where  58  Coupling contacts

Makita Grease FA No. 2:

Makita Grease FA No. 2:

Makita Grease FA No. 2:

Makita Grease SG No. 0: 

Makita Grease SG No. 0: 

1

70

[3] DISASSEMBLY/ASSEMBLY

[3] -1. Note in Disassemble (general)

No load 

speed: min.

ˉ

¹

11,000

9,000

6

1

Содержание GA4041C

Страница 1: ...or wire cup brush sets Wire bevel brush sets Wheel covers for wire bevel brush sets Diamond wheels Dust collecting wheel guards Abrasive cut off wheels Wheel covers Sanding lock nut etc Specification Continuous Rating W Voltage V Cycle Hz Input Output 840 Max Output W 110 120 220 230 240 13 12 6 7 6 4 6 1 50 60 50 60 50 60 50 60 50 60 1 400 1 400 1 400 1 400 1 400 2 100 2 100 1 800 2 000 2 100 Cur...

Страница 2: ...ng retainer wrench removing Bearing retainer 20 33 from Bearing box 1R350 Ring 60 supporting Gear housing when disassembling Shaft lock mechanism 2 LUBRICATION Fig 1 Item No Description Gear housing Gear housing cover Lubricant Amount Portion to lubricate Coupling Spindle Model No GA4041 GA4541C GA4541 GA5041C GA5041 GA4543C GA4041C GA5043C GA4043C GA6041 Smaller spiral bevel gear on armature shaf...

Страница 3: ... 3 Disconnect Carbon brush from commutator by pulling up Note No need to remove Carbon brush in this step Notch on Gear housing cover Gear housing cover Armature Gear housing cover Compression spring 33 Brake shoe holder complete 5 Remove M6 Hex nut to turn it with Wrench 10 counterclockwise Then remove Flat washer 6 and small Spiral bevel gear from Armature 6 Remove Gear housing cover with 1R045 ...

Страница 4: ...earing 627DDW 1R269 Flat washer 7 Insulation washer 1 Assemble the commutator end of Armature as drawn in Fig 4 Note This step is required for the models with electronic control system of GA4041C GA4043C GA4541C GA4543C GA5041C GA5043C Fig 4 2 Press down Self lock 6 until Wave washer 6 gets flat 3 Magnet sleeve is stabilized between Self lock 6 and Wave washer 6 by the reaction force of Wave washe...

Страница 5: ...ing 6001LLB 1 Set Brake shoe holder complete and Compression spring 33 to Armature 3 Supporting Armature section with 2 pcs of 1R258 press Gear housing cover to Armature section with 1R028 1R258 1R028 Compression spring 33 Brake shoe holder complete Groove of Gear housing cover Compression spring 33 Ball bearing 6001LLB Armature 4 Set Spiral bevel gear small and Flat washer 6 to Armature shaft The...

Страница 6: ...itch knob to OFF position 2 Assemble Armature section to Motor housing while fitting the wings of Brake shoe complete to the grooves of Spacer 3 Face the notch to the same side as Name plate by twisting Gear housing cover 4 Assemble Gear housing while facing Spindle to the same side as the notch and Name plate Groove of Spacer Spacer Wing of Brake shoe complete Wing of Brake shoe complete Switch p...

Страница 7: ... section from Gear housing Bearing box section M4x16 Hex socket head bolt 1R269 2 Remove Ball bearing 696ZZ with 1R269 3 Remove Retaining ring S 9 with 1R291 4 Remove Flat washer 10 Then remove C type plate 5 Receive Bearing box with 1R258 and remove Spindle by pressing it with Arbor press 6 Joint sleeve can be removed Ball bearing 696ZZ Retaining ring S 9 Flat washer 10 C type plate 7 Using 1R291...

Страница 8: ...efully to remove large Spiral bevel gear section including Coupling and Ball bearing 6903ZZ from Bearing box 1R286 large Spiral bevel gear Ball bearing 6903ZZ Coupling Flat washer 12 Coupling Ball bearing 6903ZZ large Spiral bevel gear 3 Put large Spiral bevel gear section on 1R258 Then apply 1R232 to Coupling of the gear section 4 Remove Coupling together with Ball bearing 6903ZZ from large Spira...

Страница 9: ...Spiral bevel gear Ball bearing 6903ZZ have to be assembled tightly that there is any gaps among them See the left illustration in Fig 10 Fig 10 Incomplete assembling causes gaps DISASSEMBLING 3 DISASSEMBLY ASSEMBLY 3 3 Spiral bevel gear large one Ball bearings 696ZZ 6201DDW cont 1 Clamp Bearing box with Vise Then while fitting the claw of 1R340 to the notch of Bearing retainer 20 33 turn 1R340 clo...

Страница 10: ...t Compression spring 4 is assembled to Switch lever in advance 2 Fitting Switch knob to the loop portion of Switch lever and the claw portion of Switch plate hold Switch knob And then release Switch lever The hook of Switch knob interlocks with the hole of Switch lever when Switch lever is pushed back to OFF position by Compression spring 4 Switch knob Switch lever Switch plate Switch lever Compre...

Страница 11: ...ng by twisting the screwdriver Fig 14 Fig 15 Switch block Controller DISASSEMBLING 3 7 Brush Holder DISASSEMBLING Insert Slotted screwdriver into the gap between Switch and Switch block While fitting the tip of the screwdriver to the side groove of Switch remove Switch by prying it off Remove 3x10 Tapping screw Then insert Slotted screwdrivers into the gap between Motor housing and Brush holder s ...

Страница 12: ...n cap Pin cap Compression spring 8 1R268 1R350 Fig 16 Fig 17 1 Disassemble Bearing box section as drawn in the upper two illustrations in Fig 7 2 Disassemble Shaft lock mechanism as drawn in Figs 16 and 17 Fig 18 Fig 19 1 Be sure to use a new Pin cap for replacement and to remove all the plastic dust on Shoulder pin 6 Fig 18 2 Assemble the Parts for Shaft lock mechanism as drawn in Fig 19 Plastic ...

Страница 13: ... suppressor 7 Black lead wire is used for some countries White lead wire is used for some countries 8 6 1 4 5 2 3 Switch block without Controller Field Brush holder 5 7 Switch Noise suppressor GA4041 GA4541 GA5041 GA6041 Fig D 1B Color index of lead wires sheath Blue Brown Switch block Noise suppressor is installed in Switch block Noise suppressor is not used for some countries Black lead wire is ...

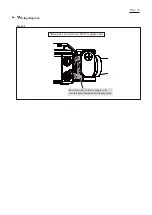
Страница 14: ...P 14 14 Wiring diagram Fig D 2 Wiring of Lead wires of Power supply cord Put Lead wires of Power supply cord into this place designated with gray color ...

Отзывы: