


18
ENGLISH
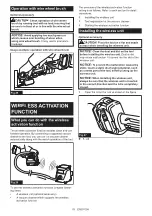
Operation with wire wheel brush
Optional accessory
CAUTION:
Check operation of wire wheel
brush by running tool with no load, insuring that
no one is in front of or in line with the wire wheel
brush.
NOTICE:
Avoid applying too much pressure
which causes over bending of wires when
using wire wheel brush.
It may lead to premature
breakage.
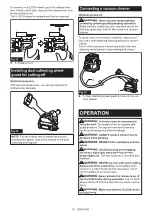
Usage example: operation with wire wheel brush
Fig.25
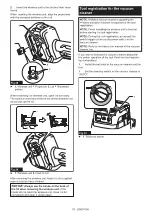
WIRELESS ACTIVATION
FUNCTION
What you can do with the wireless
activation function
The wireless activation function enables clean and com-
fortable operation. By connecting a supported vacuum
cleaner to the tool, you can run the vacuum cleaner
automatically along with the switch operation of the tool.
Fig.26
To use the wireless activation function, prepare follow-
ing items:
•
A wireless unit (optional accessory)
•
A vacuum cleaner which supports the wireless
activation function
The overview of the wireless activation function
setting is as follows. Refer to each section for detail
procedures.
1.
Installing the wireless unit
2.
Tool registration for the vacuum cleaner
3.
Starting the wireless activation function
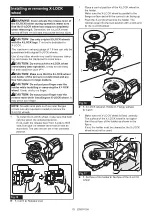
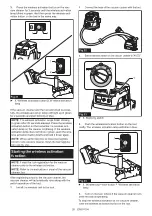
Installing the wireless unit
Optional accessory
CAUTION:
Place the tool on a flat and stable
surface when installing the wireless unit.
NOTICE:
Clean the dust and dirt on the tool
before installing the wireless unit.
Dust or dirt
may cause malfunction if it comes into the slot of the
wireless unit.
NOTICE:
To prevent the malfunction caused by
static, touch a static discharging material, such
as a metal part of the tool, before picking up the
wireless unit.
NOTICE:
When installing the wireless unit,
always be sure that the wireless unit is inserted
in the correct direction and the lid is completely
closed.
1.
Open the lid on the tool as shown in the figure.
1
Fig.27
►
1.
Lid
Содержание GA041GZ02
Страница 27: ...27...