22
CAUTION: Before doing any work on the equipment, always stop the engine and pull the plug cap off the spark plug (see “checking the spark
plug”).
Always wear protective gloves!
To ensure a long service life and to avoid any damage to the equipment, the following servicing operations should be performed at regular
intervals.
Daily checkup and maintenance
Before operation, check the machine for loose screws or missing parts. Pay particular attention to the tightness of the metal blade or nylon
–
cutting head.
Before operation, always check for clogging of the cooling air passage and the cylinder fins.
–
Clean them if necessary.
Perform the following work daily after use:
–
Clean the equipment externally and inspect for damage.
•
Clean the air filter. When working under extremely dusty conditions, clean the filter the several times a day.
•
Check the blade or the nylon cutting head for damage and make sure it is firmly mounted.
•
Check that there is sufficient difference between idling and engagement speed to ensure that the cutting tool is at a standstill while the
•
engine is idling (if necessary reduce idling speed).
If under idling conditions the tool should still continue to run, consult your nearest Authorized Service Agent.
Check the functioning of the I-O switch, the lock-off lever, the throttle lever, and the lock button.
–
SERVICING INSTRUCTIONS
REPLACEMENT OF ENGINE OIL
Deteriorated engine oil will shorten the life of the engine. Be sure to check the oil and level regularly.
WARNING: The engine and engine oil is still hot just after stopping engine. Allow sufficient time for the engine and engine oil to cool
down. Otherwise a skin burn may result.
NOTE: If the oil filled above the limit, it may be contaminated or may catch fire with white smoke. Allow sufficient time after stopping
engine for the engine oil to return to the oil tank to ensure accurate reading of the oil level.
Interval of replacement:
After first 20 operating hours, followed by every 50 operating hours.
Recommended oil:
SAE10W-30 oil of API Classification SF Class or higher (4-stroke engine oil for automobile)
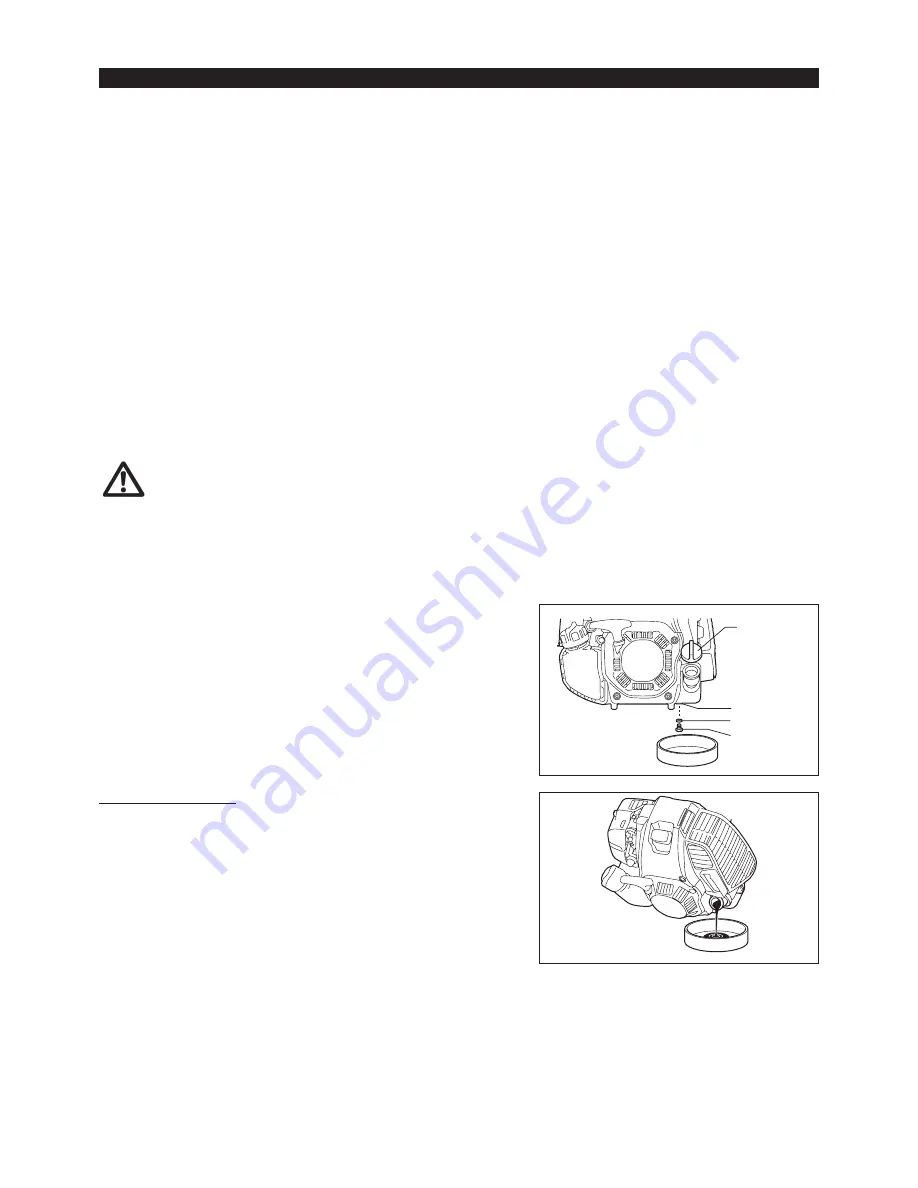
In replacement, perform the following procedure.
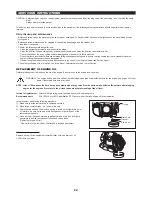
1) Make sure that the fuel tank cap is tightened securely.
2) Place large container (pan, etc.) under drain hole.
3) Remove drain bolt and then remove oil cap to drain out oil from drain hole.
At this time, be sure not to lose drain bolt’s gasket, or get dirty any of the
removed components.
4) Once all the oil has been drained, install gasket and drain bolt, and tightly
secure drain bolt, so that it will not loosen and cause leaks.
[Tightening torque: 5 N-m]
* Use cloth to fully wipe off any oil attached to bolt and equipment.
Oil cap
Drain bolt
Gasket
Drain hole
Alternative draining method
Remove oil cap, tilt the equipment toward oil filler hole, and drain out oil.
Collect oil in container.

