


11 ENGLISH
Emptying the polyethylene bag
WARNING:
Always make sure that the
cleaner is switched off and the battery cartridge is
removed before emptying the polyethylene bag.
Failure to do so may cause an electric shock and
serious personal injury.
CAUTION:
Do not apply a great impact on the
float cage and tank.
Applying a great impact may
cause deformation and damage to the parts.
CAUTION:
Empty the tank at least once a day
although this depends on picked-up dust volume in the tank.
Or, the suction force will weaken and the motor may be broken.
CAUTION:
Do not grab the hook when emptying
the tank.
Grabbing the hook may cause the hook to break.
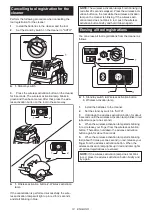
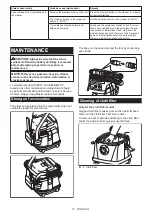
Unhook and lift up the tank cover.
Shake off the dust from the cloth filter / prefilter and then
take the polyethylene bag out of the tank.
NOTE:
Take the polyethylene bag carefully out of the
tank so that the polyethylene bag cannot be caught and
torn by the protrusion inside the tank when emptying it.
NOTE:
Empty the polyethylene bag before it
becomes full. Too much dust in the tank may cause
the polyethylene bag to be torn.
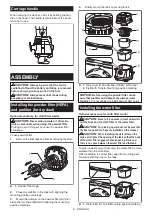
Installing the tool box
1.
Release the lock of the battery cover, and open
the battery cover.
2.
Set the rails on the tool box along the grooves on
the housing.
3.
Close the battery cover and apply the lock.
The tool box is convenient for carrying batteries, pipe,
or cuffs.
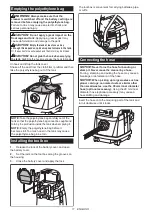
Connecting the hose
NOTICE:
Never force the hose for bending or
stamp it. Never move the cleaner by a hose.
Forcing, stamping and pulling the hose may cause a
breakage or deformation of the hose.
NOTICE:
When picking up large wastes such as
planer carvings, concrete dusts or similar other
than small wastes, use the 38 mm inner diameter
hose (optional accessory).
Using the 28 mm inner
diameter hose (optional accessory) may cause a
hose stuffing and damage.
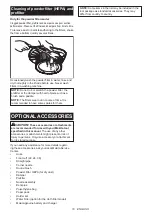
Insert the hose onto the mounting port of the tank and
turn it clockwise until it locks.
Содержание DVC153L
Страница 19: ...19 ...