


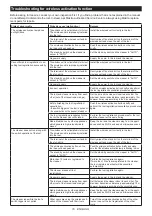


10 ENGLISH
NOTE:
It is recommended using water filter when pick
-
ing up large amount of water repeatedly. Otherwise
vacuum ability may be reduced in case of cloth filter.
Installing the paper pack
Optional accessory
WARNING:
When using the paper pack, also use
the cloth filter or prefilter together that is preinstalled on
the cleaner.
Failure to use the cloth filter / prefilter together
may cause unusual noise and heat, resulting in a fire.
CAUTION:
(For the cloth filter model)
•
Never pick up water or other liquids or wet
dusts when using the paper pack.
Picking up
such things may cause the paper pack breakage.
•
Before using the paper pack, make sure that pow-
der filter (optional accessory), damper (optional
accessory) and prefilter are always used together.
CAUTION:
(For the powder filter model)
•
Before using the paper pack, make sure
that powder filter, damper and prefilter are
always used together.
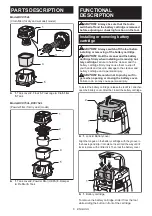
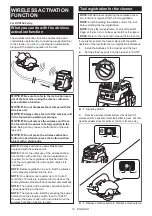
1.
Remove the rubber holder.
1
►
1.
Rubber holder
2.
Extend the paper pack.
3.
Align the paper pack opening with the dust suction
opening of the cleaner.
4.
Insert the cardboard of the paper pack onto the
holder so that it is positioned at the end beyond the
detent protrusion.
1
2
►
1.
Paper pack
2.
Holder
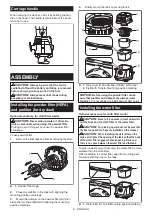
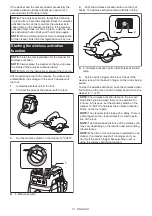
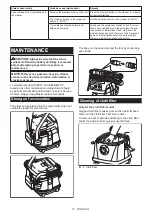
Installing the polyethylene bag
Cleaner can also be used without polyethylene bag.
However, using polyethylene bag is easier to empty the
tank without letting your hands dirty.
Spread the polyethylene bag in the tank. Insert it
between the holder plate and the tank, and pull it to the
hose inlet.
2
1
►
1.
Holder plate
2.
Polyethylene bag
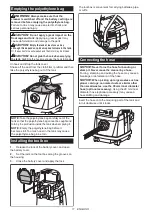
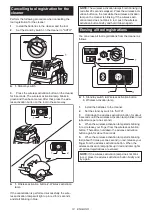
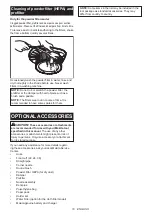
Spread the bag around the top of the tank so that the
cloth filter / prefilter edge can catch and hold the bag
securely.
1
►
1.
Cloth filter / prefilter
NOTE:
A polyethylene bag available on the
market can be used. 0.04 mm or thicker one is
recommended.
NOTE:
Too much dust will tear the bag easily, so
do not collect the dust more than the half of the bag
capacity.
Содержание DVC153L
Страница 19: ...19 ...