14 ENGLISH
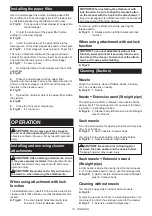
Installing the paper filter
Use the dust stopper also when installing paper filter.
Be careful not to take the upper side for the lower side
by mistake because they are different each other.
►
Fig.14:
1.
Upper side of dust stopper
2.
Lower side
of dust stopper
1.
Unfold the entrance of the paper filter before
setting it on the dust stopper.
►
Fig.15
2.
Insert the protrusion of the paper filter into the
lower groove on the dust stopper as shown in the figure.
►
Fig.16:
1.
Dust stopper
2.
Lower groove
3.
Paper filter
There is no distinction between the upper and lower
sides of the paper filter. You may insert its protrusion of
any side into the lower groove of the dust stopper.
►
Fig.17:
1.
Lower groove
3.
Overlap the frame of dust stopper with that of the
paper filter.
►
Fig.18
4.
Place the dust stopper and the paper filter
together into the cleaner cavity in the same direction of
arrow on the dust stopper. Insert them all the way into
the slots in the cleaner cavity.
►
Fig.19
5.
Spread the container part of the paper filter inside
the cleaner.
►
Fig.20
6.
Close the front cover completely.
►
Fig.21:
1.
Front cover
OPERATION
CAUTION:
Do not move your face close to
the air vent when operating the cleaner.
If foreign
objects are blown into eyes, it may result in personal
injury.
Installing and removing cleaner
attachments
CAUTION:
After installing attachments, check
if they are securely installed.
If the attachments are
installed imperfectly, they may come off and cause
personal injury.
CAUTION:
Be careful not to hit your hand on
the wall etc. when removing the attachments.
When using attachment with lock
function
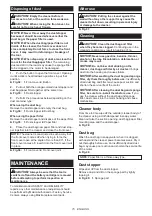
To install attachment, insert it to the suction inlet of the
cleaner until it clicks. Make sure that the attachment is
locked.
►
Fig.22:
1.
Suction inlet
2.
Attachment with lock
function
3.
Hook
4.
Release button
NOTICE:
When installing the attachment with
lock function, be sure to align the release button
on the cleaner with the hook on the attachment.
If
they are not aligned, the attachment will not be locked
and may come off from the cleaner.
To remove, pull the attachment while pushing the
release button.
►
Fig.23:
1.
Release button
2.
Attachment with lock
function
When using attachment without lock
function
NOTICE:
To connect attachment without lock
function, twist and insert it securely into the suc-
tion inlet of the cleaner. To disconnect the attach-
ment, pull it away while twisting.
►
Fig.24
Cleaning (Suction)
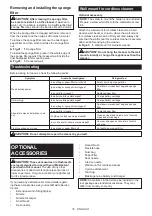
Nozzle
Attach the nozzle to clean off tables, desks, furniture,
etc. The nozzle slips on easily.
►
Fig.25:
1.
Nozzle
Extension wand (Straight pipe)
The extension wand fits in between the nozzle and the
cleaner itself. This arrangement is convenient for clean-
ing a floor in a standing position.
►
Fig.26:
1.
Cleaner body
2.
Extension wand (Straight
pipe)
3.
Nozzle
Sash nozzle
Fit on the sash nozzle for cleaning corners and crevices
of a car or furniture.
►
Fig.27:
1.
Sash nozzle
2.
Cleaner body
You can store the sash nozzle in the nozzle holder.
►
Fig.28:
1.
Nozzle holder
2.
Sash nozzle
CAUTION:
Be careful not to trap finger(s)
between the sash nozzle and the nozzle holder.
Trapping finger(s) may cause injury.
Sash Extension wand
(Straight pipe)
In tight quarters where the cleaner itself cannot squeeze
in, or in high places hard to reach, use this arrangement.
►
Fig.29:
1.
Sash nozzle
2.
Extension wand (Straight
pipe)
3.
Cleaner body
Cleaning without nozzle
You can pick up powder and dust without nozzle.
►
Fig.30
For picking up dust on a floor in a standing position, it is
convenient to attach the extension wand to the cleaner.
►
Fig.31:
1.
Extension wand (Straight pipe)
Содержание DCL285F
Страница 2: ...2 Fig 1 1 2 3 Fig 2 1 2 Fig 3 1 2 Fig 4 1 2 3 Fig 5 Fig 6 1 2 Fig 7 1 2 3 Fig 8 ...
Страница 3: ...3 1 Fig 9 Fig 10 Fig 11 Fig 12 1 Fig 13 1 2 Fig 14 Fig 15 1 2 3 Fig 16 ...
Страница 4: ...4 1 Fig 17 Fig 18 Fig 19 Fig 20 1 Fig 21 1 2 3 4 Fig 22 1 2 Fig 23 Fig 24 ...
Страница 5: ...5 1 Fig 25 1 2 3 Fig 26 1 2 Fig 27 1 2 Fig 28 1 2 3 Fig 29 Fig 30 1 Fig 31 1 2 Fig 32 ...
Страница 6: ...6 1 Fig 33 1 2 Fig 34 1 2 Fig 35 1 2 Fig 36 Fig 37 Fig 38 Fig 39 1 Fig 40 ...
Страница 7: ...7 1 Fig 41 1 Fig 42 1 Fig 43 3 4 1 2 5 Fig 44 2 3 1 4 Fig 45 2 1 Fig 46 ...
Страница 8: ...8 2 1 Fig 47 1 2 Fig 48 1 2 3 Fig 49 ...


