background image

ENGLISH (Original instructions) 

SPECIFICATIONS 

Model AN930H 

Air pressure 

170 - 320 PSIG (1.18    - 2.26 MPa) 

Nail length 

Wire-collated coil nail 45 mm (1-3/4") - 90 mm (3-1/2") 

Sheet-collated coil nail 45 mm (1-3/4") - 75 mm (3") 

Nail capacity 

Wire-collated coil nail 120 pcs ~ 300 pcs 

Sheet-collated coil nail 200 pcs 

Min. hose diameter 

4.0 mm (5/32") 

Dimensions (L X W X H) 

286 mm (11-1/4") X 128 mm (5-1/32") X 330 mm (13") 

Net weight 

2.6 kg (5.7 lbs) 

• Due to our continuing program of research and development, the specifications herein are subject to change without notice. 
• Specifications may differ from country to country. 
• Weight according to EPTA-Procedure 01/2003 


USB092-2 

IMPORTANT SAFETY 
INSTRUCTIONS 

WARNING: WHEN USING THIS TOOL, BASIC 
SAFETY PRECAUTIONS SHOULD ALWAYS BE 
FOLLOWED TO REDUCE THE RISK OF PERSONAL 
INJURY, INCLUDING THE FOLLOWING: 

READ ALL INSTRUCTIONS. 

1. 

For personal safety and proper operation and 
maintenance of the tool, read this instruction 
manual carefully before using the tool. 

2. 

Always wear safety glasses to protect your 
eyes from dust or nail injury. The safety 
glasses should conform with the 
requirements of ANSI Z87.1. 
WARNING: 
It is an employer's responsibility to enforce 
the use of safety eye protection equipment by 
the tool operators and by other persons in the 
immediate working area. 

3. 

Wear hearing protection to protect your ears 
against exhaust noise and head protection. 
Also wear light but not loose clothing. 
Sleeves should be buttoned or rolled up. No 
necktie should be worn. 

4. 

Rushing the job or forcing the tool is 
dangerous. Handle the tool carefully. Do not 
operate when under the influence of alcohol, 
drugs or the like. 

5. 

General Tool Handling Guidelines: 

(1) 

Always assume that the tool contains 
fasteners. 

(2) 

Do not point the tool toward yourself or 
anyone whether it contains fasteners or 
not. 

(3) 

Do not actuate the tool unless the tool is 
placed firmly against the workpiece. 

(4) 

Respect the tool as a working implement. 

(5) 

No horseplay. 

(6) 

Do not hold or carry the tool with a finger 
on the trigger. 

(7) 

Do not load the tool with fasteners when any 
one of the operating controls is activated. 

(8) 

Do not operate the tool with any power 
source other than that specified in the 
tool operating/safety instructions. 

6. 

An improperly functioning tool must not be 
used. 

7. 

Sparks sometimes fly when the tool is used. 
Do not use the tool near volatile, flammable 
materials such as gasoline, thinner, paint, gas, 
adhesives, etc.; they will ignite and explode, 
causing serious injury. 

8. 

The area should be sufficiently illuminated to 
assure safe operations. The area should be 
clear and litter-free. Be especially careful to 
maintain good footing and balance. 

9. 

Only those involved in the work should be in 
the vicinity. Children especially must be kept 
away at all times. 

10. 

There may be local regulations concerning 
noise which must be complied with by keeping 
noise levels within prescribed limits. In certain 
cases, shutters should be used to contain noise. 

11. 

Do not play with the contact element: it 
prevents accidental discharge, so it must be 
kept on and not removed. Securing the trigger 
in the ON position is also very dangerous. 
Never attempt to fasten the trigger. Do not 
operate a tool if any portion of the tool 
operating controls is inoperable, 
disconnected, altered, or not working properly. 

Содержание AN930H

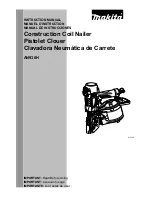
Страница 1: ...UAL MANUEL D INSTRUCTION MANUAL DE INSTRUCCIONES IMPORTANT Read Before Using IMPORTANT Lire avant usage IMPORTANTE Leer antes de usar Construction Coil Nailer Pistolet Clouer Clavadora Neumática de Carrete AN930H 013439 ...

Страница 2: ...ndle the tool carefully Do not operate when under the influence of alcohol drugs or the like 5 General Tool Handling Guidelines 1 Always assume that the tool contains fasteners 2 Do not point the tool toward yourself or anyone whether it contains fasteners or not 3 Do not actuate the tool unless the tool is placed firmly against the workpiece 4 Respect the tool as a working implement 5 No horsepla...

Страница 3: ... nail will be bent or the tool can become jammed if you mistakenly nail on top of another nail or strike a knot in the wood The nail may be thrown and hit someone or the tool itself can react dangerously Place the nails with care 23 Do not leave the loaded tool or the air compressor under pressure for a long time out in the sun Be sure that dust sand chips and foreign matter will not enter the too...

Страница 4: ...lace at a rate of approximately 25 times per minute at a compression of 250PSIG 1 76 MPa a compressor with an air output over 3 5 cfm approximately 100 liters minute is required Pressure regulators must be used to limit air pressure to the rated pressure of the tool where air supply pressure exceeds the tool s rated pressure Failure to do so may result in serious injury to tool operator or persons...

Страница 5: ...this hook can be turned by hand to the desired angle of the tool 1 013451 When changing the installation position remove the screw with a screwdriver Install the hook on another side for installation and then secure it with the screw Use the nose adapter CAUTION Always disconnect the hose before installing or removing the nose adapter If you like to protect the surface of workpiece attach the nose...

Страница 6: ...essure reservoir will discharge at the time the air supply coupling is disconnected Changing the trigger for intermittent nailing CAUTION Always disconnect the air hose and unload the tool with nails before replacing the trigger After the trigger replacement always check the tool operates properly before actual work Do not load the tool with any nails before checking the function to avoid unexpect...

Страница 7: ...ing the trigger first and then place the contact element against the work piece Checking intermittent nailing mode The tool must not operate only by connecting the air hose The tool must not operate only by pulling the trigger The tool must not operate only by placing the contact element against the work piece without pulling the trigger NOTE The operating conditions shown above are the same as th...

Страница 8: ...l directly It may cause nails to strike back causing serious injuries Do not use the tool for nailing on ceiling or roof Choose and use nails more than 10 mm 3 8 longer than total thickness of all workpiece to be fastened by referring to the table below Material thickness C shaped steel Nail length 14 35 mm 15 40 mm 1 6 3 2 mm 45 mm 1 3 4 50 mm 2 1 2 1 3 8 5 8 1 5 8 1 16 1 8 013618 1 2 3 013617 CA...

Страница 9: ...ays disconnect the air hose and remove the nails from the magazine before cleaning a jam When the nailer becomes jammed do as follows After depressing the latch lever and open the door open the magazine cap and remove the nail coil Insert a small rod or the like into the ejection port and tap it with a hammer to drive out the nail jamming from the ejection port Reset the nail coil and close the ma...

Страница 10: ...to country MAKITA LIMITED ONE YEAR WARRANTY Warranty Policy Every Makita tool is thoroughly inspected and tested before leaving the factory It is warranted to be free of defects from workmanship and materials for the period of ONE YEAR from the date of original purchase Should any trouble develop during this one year period return the COMPLETE tool freight prepaid to one of Makita s Factory or Aut...

Страница 11: ...n dispositif de protection des yeux aux utilisateurs des outils et à toute personne présente dans la zone de travail 3 Portez une protection d oreilles pour les protéger contre le bruit et portez un casque de sécurité Les vêtements portés doivent être légers et ne doivent pas être amples Veuillez boutonner ou rouler vos manches Ne portez pas de cravate 4 Il est dangereux de travailler trop vite ou...

Страница 12: ... de contact pour vérifier l absence de tout vice de fonctionnement 16 Pour éviter tout risque de choc électrique de fuite de gaz d explosion etc provoqué par le contact avec des fils dénudés des conduites ou des tuyaux de gaz vérifiez le mur ou le plafond le plancher le toit etc 17 Utilisez uniquement les clous spécifiés dans ce manuel L outil risque de mal fonctionner si vous utilisez tout autre ...

Страница 13: ... réparation doivent être effectués dans un centre de service après vente agréé Makita exclusivement avec des pièces de rechange Makita CONSERVEZ CE MODE D EMPLOI AVERTISSEMENT Une MAUVAISE UTILISATION de l outil ou l ignorance des consignes de sécurité du présent manuel d instructions peuvent entraîner une grave blessure USD501 1 Symboles Les symboles utilisés pour l outil sont indiqués ci dessous...

Страница 14: ...prises après avoir introduit l huile pour outil pneumatique DESCRIPTION DU FONCTIONNEMENT ATTENTION Déconnectez toujours le tuyau d air avant d ajuster ou de régler le fonctionnement de l outil Ajustement de la profondeur de clouage ATTENTION Déconnectez toujours le tuyau avant d ajuster la profondeur de clouage 1 013449 Cet outil permet d ajuster la profondeur du clouage Pour moduler la profondeu...

Страница 15: ...ur de bec s adaptent aux deux trous de l élément de contact ASSEMBLAGE ATTENTION Déconnectez toujours le tuyau d air avant de charger la cloueuse Chargement de la cloueuse ATTENTION Assurez vous que la plaque de soutien du rouleau est installée au niveau adéquat pour les clous utilisés 1 2 013444 Déconnectez toujours le tuyau d air de l outil Sélectionnez des clous appropriés selon la tâche Abaiss...

Страница 16: ...oussez la goupille fixant la gâchette du côté de la rondelle en uréthane puis retirez celle ci à la main ou à l aide d un tournevis plat ou d un outil similaire Tirez la goupille et sortez la du trou de son logement 3 Réglez l ensemble de la gâchette pour le clouage intermittent Tournez la partie articulée vers l intérieur de la gâchette puis mettez cette partie en contact avec la tige de la valve...

Страница 17: ...puis placer l élément de contact contre la pièce ou 1 2 013538 2 Placer l élément de contact contre la pièce puis appuyer sur la gâchette La méthode 1 convient bien au clouage continu La méthode 2 convient bien au clouage intermittent lorsque vous désirez enfoncer un clou soigneusement avec une grande précision ATTENTION Toutefois si l outil est réglé en mode de clouage intermittent AVEC LA GÂCHET...

Страница 18: ...otale de toute pièce de travail à assembler il est possible que la pression soit insuffisante Le clouage sur une plaque d acier à une profondeur excessive réduit beaucoup la force de serrage Avant de clouer réglez correctement la profondeur de clouage Lors du clouage de la plaque d acier l entraînement peut être bloqué en raison de la susceptibilité à l usure Lorsqu il est usé arrangez le ou rempl...

Страница 19: ...ès avoir abaissé le levier de verrouillage et ouvert la porte ouvrez le bouchon du magasin et retirez le rouleau de clous Insérez une petite tige ou un autre objet similaire dans la sortie d éjection et frappez dessus légèrement avec un marteau pour retirer les clous coincés dans la sortie d éjection Remettez en place le rouleau de clous fermez le bouchon du magasin ENTRETIEN ATTENTION Déconnectez...

Страница 20: ...es standard Ils peuvent varier suivant les pays GARANTIE LIMITÉE D UN AN MAKITA Politique de garantie Chaque outil Makita est inspecté rigoureusement et testé avant sa sortie d usine Nous garantissons qu il sera exempt de défaut de fabrication et de vice de matériau pour une période d UN AN à partir de la date de son achat initial Si un problème quelconque devait survenir au cours de cette période...

Страница 21: ...dad del empleador imponer el uso de equipo para protección de los ojos por los usuarios de las herramientas y por otras personas inmediatamente próximas a las áreas de trabajo 3 Use protección para los oídos para protegerlos contra el ruido del escape así como también debe usarse protección para la cabeza Además vistase con ropa ligera pero no holgada Las mangas deben estar abotonadas o arremangad...

Страница 22: ...peración defectuosa sin que haya clavos cargados y con el elemento de contacto en posición retraida por completo 16 Revise paredes techos tejados pisos y similares con atención para evitar una descarga eléctrica accidental así como una fuga de gas explosiones etc que sean provocadas por haber insertado el clavo en cables con corriente tubos o ductos de gas 17 Use solamente los clavos que se especi...

Страница 23: ... realizados por los centros de servicio autorizados o de fabricación de Makita usando siempre repuestos Makita GUARDE ESTAS INSTRUCCIONES ADVERTENCIA El USO INCORRECTO o el no seguir las normas de seguridad que se declaran en este instructivo podría resultar en lesiones personales graves USD501 1 Símbolos A continuación se muestran los símbolos utilizados para la herramienta Lea y entienda el manu...

Страница 24: ...veces después de que se haya colocado el lubricante para herramientas neumáticas DESCRIPCIÓN DEL FUNCIONAMIENTO PRECAUCIÓN Siempre desconecte la manguera de aire antes de ajustes o revisiones en la herramienta Ajuste de la profundidad del clavado PRECAUCIÓN Siempre desconecte la manguera antes de hacer ajustes de la profundidad de clavado 1 013449 Esta herramienta cuenta con ajustador para la prof...

Страница 25: ... flecha 1 2 013452 Para colocar el adaptador de boquilla al elemento de contacto presiónelo sobre éste hasta que la protuberancia en los dos puntos dentro del adaptador de boquilla en los dos orificios encaje en el elemento de contacto ENSAMBLE PRECAUCIÓN Siempre desconecte la manguera de aire antes de resuministrar clavos a la herramienta Recargado de la herramienta con clavos PRECAUCIÓN Asegúres...

Страница 26: ...l clavado a un clavado intermitente remplace el gatillo interruptor con el diseñado para un clavado intermitente 1 2 3 013551 1 Gire la palanca de bloqueo a la posición de bloqueo LOCK 2 Empuje la clavija que fija el gatillo desde el lado de la arandela de uretano y luego quite la arandela de uretano con los dedos o mediante un atornillador de cabeza plana u objeto similar Jale la clavija y sáquel...

Страница 27: ...o el gatillo y luego colocar el elemento de contacto contra la pieza de trabajo Método del clavado 1 2 013537 1 Para colocar un calvo puede primero jalar el gatillo y luego colocar el elemento de contacto contra la pieza de trabajo o 1 2 013538 2 Coloque el elemento de contacto contra la pieza de trabajo y luego jale el gatillo El método 1 es para un clavado continuo El método 2 es para un clavado...

Страница 28: ...mm 45 mm 1 3 4 50 mm 2 1 2 1 3 8 5 8 1 5 8 1 16 1 8 013618 1 2 3 013617 PRECAUCIÓN Dependiendo de la rigidez y grosor total de la combinación de todas las piezas de trabajo a ser fijadas puede que no se consiga una fijación suficiente El clavado sobre placas de acero a profundidad excesiva puede reducir bastante la fuerza de fijación Antes de hacer el clavado realice el ajuste adecuado de la profu...

Страница 29: ...vadora se atasca haga lo siguiente Tras presionar la palanca del cerrojo y abrir la compuerta abra la tapa del cartucho y retire la bobina de clavos Inserte una varilla pequeña o similar hacia el puerto de expulsión y dé un golpe ligero con un martillo para sacar los clavos atascados del puerto de expulsión Vuelva a colocar la bobina de clavos y cierre la tapa del cartucho MANTENIMIENTO PRECAUCIÓN...

Страница 30: ...aríen de país a país GARANTÍA LIMITADA MAKITA DE UN AÑO Ésta Garantía no aplica para México Política de garantía Cada herramienta Makita es inspeccionada y probada exhaustivamente antes de salir de fábrica Se garantiza que va a estar libre de defectos de mano de obra y materiales por el periodo de UN AÑO a partir de la fecha de adquisición original Si durante este periodo de un año se desarrollase...

Страница 31: ...31 ...

Страница 32: ... tipos de polvo creados por el lijado serrado amolado taladrado y otras actividades de la construccion contienen sustancias quimicas reconocidas por el Estado de California como causantes de cancer defectos de nacimiento y otros peligros de reproduccion Algunos ejemplos de estos productos quimicos son plomo de pinturas a base de plomo silice cristalino de ladrillos y cemento y otros productos de a...

Отзывы: