7
MAINTENANCE
CAUTION:
•
Always be sure that the tool is switched off and
unplugged before attempting to perform inspection
or maintenance.
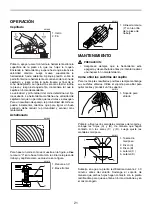
Sharpening the planer blades
Always keep your blades sharp for the best performance
possible. Use the sharpening holder to remove nicks and
produce a fine edge.
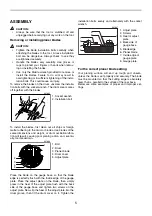
First, loosen the two wing nuts on the holder and insert
the blades (A) and (B), so that they contact the sides (C)
and (D). Then tighten the wing nuts.
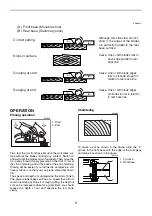
Immerse the dressing stone in water for 2 or 3 minutes
before sharpening. Hold the holder so that the blades
both contact the dressing stone for simultaneous sharp-
ening at the same angle.
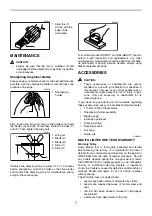
To maintain product SAFETY and RELIABILITY, repairs,
carbon brush inspection and replacement, any other
maintenance or adjustment should be performed by Mak-
ita Authorized or Factory Service Centers, always using
Makita replacement parts.
ACCESSORIES
CAUTION:
•
These accessories or attachments are recom-
mended for use with your Makita tool specified in
this manual. The use of any other accessories or
attachments might present a risk of injury to per-
sons. Only use accessory or attachment for its
stated purpose.
If you need any assistance for more details regarding
these accessories, ask your local Makita Service Center.
•
110 mm (4-3/8”) Planer blade
•
Sharpening holder assembly
•
Blade gauge
•
Extension guide set
•
Dressing stone
•
Socket wrench 9
•
Dust bag
•
Guide rule
EN0006-1
MAKITA LIMITED ONE YEAR WARRANTY
Warranty Policy
Every Makita tool is thoroughly inspected and tested
before leaving the factory. It is warranted to be free of
defects from workmanship and materials for the period of
ONE YEAR from the date of original purchase. Should
any trouble develop during this one year period, return
the COMPLETE tool, freight prepaid, to one of Makita’s
Factory or Authorized Service Centers. If inspection
shows the trouble is caused by defective workmanship or
material, Makita will repair (or at our option, replace)
without charge.
This Warranty does not apply where:
•
repairs have been made or attempted by others:
•
repairs are required because of normal wear and
tear:
•
the tool has been abused, misused or improperly
maintained:
•
alterations have been made to the tool.
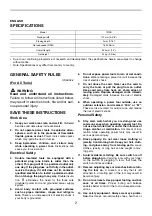
1. Align the (Y)
groove with the
edge of the
workpiece
1. Sharpening
holder
1. Wing nut
2. Blade (A)
3. Blade (B)
4. Side (C)
5. Side (D)
1
001614
1
001610
1
4
2
3
5
001611
001612
Содержание 1912B
Страница 23: ...23 ...


