8 ENGLISH
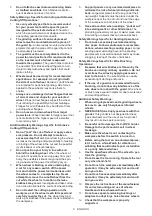
Before installing an abrasive cut-off
wheel / diamond wheel
Optional accessory
WARNING:
When using an abrasive cut-off
wheel / diamond wheel, be sure to use only the
special wheel guard designed for use with cut-off
wheels.
1
2
►
1.
Abrasive cut-off wheel / diamond wheel
2.
Wheel
guard for abrasive cut-off wheel / diamond wheel
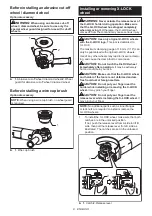
Before installing a wire cup brush
Optional accessory
NOTE:
When using a wire cup brush, no wheel guard
is required.
1
►
1.
Wire cup brush
Installing or removing X-LOCK
wheel
WARNING:
Never actuate the release lever of
the X-LOCK holder during operation. Make sure
that the X-LOCK wheel has stopped completely
when removing it.
Otherwise, the X-LOCK wheel
comes off from the tool and may cause serious injury.
CAUTION:
Use only original X-LOCK wheels
with the X-LOCK logo.
This tool is dedicated to
X-LOCK.
The maximum clamping gauge of 1.6 mm (1/16") can
only be guaranteed with original X-LOCK wheels.
Use of any other wheels may lead to insecure clamp-
ing, and cause the clamp tool to come loose.
CAUTION:
Do not touch the X-LOCK wheel
immediately after operation.
It may be extremely
hot and could burn your skin.
CAUTION:
Make sure that the X-LOCK wheel
and holder of the tool are not deformed and are
free from dust or foreign matters.
CAUTION:
Do not put your finger near the
holder while installing or removing the X-LOCK
wheel.
It may pinch your finger.
CAUTION:
Do not put your finger near the
release lever while installing the X-LOCK wheel.
It
may pinch your finger.
NOTE:
No additional parts such as inner flanges
or lock nuts are required to install or remove the
X-LOCK wheels.
1. To install the X-LOCK wheel, make sure that both
catches are in the unlocked position.
If not, push the release lever from A side to lift B
side, then pull the release lever from B side as
illustrated. The catches are set in the unlocked
position.
1
2
A
B
►
1.
Catch
2.
Release lever

