


Figure 8-6.
Attaching the vibration isolation plate to the rubber
ball mounts.
Step 3: Place the Camera in the
Quick-Release Mount
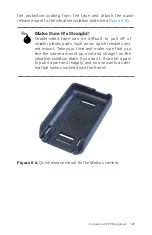
Now that we have our quick-release camera mount attached to
the vibration isolation plate—and that plate is installed on the
rubber ball mounts—all we have left to do is slide the camera
into the camera mount (see
). Make sure that the lens
of the camera is pointing away from the camera mount, then
line up the small groove that runs around the middle of the cam-
era with the five tabs that stick out from the sidewalls of the
camera mount. These tabs are what hold the camera in place
when it’s positioned inside the mount. Now, gently push the
camera back into the mount while holding the back of the
mount for extra support.
Camera and FPV Equipment 129
Содержание Belinda Kilby
Страница 1: ......
Страница 3: ...Make Getting Started with Drones Terry Kilby and Belinda Kilby...
Страница 25: ...Figure 1 5 Basic quadcopter showing how the stick commands would move the craft Introduction 13...
Страница 26: ......
Страница 90: ......
Страница 126: ......
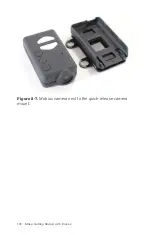
Страница 142: ...Figure 8 7 Mobius camera next to the quick release camera mount 130 Make Getting Started with Drones...
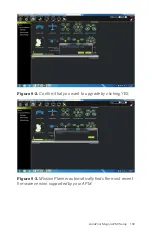
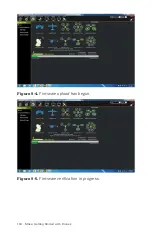
Страница 146: ...Figure 9 4 Firmware upload has begun Figure 9 5 Firmware verification in progress 134 Make Getting Started with Drones...
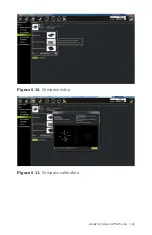
Страница 153: ...Figure 9 10 Compass setup Figure 9 11 Compass calibration ArduPilot Mega APM Setup 141...
Страница 198: ......