


MP3900X Series Router Installation Manual
Router Installation
copyright
©
2020 Maipu, all rights reserved
3-7
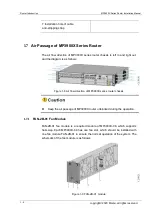
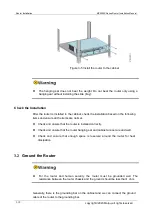
⚫
To ensure the stability of the cabinet, try to place a heavy and high router below the
cabinet.
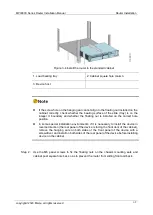
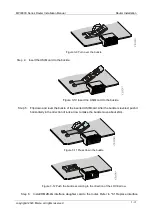
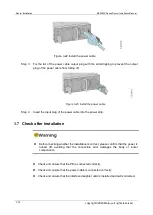
Step 2: Install the slide on the two sides, respectively. The slides installed on the both sides must
be at the same height. Then, tighten the fixing screws.
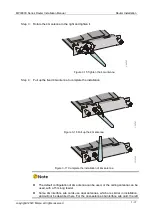
⚫
The appearance and installation methods of different cabinets and slides may vary.
This section is just for your reference. Goods in kind prevail.
Install Floating Nut to Cabinet
Before installing the chassis to the cabinet, first install the floating nut on the upright
square hole bar on the both sides in the front of the cabinet.
Ste
p 1:
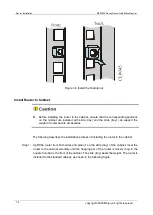
Mark the installation position of the floating nut on the upright square hole bar using a marker by
comparing with the installation hole position on the router hanging ears.
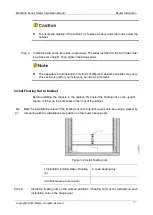
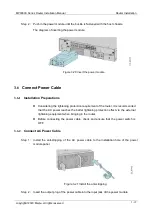
Figure 3-2 Install floating nuts
1.Installation locating plate of floating
nut
2. Load bearing tray
3.Cabinet square hole column
Step 2:
Install the floating nuts on the marked positions. A floating nut must be installed on each
installation hole on the hanging ear.


