Rev: 2.01
3
P\N: 99875451
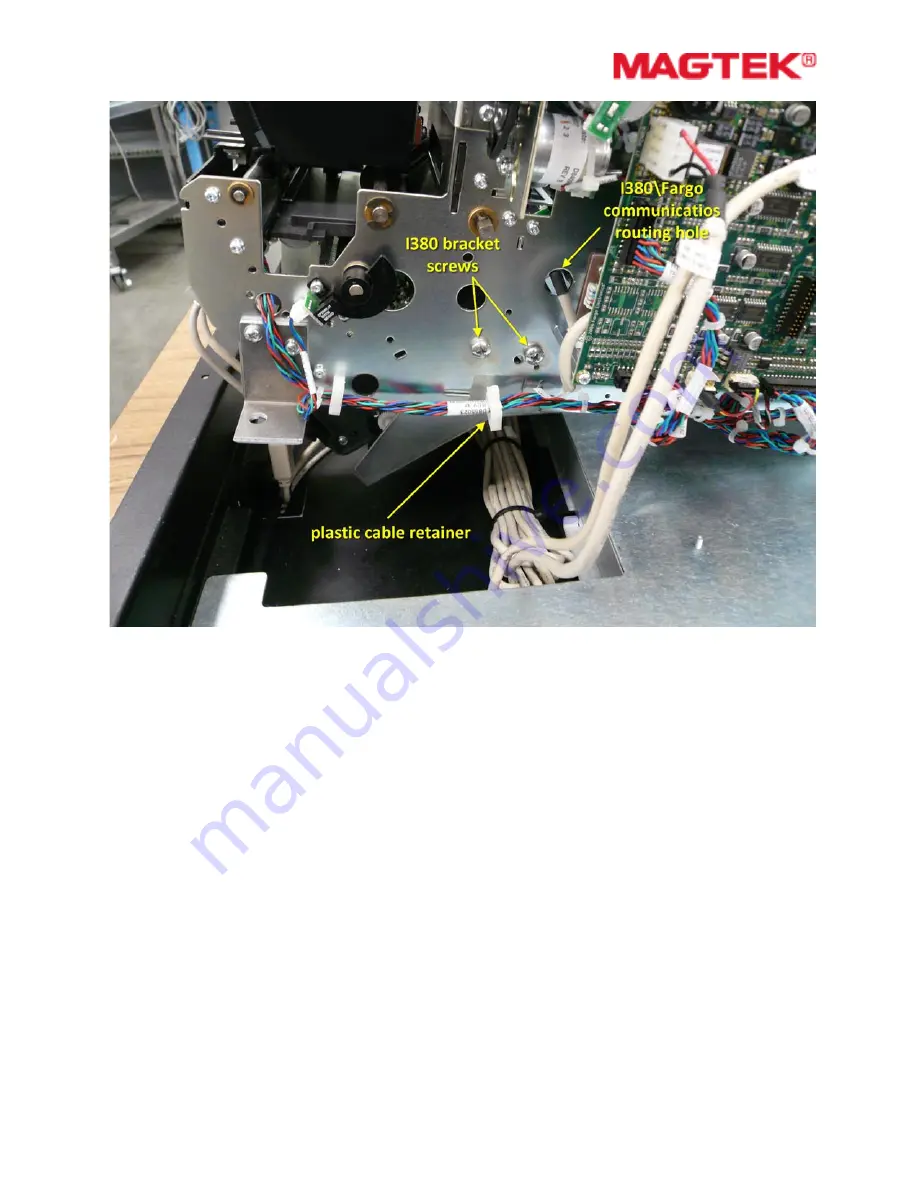
Figure 3
4.
Place one hand underneath the I380 bracket while removing the last screw and allow the
I380 assembly to drop away from the printer in a controlled manner. As you are doing so,
pull the communications cable through the routing hole in the printer.
How to Install the New I-380 Encoder
1.
Push the communications cable up and out through the routing hole in the printer,
reversing the removal process.
2.
Slide the bracketed I380 Encoder unit into the printer at a downward-facing angle. Align
the screw holes of the I380 bracket to the corresponding screw holes on the printer.
3.
Partially install the four screws and split washers that secure the bracketed I380 to the
printer but do not tighten.
4.
Use one hand to pull the bottom of the I380 encoder assembly upwards. Tighten the four
screws while holding the I380 in place to ensure that the encoder assembly is biased at
the proper angle to the printer, see figure 4.


