


14
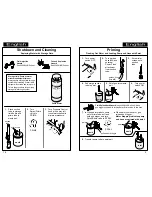
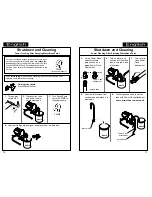
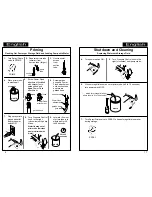
Shutdown and Cleaning
1.
Clean tip & guard and inlet
screen with water and a brush.
inlet screen
tip & guard
2.
Remove gun filter, and clean it with water and a brush.
Cleaning Tip & Guard, Inlet Screen, and Gun Filter
gun filter
(XR5)
gun filter
(XR7/XR9)
First unscrew
hose
Then unscrew
brass fitting
First unclip
trigger guard
Then unscrew
handle
3.
Install gun filter with round end pointing up.
gun filter
(XR5)
install with
round end up
gun filter
(XR7/XR9)
install with
round end up
First attach
brass fitting
Then attach
hose
First screw
on handle
containing
cleaned filter
Then clip
trigger guard
4.
Screw tip & guard assembly onto gun,
and tighten retaining nut by hand.
7
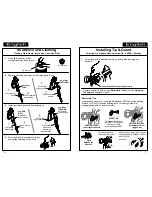
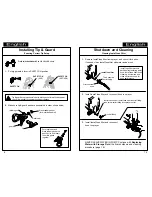
Installing Tip & Guard
Screwing Tip & Guard Onto Gun with Tip in SPRAY Position
System is ready to spray. Read Reversible Tips below and Spraying
Techniques on pages 8 and 9.
3.
Screw tip & guard assembly onto gun, and tighten retaining nut
by hand.
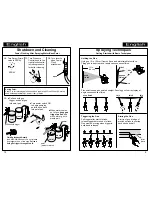
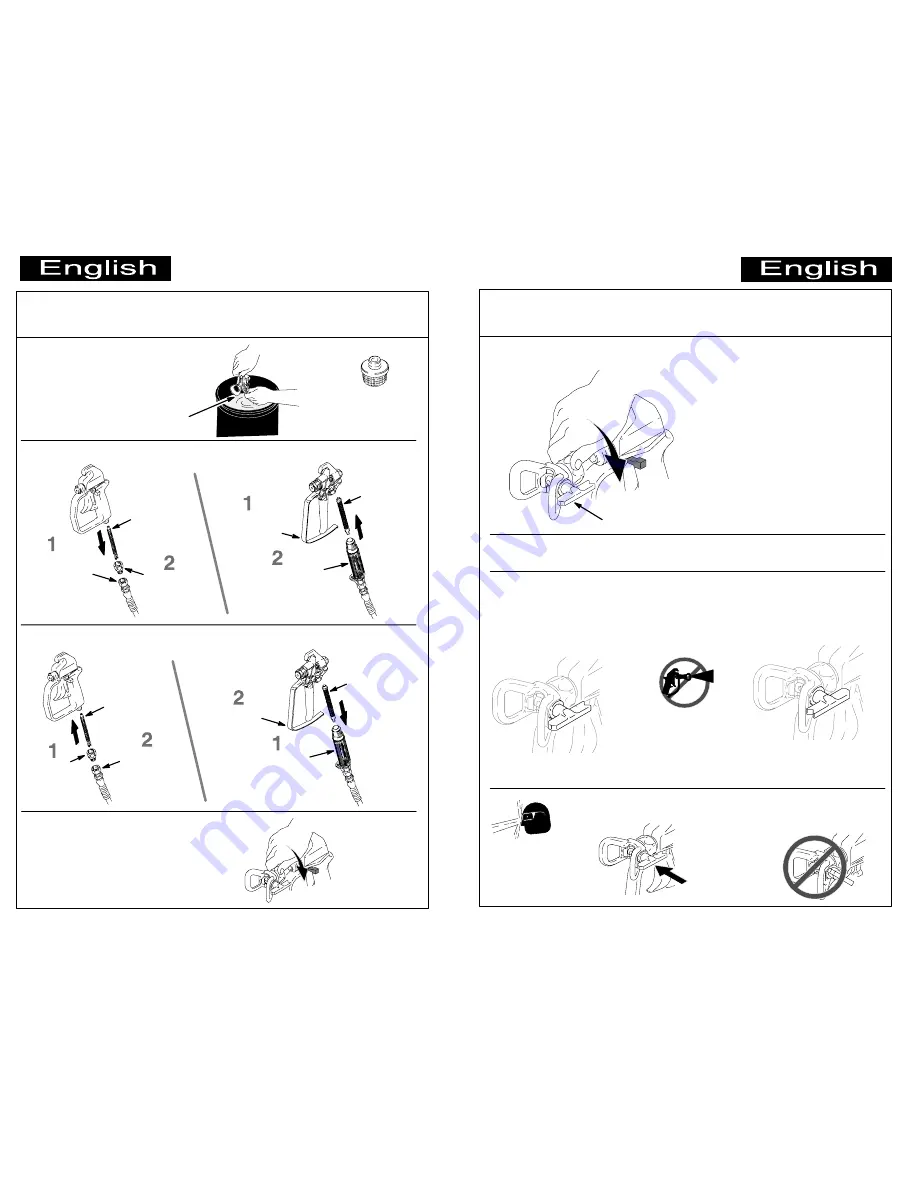
Reversible Tips
Arrow-shaped handle on reversible tip indicates SPRAY position pointing
forward or UNCLOG position pointing back. This design allows for
unclogging tips with no tip disassembly.
UNCLOG position
(pull trigger to clear
clogged tip)
SPRAY position
(pull trigger to paint)
Fluid
Splashback
Hazards
arrow-shaped handle pointing forward
SAFETY ON
Put trigger safety lever
in SAFETY ON position
before you rotate
arrow-shaped handle.
Tip must be pushed
all the way into guard.
Never pull gun trigger when arrow-
shaped handle is between SPRAY
and UNCLOG
positions.


