4.
The Battery
4.1
Installing and removing the battery
To remove the battery, turn the key to the unlock position so
that the lock disengages from the battery guide rail.
Fold your seat up by pressing on the lever beneath the
saddle. Remove the battery by pulling it upward along the
guide rail. The battery must remain vertical when removing it
from the track.
When reinserting the battery be sure to hold it all the while.
Do
not let it fall into its socket, this may damage the
connecting pins below.
4.2
Charging the battery
Never let a battery be charged unattended.
The battery’s voltage level is indicated by the LED lights located on top of the battery,
as well as on the display unit located on the handlebars. Your battery must be
charged in an ambient temperature, on a non-flammable and dry surface, and away
from any sources of heat, humidity or flammable materials. The battery and charger
must never be covered while charging.
Here are the steps to follow when charging your battery:
Step 1
Turn the battery off by switching the key to the OFF position.
Step 2
Plug the charger into the wall socket and then insert the
charger’s plug into the battery.
Step 3
The charger’s LED indicator while light up in the following manner:
• The red LED light on indicates: the battery is being charged.
(
A)
• The red LED light turning green (B) indicates:
The battery is fully charged and you can now unplug the charger.
(A)
(B)
It takes 6.5 hours for the battery to be fully charged when using the standard charger
that’s supplied with your e-bike.
Содержание Premium 48V
Страница 1: ......
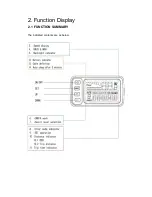
Страница 4: ...XQFWLRQ LVSOD 81 7 21 6800 5 7KH LQGLFDWHG FRQWHQWV DUH DV EHORZ...


