MAGNOVENT FR3-43 Скачать руководство пользователя страница 3

!

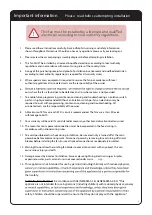
Important information


- Please  read befo re attempting installation

3

1. Please read these instructions carefully, be mindful of all warnings and safety information

shown throughout this manual. Should you have any questions please call your local agent.

2. Please review the accompanying assembly diagrams before attempting installation.

3. This fan MUST be installed by a licensed & qualified electrician according to local authority

regulations and in accordance with current wiring rules of the country/state.

4. A copy of the purchasing receipt and proof of installation by a licensed and qualified electrician

according to local authority regulations is required for all warranty claims.

5. Where special access equipment is required to service the fan in accordance with local

authority regulations all associated costs are the responsibility of the owner.

6.

outs where the fan is found not to be defective and / or where access is not provided.

7. To enable future programming, maintenance, cleaning and troubleshooting an isolation switch

per fan is highly recommended. Without an isolation switch per fan, an electrician maybe

required to assist with programming, maintenance, cleaning and troubleshooting. All

associated costs are the responsibility of the owner.

8. A Maximum of 8 fans on each RCD / circuit is recommended. The fans are a Class 5 Device

with leakage to Earth.

9. Your warranty will be void if a solid state dimmer or any other brand of wall controller is used.

10. The means for mains power disconnection must be incorporated in the fixed wiring in

accordance with national wiring rules.

11. To avoid possible electric shock during installation, be sure electricity is turned off at the main

power box before commencing work. Disconnect power by removing fuse or turning off circuit

breaker before installing the fan. Ensure all spliced connections are adequately insulated.

12. Warning! Do not allow the rotating fan blades to come into contact with any object, this can

cause serious injury or death.

13. Damage caused by incorrect installation, Force-majeure, lightning, electrical surges & spikes,

exposure to water, pests or moisture is not covered under warra

nty.

14.

This appliance is not intended for use by person

s

 (including


children) with reduced physical,

their safety.

Australia, New Zealand:

 In accordance with AS/NZS60355-1 & ASNZS60355-2-80: “This

appliance is not intended for use by persons 

(

including


children) with reduced physical, sensory

safety. Children should be supervised to ensure that they do not play with the appli

a

nce.”

This fan must be installed by a licensed and quali ed

Содержание FR3-43

Страница 1: ...MAGNOVENT B U I L D I N G E F F I C I E N C Y INSTALLATION GUIDE FR International edition 2019 07...

Страница 2: ...na onal distributer retailer AEIM03AE MAGNOVENT S L All rights reserved July 2020 The technical documenta on is updated periodically MAGNOVENT S L reserves the right to modify all or part of the conte...

Страница 3: ...shooting All associated costs are the responsibility of the owner 8 A Maximum of 8 fans on each RCD circuit is recommended The fans are a Class 5 Device with leakage to Earth 9 Your warranty will be v...

Страница 4: ...io n 12 Care and Cleanin g 13 Troubleshootin g 13 If the fan is nois y 13 If the fan rotates but does not create much airflo w 13 General Informatio n 14 Normal Wear and Tear 14 Ceiling Fan Warrant y...

Страница 5: ...llowing CEILING SPACER x 2 HANGER BRACKET MOTOR ASSEMBLY CONTROL RECEIVER MOTOR HOUSING 50 FAN BLADE X3 43 FAN BLADE X3 OR 60 FAN BLADE X3 OR REMOTE CONTROL HUB UPPER HUB LOWER AAA BATTERIES x2 OR TIM...

Страница 6: ...size and strength to support a 35Kg 77lbs load If a between two beams Proper care must be and stronger screws Ceiling Joist OPTION A OPTION B Embedded STEP 2 Connecting M ains Power to Terminal Block...

Страница 7: ...in suspension Installing R eceiver into Hanger B racket 7 STEP 3 Learn Switch Switch to O to pair receiver with the Remote control and Switch to X to lock the pairing code with the Remote control Sli...

Страница 8: ...3PIN connector between Mains Power and Reciever 3PIN Mains Power to Receiver Aerial 3PIN Receiver to Motor Fix Remote Control Aerial to ceiling within circle of Fan Motor Housing Housing perime ter S...

Страница 9: ...T SWITCH 1 4 5 3 2 Pairing per Remote Control O LIGHT DIMMING LEARN BUTTON LIGHT SWI TCH LIGHT ON OFF Pairing the Remote Control NOTE 1 On Receiver Verify that the Learn switch is in the O LEARN BUTTO...

Страница 10: ...oles on the Housing and move upwards Push tabs inwards slightly before sliding upwards STEP 8 Assembling the Fan Blades A B Place the Hub Upper onto a clean working area with the 2 holes in the Hub Up...

Страница 11: ...er No liability is accepted if the Silicone ring is the clearance X between the ceiling and motor housing is equal all way round Align Connector and slide fan D Hold push up Fan Blades and insert Pivo...

Страница 12: ...engaged Re check the correct assembly by gently pulling on the LED LIGHT A 150mm 6 B 26 6mm ROD Suitable for Raked Ceiling up to 15 B Extension Rod Length 115mm Rod 4 17 32 600mm Rod 23 5 8 900mm Rod...

Страница 13: ...iling Kit CEILING JOIST B C a B Extension Rod Length 115mm Rod 4 17 32 600mm Rod 23 5 8 900mm Rod 35 7 16 Accessories Required Included Not Included Not Included C Clearance 200mm min 200mm min a Angl...

Страница 14: ...5 SPEED 6 FR3 43 70rpm 4 5W 57rpm 4 4W 57rpm 4 5W 99rpm 6W 93rpm 9 3W 80rpm 6 7W 126rpm 8 4W 122rpm 11W 101rpm 9 6W 151rpm 11 3W 142rpm 15W 126rpm 14 5W 181rpm 15W 160rpm 20 4W 150rpm 22 5W 207rpm 20W...

Страница 15: ...xtreme cases only causing the blades to wobble during use This is likely to be more apparent on fans with an extension rod Regular cleaning of the blade is recommended to prevent dust from building up...

Страница 16: ...by Aeratron Pty Ltd or the retailer during this 3 year period The cost of obtaining or using special access provide such equipment and have it safely installed and operated Remote Control Warranty Per...

Страница 17: ...not installed by a licensed electrician 3 Repair of a ceiling fan used incorrectly accidentally damaged ed in any way or not serviced in 4 Travelling costs incurred by Aeratron Pty Ltd personnel or s...

Страница 18: ...________ Electricians Details Model ______________________________________________ Colour ______________________________________________ Date of Purchase ______________________________________ WARRANT...

Страница 19: ...HEADQUARTERS SOCIAL MEDIA P E T ctica c Ma a 32 46980 Paterna Valencia Spain 34 96 134 12 24 info magnovent eu www magnovent eu MagnoventClimateSolutions Magnovent Magnovent 19...

Страница 20: ...full credit for the desich of your Aeratron fan we need to admit we weren t the rst to think of it The pro le of the Aeratron blade and the winglet at its end reduce turbulence providing more air ow w...

Отзывы: