background image

37

English

3139 246 XXXXX

Discs for recording

Two different formats of DVD recordable
discs can be used with this DVD
recorder:

DVD+RW


(DVD ‘plus’  Rewritable)

– Discs are re-writable can be used for
multiple recordings once existing data is
erased.
– To prevent accidental loss of
recordings, when you starting recording,
hold down the RECORD button until
‘SAFE RECORD’ message appears.

DVD+R


(DVD ‘plus’  Recordable)

– Discs can only be used for a single
recording.  Each new recording is always
added at the end of all previous
recordings as existing recordings cannot
be overwritten.
– Editing can be made on DVD+R discs
as long as they have not been finalized.  It
is also possible to create additional
chapter markings.
– You can also delete unwanted
recordings.  However, the disc space
occupied by the deleted recordings
cannot be recovered for further
recording.
– To play a DVD+R disc on other DVD
player, it must be finalized (see page 45
“Playing your recording on other DVD
player (DVD+R)”.) After this is done, no
more data can be added to the disc.

IMPORTANT!
Unrecordable pictures

Television programs, films, video tapes,
discs, and other materials may be
copyrighted and therefore they cannot be
recorded on this recorder.

Recording settings

Before recording, you may have to set up
the recording mode or select the settings
that best suit your needs and
requirements.

1

Press 

SYSTEM-MENU

 on the remote

control.

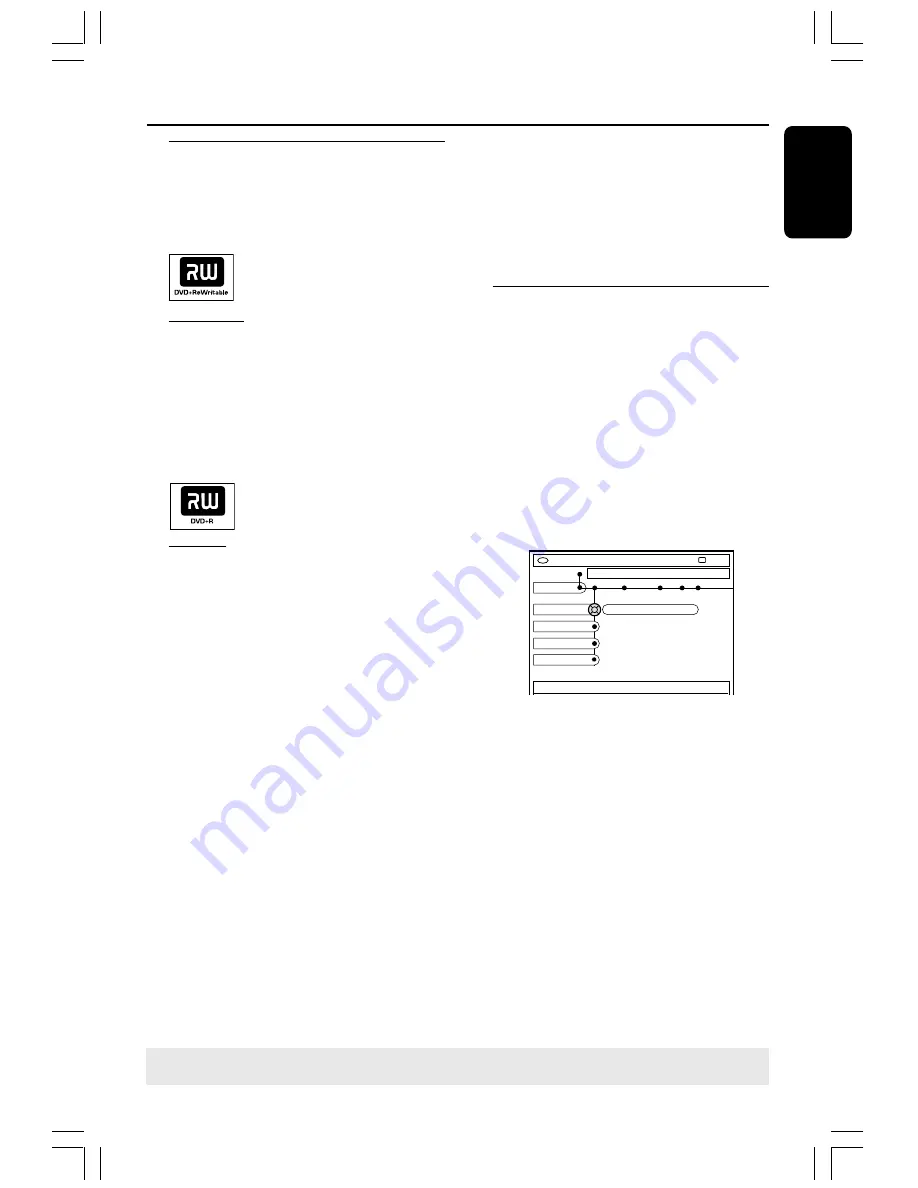
The system menu appears on TV.

2

Press 

4

 to select { 

Preferences

 .}

3

Press 

2

 to select { 

Recording

 .}

DVD-VIDEO-TITLE 04|CO1

[PLAY] [EDIT] [OK] = PLAY

Recording  

STOP

Preferences

Record mode

Language

M2

Chapters

Filter

4

Press 

3


4

 to select the setting for

recording.

Instructions for adjusting the settings

are provided in the following pages.

5

To exit, press 

SYSTEM-MENU

.

TIPS:

To play a DVD+R on other DVD players, see “Finalizing disc (DVD+R)”.

TIPS:

Press 

1

 to go back to previous menu item.  Press 

SYSTEM-MENU

 to exit the menu.

Recording

MRV660_17_Eng40

9/3/05, 10:25 AM

37

Содержание MRV660

Страница 1: ...rgent d astuces destinées à simplifier l utilisation de votre produit Magnavox Toutefois si vous ne parvenez pas à résoudre votre probléme vous pouvez accéder à notre aide en ligne à l adresse www magnavox com ou formez le 1 800 661 6162 Francophone 1 800 705 2000 English speaking Veillez à avoir votre produit à portée de main Gracias por escoger Magnavox Necesita ayuda inmediata Lea primero la Gu...

Страница 2: ...g service networks in the industry What s more your purchase guaran tees you ll receive all the information and special offers for which you qualify plus easy access to acces sories from our convenient home shopping network Most importantly you can count on our uncompro mising commitment to your total satisfaction All of this is our way of saying welcome and thanks for investing in a MAGNAVOX prod...

Страница 3: ...n a cart is used use caution when moving the cart apparatus combination to avoid injury from tip over 13 Unplug this apparatus during lightning storms or when unused for long periods of time 14 Refer all servicing to qualified service personnel Servicing is required when the apparatus has been damaged in any way such as power supply cord or plug is damaged liquid has been spilled or objects have f...

Страница 4: ...électrique édicté par le Ministère des Communications du Canada CONSUMERS SHOULD NOTE THAT NOT ALL HIGH DEFINITION TELEVISION SETS ARE FULLY COMPATIBLE WITH THIS PRODUCT AND MAY CAUSE ARTIFACTS TO BE DISPLAYED IN THE PICTURE IN CASE OF 525 OR 625 PROGRESSIVE SCAN PICTURE PROBLEMS IT IS RECOMMENDED THAT THE USER SWITCH THE CONNECTION TO THE STANDARD DEFINITION OUTPUT IF THERE ARE QUESTIONS REGARDIN...

Страница 5: ...s connection is used for the transfer of high bandwidth digital signals as used by digital video DV camcorders Audio and video signals are transmitted using a cable This product incorporates copyright protection technology that is protected by method claims of certain US patent and other intellectual property rights owned by Macrovision Corporation and other rights owners Use of this copyright pro...

Страница 6: ... Pausing playback slow motion play 35 Selecting various play mode 36 Repeat play 36 Repeating a specific segment A B 36 Shuffle play 36 Scan disc 36 Special Functions 5 Care and Safety Information Setup 8 Cleaning discs 8 About recycling 8 General Information Introduction 9 Accessories supplied 9 Region codes 9 Connecting toTV General 10 Selecting a suitable connection to your TV 10 Setting the TV...

Страница 7: ...merge split hide 47 Editing title divide append index picture 47 48 Deleting chapter markers 48 Photo editing 48 Using the Browser Browsing the disc 49 Color coded buttons functions 49 Browsing the picture disc 50 Adding pictures to an album 50 Changing the picture order within an album 51 Deleting an album 51 Deleting picture in an album 51 Changing the slide show settings 52 System Menu Preferen...

Страница 8: ...liquid filled objects lighted candles Care and Safety Information Cleaning discs Some problems occur because the disc inside the recorder is dirty frozen picture sound disruptions picture distortions To avoid these problems discs should be cleaned on a regular basis To clean a disc use a micro fibre cleaning cloth and wipe the disc from the center to the edge in a straight line CAUTION Do not use ...

Страница 9: ... If you have questions or if problems come up during operation please see the chapter Troubleshooting If you need further assistance please call the customer support service for your country The corresponding telephone numbers and e mail addresses are given in the guarantee booklet ALL 1 Accessories supplied Remote control and batteries Audio Video AV cables Antenna cable Quick Use Guide Region co...

Страница 10: ...the DVD recorder to turn it on 2 Turn on the TV and set it to the correct video in channel You should see the blue DVD background screen or the first installation screen on the TV Usually this channel is between the lowest and highest channels and may be called FRONT A V IN VIDEO See your TV s manual for more details Or you may go to channel 1 on your TV then press the Channel down button repeated...

Страница 11: ... output jack to the antenna input jack at the back of your TV set 3 Use the component video cable to connect the DVD recorder s COMPONENTVIDEO OUT 1 jacks to the corresponding component video input jacks or labeled as YUV or Y Pb Cb Pr Cr at the back of yourTV set 4 Use an audio cable red white to connect the DVD recorder s AUDIO L R OUT 1 jack to the audio input jack at the back of your TV set or...

Страница 12: ...e page 24 Before enabling the progressive scan function you must ensure that yourTV progressive scan function is turned on refer to yourTV owner s manual Helpful Hint To switch between interlaced and progressive scan output press and hold while reconnect its MAINS to the power supply The display panel will show Progressive Scan if the progressive scan function is enabled Connecting toTV cont d MRV...

Страница 13: ...HS cable to connect the DVD recorder s S VIDEO Y C OUT 2 jack to the S Video In jack at the back of your TV set or labeled as S Video In or SVHS Option 2 Using S Video Y C jack 1 4 Use an audio cable red white to connect the DVD recorder s AUDIO L R OUT 2 jack to the audio input jack at the back of your TV set or labeled as AV In or Audio In 5 Connect the power cable from the DVD recorder s MAINS ...

Страница 14: ...w plug to connect the DVD recorder s VIDEO CVBS OUT 2 jack to theVideo In jack at the back of your TV set or labeled asVideo In AV In or Composite Option 3 Using Video CVBS jack 1 4 Use the supplied AV cables red white plugs to connect the DVD recorder s AUDIO L R OUT 2 jack to the audio input jack at the back of your TV set or labeled as AV In or Audio In 5 Connect the power cable from the DVD re...

Страница 15: ...ble from the DVD recorder s MAINS to the power supply TV 1 2 3 4 Press STANDBY ON 2 on the DVD recorder to turn it on The message IS THE TV ON appears on the display panel 5 Turn on the TV power Select the correct Video In channel at the TV see page 10 To switch between channel 3 and 4 hold down button 3 or 4 on the remote control to select the respective channel The first installation menu Langua...

Страница 16: ... processed by the DVD recorder Connecting a Satellite Receiver Cable Box 1 If your Satellite Receiver Cable Box has only a single antenna output RF OUT or TO TV use the antenna cable to connect it with the ANTENNA input jack at the back of the DVD recorder 2 For complete connection to your TV set see pages 11 15 for details Alternatively you can connect it to the VIDEO CVBS or S VIDEO Y C and AUDI...

Страница 17: ...IN EXT2 input jack to the corresponding S VHS output jack on theVCR DVD player as shown on the below illustration OR Use a video CVBS cable to connect the DVD recorder s VIDEO CVBS IN EXT2 input jack to the corresponding video output jack on the VCR DVD player 2 Use an audio cable red white to connect the DVD recorder s AUDIO L R IN EXT2 input jacks to the audio output jack on theVCR DVD player CO...

Страница 18: ...cks Connecting Additional Devices cont d S VIDEO OUT L R VIDEO OUT OR AUDIO OUT 1 2 DV OUT Option 2 Using S VIDEO In or VIDEO In jack Use S VIDEO connection if you have a Hi8 or S VHS C camcorder It provides very good picture quality Alternatively you can useVIDEO connection if your camcorder has only a single video output CompositeVideo CVBS It provides good picture quality 1 Use a S video cable ...

Страница 19: ... DVD recorder or the amplifier may be damaged as a result You can connect the DVD recorder to an A V receiver or amplifier in order to enjoy the home theater system s surround sound capabilities Use a coaxial cable to connect COAXIAL jack to one of the following devices with the same input jack an A V receiver or an A V amplifier with a digital multi channel sound decoder a receiver with two chann...

Страница 20: ...current TV channel or the current video input source 7 PLAY 2 Play a disc 8 PAUSE Pause the playback or recording Press repeatedly to advance a paused picture one frame at a time 9 OK Store or confirm an entry 0 1 2 Cursor buttons for moving to the left or right 34 Cursor buttons for moving up down or change TV channel at the recorder in Tuner mode SYSTEM MENU Access or exit the system menu RETURN...

Страница 21: ...e disc tray BROWSER Display the on screen Media Browser that allows you to browse through and manage the contents stored in the current disc DISC MENU Access to DVD s disc menu or Index Picture screen of a DVD R W SELECT Select a function Toggle between upper and lower case characters while using the alphanumeric keypad EDIT Access or exit the edit menu Color coded buttons A number of functions ar...

Страница 22: ... Using the remote control to operate the system 1 Aim the remote control directly at the remote sensor iR on the front panel 2 Select the source you wish to control by pressing one of the source select buttons on the remote control for exampleTV TUNER 3 Then select the desired function for example S T Using the alphanumeric keypad to enter the characters ABC ABC DEF JKL TUV Press a number button a...

Страница 23: ...t channel number CAM 2 1 STANDBY ON 2 Turn on or off the DVD recorder 2 Disc tray 3 OPEN CLOSE ç Open or close the disc tray 4 Display panel Show information about the current status of the DVD recorder 5 PLAY 2 Play a disc 6 RECORD 0 Start recording the current TV channel or the current video input source 7 PREV CH Go to the previous chapter track do a reverse search or go to the previous channel...

Страница 24: ...s and language options IMPORTANT You have to turn on yourTV and select the correctVideo In channel to see the First Installation menu You have to complete the First Installation before you start operating the DVD recorder 1 Press STANDBY ON 2 to turn on the DVD recorder The Language and Country menu appears on theTV LANGUAGE AND COUNTRY Select Language and Country Language Country Done Menu Englis...

Страница 25: ...e check the Date and if incorrect navigate right to correct the Date Time Date Done 09 00 PM 06 30 2004 OK Check if the information on the menu is correct If required changes follow steps 4 8 of Setting the time and date on page 28 Press 4 to select Done and press OK to save the changes The DVD recorder is ready for use Installing the DVD Recorder cont d TIPS Press OK to exit the initial installat...

Страница 26: ...arked you can only access these channels by pressing the corresponding number button on the remote control TV channel programming Although the DVD recorder selects availableTV channels during first installation you may want to repeat the process later if more channels become available in your area or if you are reinstalling the DVD recorder Automatic TV channel search This will erase and replace a...

Страница 27: ...eatedly to select Set up 3 Press 2 repeatedly to select Analog Ch 4 Press 4 repeatedly to select Connection and press 2 to confirm 5 Press 3 4 to select the connection the TV is using Auto Select this to enable the DVD recorder to detect the input signal automatically Cable Select this if you have connected a cable signal Antenna Select this if you have connected an antenna signal 6 Press OK to co...

Страница 28: ...tation s daylight saving time schedule Helpful Hint If you store aTV channel that transmits PBS on program channel P01 the date and time will automatically be transmitted and constantly updated when in standby Installing the DVD Recorder cont d TIPS Press 1 to go back to previous menu item Press SYSTEM MENU to exit the menu Setting the time and date Manual time date settings If the DVD recorder ha...

Страница 29: ...t Set up 3 Press 2 repeatedly to select Language DVD VIDEO TITLE 04 CO1 Language STOP Set up Menu Audio Subtitle Country 4 Press 3 4 to select one of the options below at a time then press 2 Menu language of the OSD menu Audio playback language Subtitle subtitle language Country location 5 Press 3 4 to select a desired language and press 1 to confirm 6 Repeat steps 4 5 for other settings Installin...

Страница 30: ...nt to play facing up 4 Turn on the TV power Select the correct Video In channel at the TV 5 Playback will start automatically or a dialog will appear on the TV see next page Playable discs Using this DVD Recorder you can play and record on the following discs Recording and Playback DVD RW DVD plus Rewritable can be recorded on over and over DVD R DVD plus Recordable can be recorded only once Playb...

Страница 31: ...ng playback press T C on the remote to select Title or Chapter then press 2 To stop playback press STOP 9 Playing a Super Video CDs Super Video CDs may feature PBC Play Back Control This allows you to play the video CDs interactively following the menu on the display 1 Insert a Super Video CD If the PBC is on the disc index menu will appear on theTV 2 Use alphanumeric keypad 0 9 to input your sele...

Страница 32: ...g a picture disc slide show You can display JPEG pictures in the selected roll automatically one after the other at adjustable intervals 1 Insert a JPEG picture disc CD DVD RW DVD R If the picture overview appears on theTV 2 Use 1 2 3 4 to navigate within the menu and select a photo roll folder to play 3 Press PLAY 2 to start the slide show playback OR Press OK to show 12 thumbnail pictures You ca...

Страница 33: ... 2 to go to the next digit field You may also use the alphanumeric keypad 0 9 to enter the correct digit directly 3 Press OK to confirm Playback skips to the selected time Changing subtitle language This operation works only on DVDs with multiple subtitle languages you can change the language you want while playing DVD This function can also be accessed via the Green button on the remote control 1...

Страница 34: ...the audio language setting temporarily SAP or Off if the additional language is available in the TV programs Once the DVD recorder is turned off and on again it will return to the default settings see page 38 Additional Playback Features cont d Switching camera angles This option is only available with DVDs that contain sequences recorded from different camera angles This allows you to view the pi...

Страница 35: ...OR Press BROWSER on the remote control to display the titles list Then press 3 4 to select a title and press OK to confirm Searching forwards backwards You can fast forward or fast reverse a disc at four eight or thirty two times normal playback speed 1 During playback hold down reverse or forward to switch to the search function The Search status bar appears It displays the Search speed 32 8x 4x ...

Страница 36: ... press Blue button REPEAT A B on the remote control This indicates that the start point has been marked 2 Press Blue button REPEAT A B on the remote control again to mark the end of the segment A visual marker is placed on the program bar Playback skips to the start of the marked segment 3 To cancel repeat playback press Blue button again Shuffle play Select shuffle play mode to allow the DVD reco...

Страница 37: ...c on other DVD player it must be finalized see page 45 Playing your recording on other DVD player DVD R After this is done no more data can be added to the disc IMPORTANT Unrecordable pictures Television programs films video tapes discs and other materials may be copyrighted and therefore they cannot be recorded on this recorder Recording settings Before recording you may have to set up the record...

Страница 38: ...Recording cont d Recording language Some TV programs broadcast additional audio language SAP second audio program Usually second audio means the program has a second language available For example if a program is available in English and Spanish with being the SAP option When you play the recording you can play only in the audio you recorded 1 Press 4 to select Language and press 2 to enter its op...

Страница 39: ...XT 2 IN EXT2 S VIDEO Y C orVIDEO CVBS sockets at the back EXT 1 IN EXT1 COMPONENT VIDEO sockets at the back 4 Press RECORD 0 to start recording For DVD RW disc to prevent accidental loss of recordings hold down the RECORD 0 until the message SAFE RECORD appears on the display panel TIPS To play a DVD R on other DVD players see Finalizing disc DVD R TIPS Underlined option is the factory default set...

Страница 40: ...le on the disc Manual recording with automatic turn off One Touch Recording 1 Follow the steps 1 3 of Manual Recording on pages 39 40 2 Press RECORD 0 on the remote control twice to start 30 minutes recording Each time you press RECORD 0 you will add 30 minutes to the recording time The recorder will stop recording at the designated end time and turn off automatically If you wish to delete the rec...

Страница 41: ... and Date menu will appear on the screen see page 28 3 Press the matching color coded button on the remote control to select NEW TIMER The timer entry screen appears TIMER 11 55 PM Start time 11 56 PM Stop time 12 26 PM Date 06 30 2004 Channel CH001 Repeat Once M1 Clear all Store Cancel Change start time Record Mode 4 Press 3 4 to select an entry in the menu and press 2 to confirm 5 Press 3 4 to s...

Страница 42: ...r will switch to standby mode automatically before the programmed recording begin The TIMER icon will light up on the display panel if a timer recording is set Helpful Hints Set the timer recording one minute ahead of the program s start time This helps ensure the entire program is recorded as the disc requires about 30 seconds to prepare for recording Program timer recording from CAM2 external in...

Страница 43: ...timer entry screen of the current selected timer program appears 5 Follow the steps 4 9 of Programming recordings on pages 41 42 to make the necessary changes Deleting a programmed recording 1 Turn on the TV power Select the correct Video In channel at the TV 2 Press TIMER on the remote control The timer overview appears 3 Press 3 4 to select a timer program which you want to delete 4 Press the ma...

Страница 44: ...clear the entry on the currently selected menu item Index Picture screen The Index Picture screen shows your recordings on a DVD RW or DVD R RW MY MOVIES STOP PLAY EDIT OK PLAY MY MOVIES 1 7 Static lights The Pianist The island of lost dream Lord of the Rings The T Habla Con Ella The Ring 00 22 08 M4 14 01 03 Delete Protect 01 20 00 M4 21 02 03 00 32 02 M4 28 06 03 02 20 16 00 00 An Index Picture ...

Страница 45: ...ible in the menu and press OK to confirm Helpful Hint If the Compatible not available for selection it means that the disc is already compatible Editing Finalizing Recording cont d Playing your recording on other DVD player DVD R This function is necessary for a DVD R in order to be played back on a DVD player Otherwise the DVD R will play only on this DVD recorder After finalized no further recor...

Страница 46: ...ll set the chapter for unhide Editing Finalizing Recording cont d Video editing In the edit video mode the entire recording will be played back regardless of whether they are hidden or not 1 Insert a recorded DVD RW or an unfinalized DVD R The Index Picture screen appears on the TV 2 Press 3 4 to select a recording 3 Press EDIT on the remote control The edit menu appears 4 Press 3 4 to select Vide...

Страница 47: ...x picture Editing chapter merge split hide 1 Start playback a recorded DVD RW or an unfinalized DVD R 2 Press EDIT on the remote control 3 Press the matching color coded button on the remote control to select Chapter The chapter editing menu appears RW SHREK EDIT MODE EDIT Exit Merge Back Split Hide PAUSE 00 00 00 01 02 4 Press the matching color coded button on the remote control to make your edi...

Страница 48: ...the currently selected item Album edit name Photo edit date 1 Insert a recorded DVD RW or an unfinalized DVD R 2 Use 1 2 3 4 to select an entry in the menu 3 Press EDIT on the remote control The relevant edit menu appears 4 Press 3 4 to change the character number or make an entry by using the alphanumeric keypad 0 9 Press 1 2 to move to the previous or next entry field 5 Press OK to confirm the c...

Страница 49: ...s 3 4 to view the detailed overview of the selected title chapter The content is displayed within two panels left panel displays the titles of the media and right panel displays the information of the current title 4 To start playback of the current title press PLAY 2 To change the disc content information press EDIT see page 45 Changing the disc title name Helpful Hints The information showed on ...

Страница 50: ...menu and press 3 4 to select a desired photo roll folder DVD Photo Photo Rolls All Photo Rolls 01 02 2003 1 01 02 2003 1 01 02 2003 2 01 02 2003 3 Berwang Davoux Sylvia 01 02 2003 42 photos Stop To Album PLAY RETURN BROWSER For overview press OK 3 Press OK to display the picture overview The 12 roll thumbnails picture screen appears DVD Photo Rolls Roll KYZ To Album Select All Select Rotate 06 06 ...

Страница 51: ...remote control to select Select to confirm each selected photo Select Rotate to rotate the selected photo in 90 degree clockwise increments 5 Press the matching color button on the remote control to select Move A navigator will appear on the menu enable you to select the position between the photos 6 Use 1 2 3 4 to move the navigator around the menu and press OK to confirm the position where you w...

Страница 52: ...oll album folder 3 Press PLAY 2 to start slide show play Album 001 Photo 001 PAUSE EDIT RETURN STOP BROWSER Zoom Repeat Speed Up Speed Down Zoom Select this to activate zoom mode In zoom mode Use 1 2 3 4 to pan through the zoomed image Press the matching color buttons ZOOM OUT or ZOOM IN repeatedly to select the desired zoom ratio 2x 4x 8x Select End to exit zoom mode Repeat Select this to toggle ...

Страница 53: ...enu item Press SYSTEM MENU to exit the menu Recording For more information on this menu please see pages 37 39 Recording settings Sound DVD VIDEO TITLE 04 CO1 Sound STOP Preferences Sound Mode Night Mode Sound mode You can select from the following settings how sound will be played back by devices connected to the analog outputs L R AUDIO OUT Stereo To hear sound from the left and right audio chan...

Страница 54: ... panel will show various features offered by the system while in standby mode Disc DVD VIDEO TITLE 04 CO1 Disc STOP Preferences Adapt menu Delete all Adapt menu If a DVD RW has been recorded in a computer drive or in another DVD recorder the Picture Index screen may not be displayed correctly This feature allows you to change the format supported by this DVD recorder Select Adapt menu and press OK...

Страница 55: ...Press 1 to confirm 7 To exit press SYSTEM MENU System DVD VIDEO TITLE 04 CO1 System STOP Set up Auto standby Second RC OSD Display PBC Version Info Auto standby The system will automatically turn on to standby mode if you do not press any buttons within 15 minutes after a disc has stopped playing or in Browser mode This is a power saving feature On Turn on Auto standby mode Off Turn off Auto stand...

Страница 56: ...eo output DVD VIDEO TITLE 04 CO1 Video output STOP Set up TV shape Black level Horizontal Progressive TV shape The picture shape can be adjusted to fit your TV 4 3 Letterbox For a wide screen display with black bars on the top and bottom 4 3 Panscan For a full height picture with the sides trimmed 16 9 For wide screen TV frame ratio 16 9 Black level Adapts the color dynamic for NTSC disc Normal No...

Страница 57: ...e scan On Select this to enable progressive scan function Off Select this to disable the progressive scan function Audio output After connecting the DVD recorder to your TV and other devices you may need to change the digital output setting Adjust the Digital Output only if you use the DVD recorder s COAXIAL jack DVD VIDEO TITLE 04 CO1 Audio output STOP Set up Digital output 96 kHz Digital output ...

Страница 58: ...four digit you prefer 5 Press 4 repeatedly to select Change pin and press 2 to confirm Please enter New Pin New Pin Pin Code Cancel 6 Use the alphanumeric keypad 0 9 to enter your new four digit pin code You must enter the same pin code a second time to confirm it To cancel your change press 4 to select Cancel and press OK to confirm Setting the country of origin The Parental control levels depend...

Страница 59: ...ck the disc while in browser mode 1 Press the BROWSER on the remote control The disc content menu appears 2 Press the matching color coded button on the remote control to select ChildLock The disc is now locked You must enter the four digit pin code the next time when you insert the disc Helpful Hint Two sided DVDs and multi volume discs may have a different ID for each side volume To completely u...

Страница 60: ... pin Level 1 2 3 4 6 Press 3 4 to select the desired parental level and press 1 to confirm To disable Parental controls and allow all discs to play select Rating explanations Parental Control is not active 1 Childsafe acceptable for viewers of all ages 3 Parental Guidance suggested 4 Unsuitable for children under age 13 6 Restricted recommended that parents restrict children under 17 from viewing ...

Страница 61: ...M Audio Performance DA Converter 24 bit 192 kHz AD Converter 24 bit 96 kHz Signal Noise 1kHz 105 dB Dynamic range 1kHz 90 dB Cross talk 1kHz 105 dB Distortion Noise 1kHz 90 dB Rear Connections ComponentVideo Out In S video Out In Video CVBS Out In Audio left right out Digital audio out coaxial RF antenna in RF TV out Mains Front Connections i LINK DV in IEEE 1394 4 pin S video in Video in Audio le...

Страница 62: ...PEN CLOSE on the front of the recorder while you reconnect the power cord to the power supply 3 As soon as the time or 00 00 appears on the display within 6 10 seconds release the buttons There is a technical problem Disconnect the DVD recorder from the power outlet for 30 seconds then connect again If the DVD recorder still will not operate then reset it to the default factory settings 1 Disconne...

Страница 63: ...he disc Sometimes a small amount of picture distortion may appear This is not a malfunction If you set the Record Mode to a low quality speed change to a higher quality speed after you finish recording Leaving the DVD recorder set to a low quality speed may affect the picture quality when playing DVDs later Read chapter Recording Recording settings for details The recording can be made in color on...

Страница 64: ...a special function 1 Press OPEN CLOSE on the DVD recorder to open the disc tray 2 Insert the disc but do not close the tray 3 Hold down the number button 2 on the remote control until the tray closes The disc is modified 4 If this fails to produce the desired result repeat the procedure using the number button 3 on the remote control 5 You can restore the disc to its original condition by pressing...

Страница 65: ...ndby mode Select Suspend will suspend the timer recording Select Cancel recording will cancel the timer recording Either no disc was inserted or a disc was inserted that cannot be used for recordings Insert a disc that can be recorded upon Locate on the disc the right position for the recording Press STOP button Turn off the DVD recorder by pressing STANDBY ON button It has reached the maximum pro...

Страница 66: ...ER A timer recording has been programmed or is active BLOCKED The disc tray cannot be opened or closed due to some mechanical obstruction COMPATIBLE The DVD Recorder is busy making changes to make the disc DVD compatible CLOSING Disc tray is closing COPY PRO The DVD video cassette you are trying to copy is copy protected DISC ERR An error occurred when writing the title If this happens often pleas...

Страница 67: ...with PAL recordings has been inserted and an attempt was made to record an NTSC signal Insert a new disc or use a disc containing NTSC recordings PHOTO MMM NNN Number of the current photo for Photo mode MMM represents the order of the current photo NNN represents the total number of photos in the album If the number exceeds 999 999 will be displayed instead POST FORMAT The disc is being prepared a...

Страница 68: ...its high compression ratio MP3 A file format with a sound data compression system MP3 is the abbreviation of Motion Picture Experts Group 1 or MPEG 1 Audio Layer 3 By using the MP3 format one CD R or CD RW can contain about 10 times more data then a regular CD MPEG Motion Picture Experts Group A collection of compression systems for digital audio and video Multichannel DVDs are formatted to have e...

Страница 69: ...ring to product during shipping when improp erly packaged or costs associated with packaging Product lost in shipment and no signature verification of receipt can be obtained A product used for commercial or institutional purposes including but not limited to rental purposes Products sold AS IS or RENEWED SHIP IN WARRANTY For Ship In warranty repair ship the product to a Magnavox authorized repair...

Страница 70: ...70 3139 246 XXXXX CLASS 1 LASER PRODUCT Printed in China SgpJP 0511 17 1 3139 246 14762 DVD RECORDER 660 MRV660_17_Eng40 9 3 05 10 26 AM 70 ...

Отзывы: