background image


ExpressBox 3400


Install Host Interface card (STEP 3)

Begin the installation of your 

computer.  

The Host Interface card

a “full-height” bracket.

 
For low profile case applications, you may need to change t
bracket to the low profile bracket that shipped with your system
below.  This is done by removing the screws that hold the card to the 
bracket.  Be sure
action.  


WARNING  
You must only install the Host Interface card 
Only use Interface card WITH bracket. 

inserted into a PCIe slot.  Although 
conventional PCI slots, you run the risk of damaging the PCI Express host card if you insert it 
into a PCI slot. 


1.


Once the host computer is turned OFF
remove the cover. 

2.


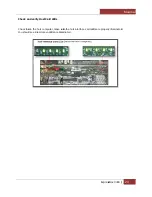
Check the red DIP switch (SW4) on the 


ExpressBox 3400 | Chapter  2     Hardware Installation

(STEP 3)    

Begin the installation of your Host Interface card by first powering down your 


Host Interface card is a “half-height,” x8-capable PCIe card mou

height” bracket. 


For low profile case applications, you may need to change the mounting 
bracket to the low profile bracket that shipped with your system, see

This is done by removing the screws that hold the card to the 

Be sure you are using proper ESD procedures when completing this 


You must only install the Host Interface card 

into a 

PCI EXPRESS SLOT

.  

Only use Interface card WITH bracket. 

This will ensure that your PCIe host card can only be 

Although a Host Interface card without brackets may fit into

conventional PCI slots, you run the risk of damaging the PCI Express host card if you insert it 

turned OFF and all power cords are disconnected from the AC outlet, 

) on the Interface card, make sure it is set to “OFF= HOST”


Magma 

Chapter  2     Hardware Installation 

15 

card by first powering down your 

capable PCIe card mounted to 

he mounting 

, see picture 

This is done by removing the screws that hold the card to the 

you are using proper ESD procedures when completing this 

This will ensure that your PCIe host card can only be 

without brackets may fit into 

conventional PCI slots, you run the risk of damaging the PCI Express host card if you insert it 

and all power cords are disconnected from the AC outlet, 

”. 

Содержание EXPRESSBOX 3400

Страница 1: ...EXPRESSBOX 3400 User Manual PCIe to PCIe Expansion Model EB3400...

Страница 2: ...15 Install PCIe Cards STEP 4 16 Aux Power Connectors 17 High Power PCIe card installation 17 Connect PCIe Cable STEP 5 19 To Disconnect Cable 19 Cable Configuration 20 Attach Power Cord STEP 6 20 Con...

Страница 3: ...Information 28 Interface Card LEDs 28 LINKUP SLOT LEDs 30 Activity LEDs 31 Backplane LEDs 31 Internal Front Fan Control Settings 32 Front Fan Removal Installation 33 Chapter 5 Troubleshooting 34 Chap...

Страница 4: ...p to help you CAUTION Used to indicate and prevent the following procedure or step from causing damage to the equipment WARNING Used to indicate and prevent the following step from causing injury DANG...

Страница 5: ...1 Before taking covers off a computer perform the following steps 2 Turn off the computer and any peripheral devices 3 Disconnect the computer and peripheral power cords from their AC outlets or inle...

Страница 6: ...hich can include wrist straps and smocks when servicing equipment You can also take the following steps to prevent damage from electrostatic discharge ESD When unpacking a static sensitive component f...

Страница 7: ...Product Name Description ExpressBox 3400 7 Slot Expansion Gen 3 Use Magma s PCI Express Expansion to create a super fast PCIe connection outside the computer The ExpressBox 3400 is the perfect solutio...

Страница 8: ...l x16 PCIe PCIe Link Cards Form Factor X8 PCIE low Profile half length LED Indicators PCIe Link width reset clock Interconnect Bandwidth PCIe Gen 3 8 GT s to all peripherals and host link Physical Cha...

Страница 9: ...uired for installation Read this manual Part List ITEM DESCRIPTION QTY 1 Host Interface card 1 2 1meter or 2meter IO cable 1 3 Power Cord 1 4 Expansion Interface Card Installed 1 4 QSG Quick Start Gui...

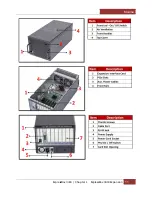
Страница 10: ...for Interface card c Slot LEDs Link and Activity LEDs 2 Interface card a Expansion and Host mode DIP switch b Speed Toggle switches c One Cable port x8 3 Power Supply a Power cord socket b On Off Swit...

Страница 11: ...Magma ExpressBox 3400 Chapter 1 ExpressBox 3400 Expansion 11...

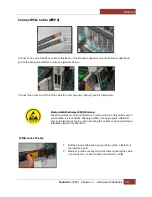
Страница 12: ...ging If you need to set a circuit card down be sure to place it inside or on top of an anti static surface For more information see Protecting Against Electrostatic Discharge in the Preface WARNING Hi...

Страница 13: ...ards High Power PCIe cards after you have verified and tested that the Magma expansion chassis is functional When installing 3rd Party PCIe cards start with one card first just to see if there are any...

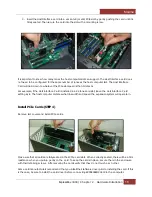
Страница 14: ...t the Expansion Interface card is already installed need to install the Expansion Interface card Interface card or install a new Expansion Interface card follow these Turn off the Expansion chassis fi...

Страница 15: ...d to change the mounting bracket to the low profile bracket that shipped with your system see This is done by removing the screws that hold the card to the Be sure you are using proper ESD procedures...

Страница 16: ...installed in a X4 lane card slot leave the Host Interface Card setting as is The host computer dictates what link width and speed the expansion system will operate in Install PCIe Cards STEP 4 Remove...

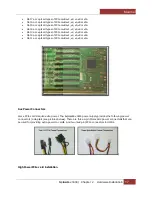
Страница 17: ...ards High Power PCIe card installation ExpressBox 3400 Chapter 2 Hardware Installation accepts all types of PCIe cards x1 x2 x4 x8 or x16 accepts all types of PCIe cards x1 x2 x4 x8 or x16 accepts all...

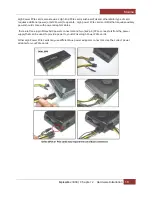
Страница 18: ...rate High power PCIe cards or GPUs that requires auxiliary power should come with power adapter cables There are three 4 pin Molex AUX power connectors and two 6 2 pin PCIe connectors from the power s...

Страница 19: ...to host computer x8 port see pictures below Electrostatic Discharge ESD Warning The PCIe cables are high performance communication cables and as such are sensitive to electrostatic discharge ESD Use a...

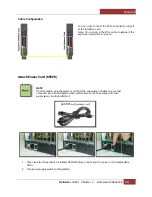
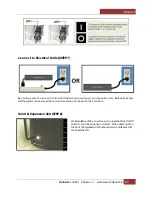
Страница 20: ...only connect the PCIe cable to of the Interface card Note Do not plug in the PCIe cable to x16 port the expansion unit will not operate the power cord from the expansion chassis and your host computer...

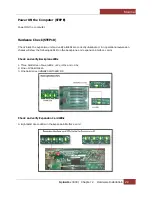
Страница 21: ...orrect methods when powering up your expansion unit Before powering ON the system make sure all PCIe cards are seated properly into the card slots For ExpressBox 3400 you will need to press the front...

Страница 22: ...nd 2 5v 2 One 1V Solid Green 3 One Solid Green LINKUP SLOT 0 LED D8 Check and verify Expansion Card LEDs 4 Eight Solid Green LEDs on the Expansion Inte ExpressBox 3400 Chapter 2 Hardware Installation...

Страница 23: ...nated You should see 8 solid green LEDs are illuminated ExpressBox 3400 Check Inside the host computer make sure the host interface card LEDs are properly illuminated You should see 8 solid green LEDs...

Страница 24: ...rals such as hard drives into the chassis If however the installation was unsuccessful you may not see the PCI to PCI Bridge or it will have a small yellow symbol in front of it as shown below The fir...

Страница 25: ...Box 3400 Chapter 3 Software Installation r for Mac OS To verify a successful installation of Magma ExpressBox 3400 on Mac select About This Mac under the Your first step will vary depending on which v...

Страница 26: ...ystem Report 2 Click PCI cards ExpressBox 3400 Chapter 3 Software Installation unit has been installed in a Linux based system its installation can be verified by typing the following command lines Di...

Страница 27: ...vers have been required for Magma Expansion and Host Interface card with Windows 7 rivers for any 3rd Party PCIe cards that you install into the expansion unit Drivers Party PCIe cards can be obtained...

Страница 28: ...d Technical Information Technical Information is capable of operating at x16 x8 x4 x2 and x1 link widths With ExpressBox the Interface card can only operate in a x8 speed is ON the Reset is asserted i...

Страница 29: ...AND D7 when illuminated it signifies power is good see table below seeing One or Two Green LEDs that are illuminated on the Backplane after the Magma EXPRESSBOX 3400 is turned on you may be having a p...

Страница 30: ...icators SLOT LINK UP LED illuminates when a PCIe card is installed When all of the PCIe slots are populated with PCIe cards all SLOT LINK UP LEDs should come on see picture If you have PCIE cards inst...

Страница 31: ...apter 4 Advanced Technical Information dicator When this LED comes ON it signifies that the PCIe card is executing a command or being used accessed by the application It comes ON as solid green and A...

Страница 32: ...Magma provides EXPRESSBOX 3400 with the fan functioning at full speed MAX However noise is a concern for many applications For noise sensitive applications we have provided an Adjustable Fan Control...

Страница 33: ...Remove the mounting screws on the side panel see pictures below Gently pull out the Fan housing Disconnect the two Fan Power Cables Remove all screws from the front Flip the fan housing to access the...

Страница 34: ...5 Troubleshooting shooting Q If the Interface card fails to power up what should I check A Make sure it is firmly seated into the PCIe card slot 0 power supply is working A If the Interface card is p...

Страница 35: ...ould be set to OFF host and the other is set to nterface card that must be set correctly in order to work set to ON EXP should be installed only inside the Magma Expansion when set to OFF HOST should...

Страница 36: ...to avoid or prevent possible damage Note Expansion board and PCIe PCI cards that arrive damaged in shipment will not be covered under warranty Returning Merchandise to MAGMA If factory service is req...

Страница 37: ...of the FCC Rules Operation is subject to the following two conditions 1 this device may not cause harmful interference and 2 this device must accept any interference received including interference t...

Страница 38: ...Manual P N 09 09998 00 Rev A...

Отзывы: