


16
Advanced Settings
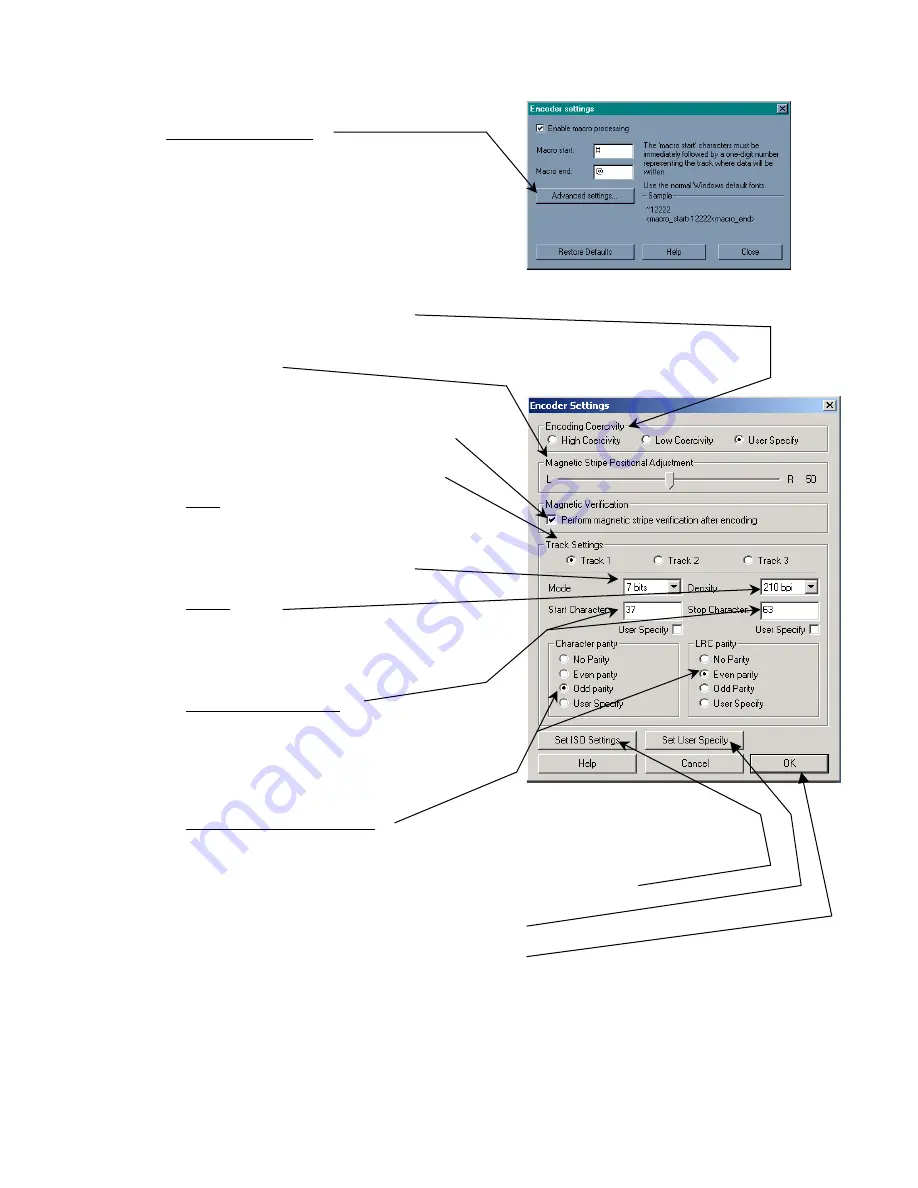
Within this page you can manually select the
Encoding Coercivity
and
Track Settings,
or
alternatively you can select
User Specify
in which
case the driver will take the settings from the
badging application. These settings will either be
set in the application software or they can be
specified on the image.
Encoding Coercivity
Depending on the type of cards being used, select either ‘High coercivity’, ‘Low coercivity’ or if set in
the badging application, ‘User Specify’.
Magnetic Stripe Positional Adjust
Using the slider you can change the position along the magnetic stripe at which the printer will
begin encoding.
Magnetic Verification
Select this option if you wish the printer to verify that the
card has been correctly encoded before printing.
Track Settings
Toggle between tracks using these buttons.
Mode
Use this function to select 7, 6, 5, 4 or 1 bit magnetic
encoding data for the track selected. Alternatively
choose user specify box if you wish these to be
specified by the badging application.
Density
Use this function to select a bit density of 75 or 210 bits
per inch (BPI) for the track selected. Alternatively
choose User Specify.
Start and Stop Characters
Enter the decimal ASCII code for the start and stop
characters you require for each track, or tick the User
Specify box if you wish these to be specified by the
badging application.
Character Parity and LRC parity
Select odd, even or no parity for each character used in the data string, and the LRC check
digit. Select User Specify if the parities are set in the badging application.
Click on
Restore Defaults
if you want all the settings to revert to ISO standard.
Click on
Set User Specify
to set all settings to user specify.
Click
OK
to accept all the settings and exit this dialogue box.