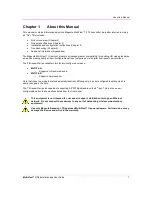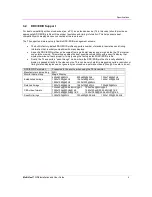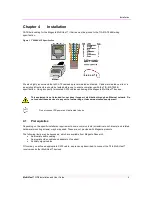
Installation
MultiView™ II T4 Installation and User Guide
10
4.3.4
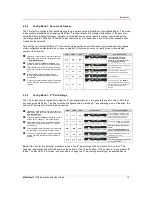
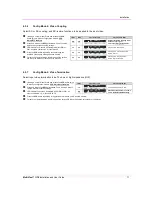
Config Mode-1: Sync-mode Options
The T4 is factory-configured for auto-detecting the proper sync-mode (RepliSync-I normal/stretched). This mode
is generally compatible with all existing MultiView™ receiver products that support RepliSync (if they are also
using their factory-default settings). However, some video sources may require a custom sync-mode setting
(most especially at 1080p and 1920x1200 video resolutions). For these cases, one of the other available sync-
modes can be selected.
Note that any connected MultiView™ receiver should generally be set to the same sync-mode and may require
other configuration adjustments (such as sync-polarity). Otherwise, you may not get a proper video display
output at that receiver.
(starting in normal-mode) Press and release the
CFG button once to access configuration mode-
1. CFG indicator = on.
Press and release the SEL button once. You
will now be able to change sync-mode settings.
LED indicators 1-3 should be illuminated (either
DIM or ON); all others (indicators 4-8) should be
off.
Press the CFG button repeatedly to step
through the available sync-mode settings as
shown below.
To leave configuration-mode step through all the
options OR leave the buttons untouched for 10
seconds.
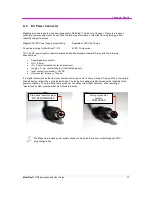
4.3.5
Config Mode-1: 4
th
Pair Settings
The T4 provides several options for using the 4
th
-pair signals (pairs 1-3 are generally used for video). Note that
any connected MultiView™ receiver must be configured with a matching 4
th
-pair operating mode. Otherwise, the
desired 4
th
-pair signal will not work as expected.
(starting in normal-mode) Press and release the
CFG button once to access configuration-mode-1.
CFG indicator = on.
Press and release the SEL button twice. You will
now be able to change 4
th
-pair option settings.
LED indicators 4-6 should be illuminated (either
DIM or ON); all others (indicators 1-3, 7 and 8)
should be off.
Press the CFG button repeatedly to step through
the available 4
th
-pair settings as shown below.
To leave configuration-mode step through all the
options OR leave the buttons untouched for 10
seconds.
Note: If the “set factory defaults” procedure is used, the 4
th
-pair settings will be set to the T4-A version. This
happens regardless of what P/N appears on the bottom of the T4 (see bottom of T4 enclosure for the product-ID
label). To select the T4-S version, you will need to change the 4
th
-pair setting accordingly, as detailed above.
LED1
LED2
LED3
Front Panel View
Sync-mode Setting
dim
dim
dim
The T4 will auto-detect the
required RepliSync-I mode
(“normal” or “stretched”). This is
the factory-default setting.
dim
dim
ON
Force RepliSync-I normal Horizontal
sync. pulse encoding.
dim
ON
dim
Force RepliSync-I “stretched”
Horizontal sync. pulse encoding.
dim
ON
ON
Force RepliSync-II.
ON
dim
dim
Force fixed-sync mode. NOTE: A
connected MultiView receiver must
also be in fixed-sync mode and with
H/V polarities selected at the
receiver.
LED4
LED5
LED6
Front Panel View
4
th
-pair Operating Mode
dim
dim
dim
4
th
-pair signals are disabled. This
effectively “mutes” anything being
sent on the 4
th
pair. This can be
useful for diagnostic purposes.
dim
dim
ON
Direct pass-through of 4
th
-pair wires
(custom applications).
dim
ON
dim
External analog (L+R summed)
audio.
This is the factory-default mode,
which represents a T4-A version.
dim
ON
ON
External S/PDIF digital audio. Input-
impedance = 75-ohms.
ON
dim
dim
Simplex-serial.
This is the factory-delivered mode
for the T4-S version.


