Product Notes
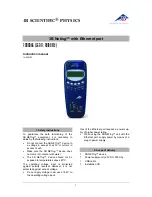
The RTDTemp2000 is precision RTD-based temperature data logger with LCD display. The
convenient LCD provides access to the current temperature reading, as well as minimum,
maximum and average statistics.
Backlight
The backlight uses a significant amount of battery life. Refer to the manual to configure the
auto shut-off when not in use.
Set Password
To password protect the device so that others cannot start, stop or reset the device;
- In the Connected Devices panel, click the device desired.
- On the Device Tab, in the Information Group, click Properties. Or, right-click the device
and select Properties in the context menu.
- On the General Tab, click Set Password.
- Enter and confirm the password in the box that appears, then select OK
Wiring the Data Logger
Wiring Options
For 4-wire RTD probes, connect the four lead wires to your RTD
logger as shown in the figures below.
For 3-wire RTD probes, short inputs 3 and 4
together, then connect the lead wires to inputs 1,
2 and 3.
For 2-wire RTD probes, short inputs 3 and 4 together
and inputs 1 and 2 together, then connect the RTD
lead wires to inputs 2 and 3.
Warning: Note the polarity instructions. Do not attach wires to the wrong terminals.
100 Ohm, 2 or 4 wire RTD probes are recommended for the most accurate performance.
Most 100 Ohm, 3 wire RTD probes will work, but MadgeTech cannot guarantee the
accuracy. To determine whether or not the 3-wire RTD probe will work, the resistance
between the two same colored wires should be less than 1 Ohm.
Note: Please contact the
manufacturer of the RTD probe for questions on the resistance
Installation Guide
Installing the Interface cable
- IFC200
Insert the device into a USB port. The drivers will install automatically.
Installing the software
Insert the Software USB Stick in an open USB port. If the autorun does not appear, locate
RTDTemp2000
Product Information Card
the drive on the computer and double click on
Autorun.exe
. Follow the instructions
provided in the Wizard.
Device Operation
Connecting and Starting the data logger
- Once the software is installed and running, plug the interface cable into the data logger.
- Connect the USB end of the interface cable into an open USB port on the computer.
- The device will appear in the Connected Devices list, highlight the desired data logger.
- For most applications, select “
Custom Start
” from the menu bar and choose the desired
start method, reading rate and other parameters appropriate for the data logging
application and click “
Start
”. (
“
Quick Start
” applies the most recent custom start options,
“
Batch Start
” is used for managing multiple loggers at once, “
Real Time Start
” stores the
dataset as it records while connected to the logger.
)
- The status of the device will change to “
Running
”, “
Waiting to Start
” or “
Waiting to
Manual Start
”, depending upon your start method.
- Disconnect the data logger from the interface cable and place it in the environment to
measure.
Note: The device will stop recording data when the end of memory is reached or the device is stopped. At this point the device
cannot be restarted until it has been re-armed by the computer.
Downloading data from a data logger
- Highlight the data logger in the Connected Devices list. Click “
Stop
” on the menu bar.
- Once the data logger is stopped, with the logger highlighted, click “
Download
”. You will
be prompted to name your report.
- Downloading will offload and save all the recorded data to the PC.
Device Maintenance
Battery Replacement
Materials:
3/32” HEX Driver (Allen Key) and a Replacement Battery (U9VL-J)
- Remove the back cover from the device by unscrewing the four screws.
- Remove the battery from its compartment and unsnap it from the connector.
- Snap the new battery into the terminals and verify it is secure.
- Replace the cover taking care not to pinch the wires. Screw the enclosure back together
securely.
Note: Be sure not to over tighten the screws or strip the threads.
Recalibration
The RTDTemp2000 standard calibration is at two points, 50
Ω
and 150
Ω
.
KEY
1- Ref +
2- Measurement(-) Input
3- Measurement (+) Input
4- Excitation Current Out (+)
www.calcert.com
1.800.544.2843
0
5
10
15
20
25
30