


RFC1000
Product Quick Reference Card
RFOT:
To program the channel on an RFOT data logger, unscrew the body of
the RFOT and remove the enclosure. Switch the wireless ON / OFF switch (red
switch, next to the probe cable connector) to ‘0’. The dip switches are located
on the back of the PCB (opposite side of the battery). Change the dip switches to
match the photo. Return the wireless ON / OFF switch to ‘1’.
Therm-A-Lert-Series:
Switch the wireless ON / OFF switch to ‘0’. The dip
switches are located on the back of the device. Change the dip switches to
match the photo. Switch the wireless ON / OFF switch back to ‘1’.
Deploying and Activating Devices
Step 1:
Plug the RFC1000 into the USB port on the base station computer.
(Additional RFC1000s can be used as repeaters to transmit over greater distances)
Step 2:
If using multiple RFC1000s plug each one into a wall outlet in the
desired locations.
(If transmitting over a distance greater than 1000 feet indoors
or 4000 feet outdoors or there are walls/obstacles/corners that need to be
maneuvered around, set up additional RFC1000s as needed.)
Step 3:
Verify that the data loggers are in wireless transmission mode by
confirming the wireless ON / OFF switch is in the ‘1’ position on each data
logger.
(See Channel Programming steps above)
Step 4:
On your PC, launch the MadgeNet software program. All active data
loggers will be listed in the software showing that the device(s) are recognized.
Step 5:
To activate your data loggers, click on one to highlight, then click the
Claim
icon, and then click the
Start
button. Do this for each logger in your list
that you wish to activate.
Step 6:
To view data on the screen in real-time, click the
Stream
button.
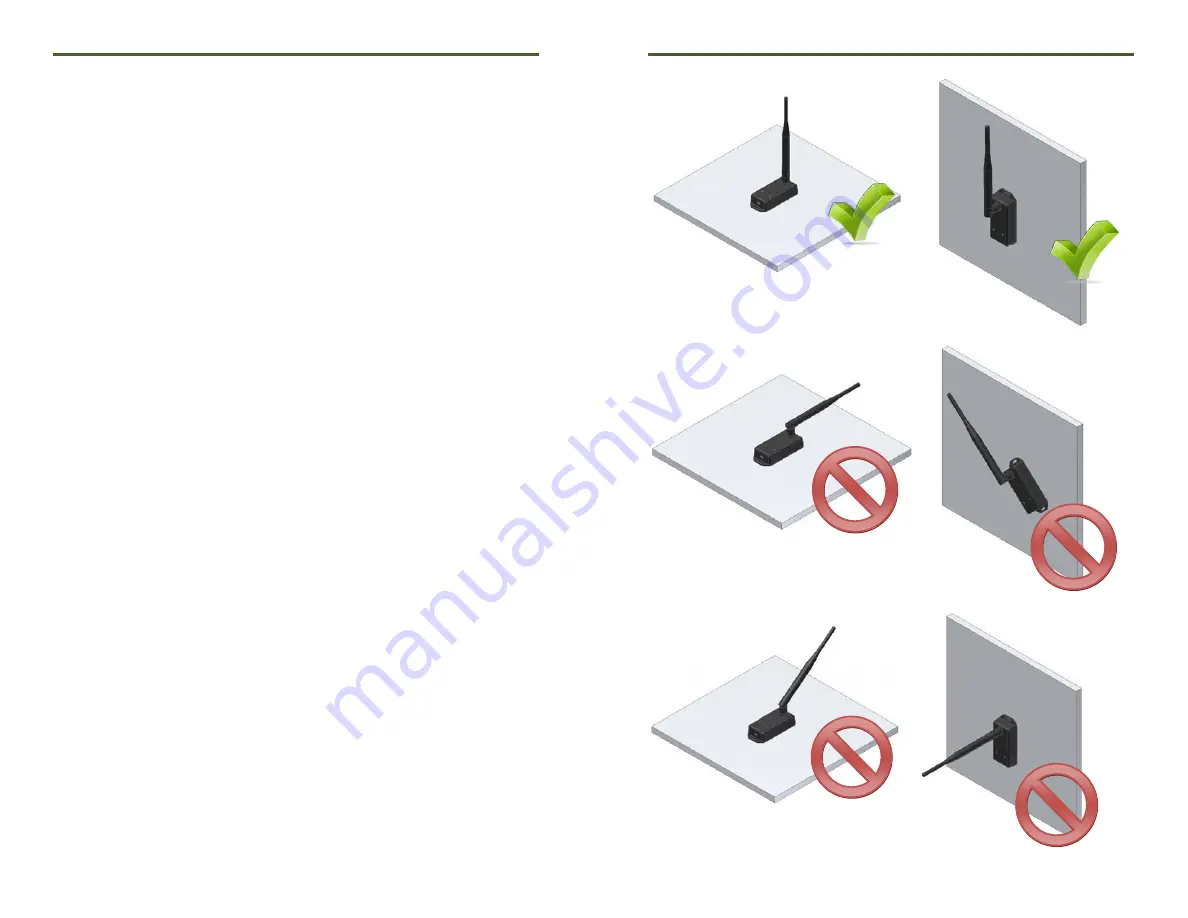
Mounting Instructions
For best wireless performance, both the RFC1000 and the MadgeTech data
loggers should be mounted in the same orientation. This usually means that
the external antenna should be pointing straight up. The antenna can pivot to
accommodate either a wall mount or a desk mount.


