


10
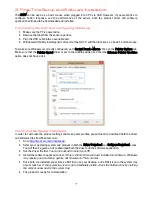
FLUX Programming Overview
The following section will take guide you through the layout of the user interface and how each element
operates.
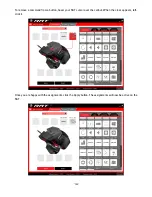
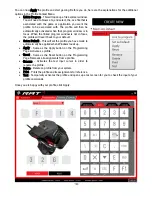
When you first load up FLUX, it will look like this:
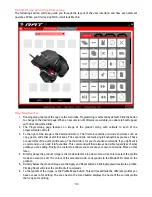
Key Elements:
1.
Running along the top of the app are the main tabs. Programming is selected by default. Click the button
to change to the desired page. When a new version of software is available, an update tab will appear
with direct download links.
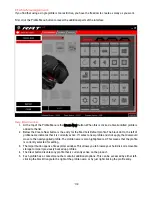
2.
The Programming page features an image of the product along with callouts to each of the
programmable controls.
3.
To the right of the image is the Command Library. The first tab contains pre-made shortcuts such as
copy, paste, and other useful functions. The second tab contains single keyboard key presses. These
are useful for ultra-quick profile setup. The third tab is for your favourite commands. If you right-click
a command you can add it to favourites. This command will then always be visible regardless of what
profile you are editing. Finally, the custom tab allows you to create your own commands. More on that
later…
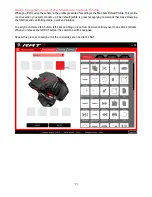
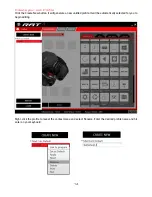
4.
Directly above the product image is the mode selector drop down menu. Use this to select the profile
mode you want to edit. The colour of the selected mode, corresponds to the Mode LED colour on the
product.
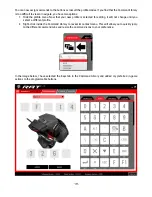
5.
Directly below the product image are the Apply and Reset buttons. Clicking Apply will activate a profile.
Clicking Reset will clear the profile of all commands.
6.
To the top left of the image, is the Profile Menu button. This will reveal/hide the different profiles you
have access to for editing. The area next to the menu button displays the name of the current profile
that is open for editing.
Содержание RAT 4
Страница 1: ...1 PRODUCT GUIDE Version 1 0...


