background image

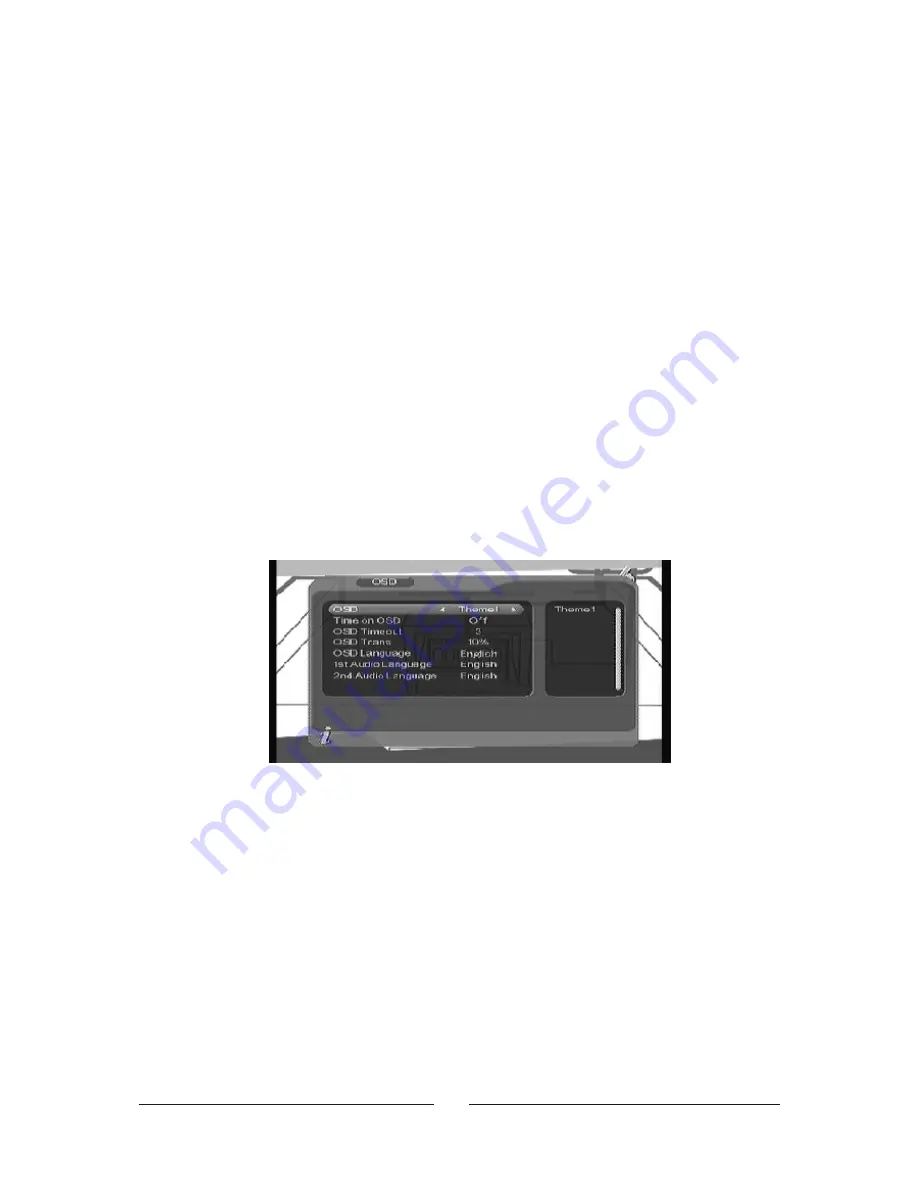
Figure 2.20 Setting page 


    Press VOL+/- key to choose “Yes”or“No”,press OK key to confirm.
3.All set up and operation are the same as in TV channel.

2.3 CONFIGURATION


Configuration provides individualized system setup function,you can configure 

the system according to your own hobby and demand. You can enter Configuration 
menu via the menu (MENU

Digital TV

Configuration) .

2


All options are listed on the left of the OSD menu, when the cursor


moves on the 

option in OSD menu, the values corresponding to this


option on the right or the 

menu, press CH+/- key to move upward


and downward to choose the options in 

OSD menu, press CH+/- key to move upward and downward to choose the options 
in OSD menu.
There are following options in OSD menu:


(1).OSD option sets system menu mode ;currently.
(2).Time on OSD Option sets whether to display system time in full-screen play 


channel, Move the cursor to Time on OSD option, press


VOL+/- key to choose 


between on and off, the default is off.

 (3).Trans option sets menu transparency, press VOL+/-  key to adjust between 


0%-60%.

 (4).Trans option sets menu transparency, press VOL+/-  key to adjust between 


0%-60%.

2. To  delete  all  TV  channels, press  CH+/-  key  to  move  the  cursor to ALL TV 

Channels option, press OK key, then the system will hint with  “Delete All TV


Channels?”

.3.1 OSD

Via OSD option setup,  you can set  the  user  interface  display


mode according to

your  own  demand. Via  the  menu ( MENU

Digita TV

Configuration

O

  SD)

,

You can  enter OSD menu, as shown in Figure 2.20:

14

Содержание M-TVT300D

Страница 1: ...ALDINET Spa Viale C COlombo 8 20090 Trezzano s Naviglio MI IYALY M TVT300D M TVT300D E nglish...

Страница 2: ...na power supply function for pair use with mobile active antenna Over 1000 channels TV radio Programmable Channel list editing Favorite channel list editing PIG Picture in Graphic support Electronic p...

Страница 3: ...sport Stream Video Aspect Ratio Video System Video Output Video Resolution UHF 470 MHz 862MHz VHF 174 MHz 230 MHz 75 78dBm 20dBm F Terminal 6M 7M 8M DVB T EN300 744 QPSK 16QAM 64QAM 1 32 1 16 1 8 1 4...

Страница 4: ...Audio Output 1Vpp 47Kohm Adjustable With E Volume General MPEG Chip SUNPLUS SPHE1002AT With 32bit RISC ARC CPU 121 5 MHz Flash Memory 8Mega bit SDRAM 64 Mega bit Operating Temperature 10 Storage Tempe...

Страница 5: ...annels sequentially up or down in viewing mode and move to the next higher or lower item in the menu CH LIST A list will enter the channel in viewing mode VOL Alter the Audio output level up or down i...

Страница 6: ...select different program class press CH to select program Press OK to affirm program Selection press EXI T to hide men u 1 Press numbe r keys to input program numbe r 2 If there are some favorite prog...

Страница 7: ...ter into Weekly Mode to display the programs and program information in different time ranges of the currently program list within one week as shown in Figure 3 7 1 Press PGUP PGDW key to switch betwe...

Страница 8: ...ext please press TTX on the remote controller to enter into the teletext page As shown in the figure below 2 Input three digits to go to corresponding page you want 3 Press CH to go to the previous pa...

Страница 9: ...elligent and convenient mode of programs searching which covers programs of all frequency points of target countries and regions At present this system covers many targets countries and regions includ...

Страница 10: ...s shown in figure below 2 Prior to auto scanning you need to configure relevant parameters including 1 Start Freq KHz the default frequency is 474000KHz you can input relevant digital to modify it 2 E...

Страница 11: ...ve Channel Lock Channel Press CH key to choose the line where Favorite Channel is then press the 4 colorkey on the remote controller press the red key to set and cancel Favorite Channel the green key...

Страница 12: ...ter into and it will not enter into channel sorting page 2 Before sorting the type of sorting shall be set including the following items 1 First Option choose the programs to be sorted via the selecti...

Страница 13: ...nnel grouping 3 After channel is edited when EXIT key is pressed to exit the menu if actual channel editing action exists the system will carry out channel grouping renewal with the hint of Update suc...

Страница 14: ...XIT key to return to Edit Channel page 3 Press the yellow key to remote controller to enter Rename Channel menu as shown in Figure 2 16 The operation for this menu is as that of Add Channel page 2 2 5...

Страница 15: ...ve upward and downward to choose the options in OSD menu There are following options in OSD menu 1 OSD option sets system menu mode currently 2 Time on OSD Option sets whether to display system time i...

Страница 16: ...nguage list press CH key to choose language press OK key to confirm 5 Press OK key to confirm the editing action in OSD menu the system will hint with Update succeeds and then return to the previous m...

Страница 17: ...one 1 Move the cursor to Brightness option press VOL key to move the cursor into the Properties list on the right as shown in Figure 2 23 2 Press CH key to move upward and downward the cursor to choo...

Страница 18: ...OK key to save set the system will hint with Update succeeds 2 3 3 System Set up System set up menu can provide convenient system set up you can via menu MENU Configuration System Set up enter System...

Страница 19: ...NU Digital TV Configuration time You can set Timer Mode in Time page Timer Mode set time mode Date set date Time set time GMT Off set set GMT Off set Summer Time set summer time In time menu there is...

Страница 20: ...move the cursor to On Time option Press 0 9 number key on the remote controller to revise time 7 Press OK key the system will hint with Update succeeds Press EXIT key to return previous menu 2 Press...

Страница 21: ...ems Via menu MENU Digital TV Software Upgrade enter Software Upgrade menu 2 4 1 Download update BIN file from USB 1 Copy the bin file into USB 2 Plug the USB into 3 Follow up the dialog information an...

Страница 22: ...ss UP DOWN key to choose movie file name 3 Press ENTER key to play movies 4 Press FF key to play movie quickly 2 4 8 20 1 5 Press REW key to rewind movie 2 4 8 20 1 6 Press SLOW key to slow down movie...

Страница 23: ...lay music file its interface is as shown in Figure 3 4 4 Press FF key to play quickly 2 4 8 20 1 5 Press REW key to rewind music 2 4 8 20 1 6 Press PREV key to play previous music press NEXT key to pl...

Страница 24: ...ess ENTER key to play photo file 4 Press PREV key to play previous photo NEXT key to play next photo 5 Press PREV key to play previous photo NEXT key to play next photo 6 In full screen play state 1 P...

Отзывы: