background image

  D7                                                                                                                    User Guide 


Chapter 2 - System Setup


Find a suitable place for your D7, within a distance of 1.2m or less of your TV screen. 
Connect the power supply and the power outlet. 
 
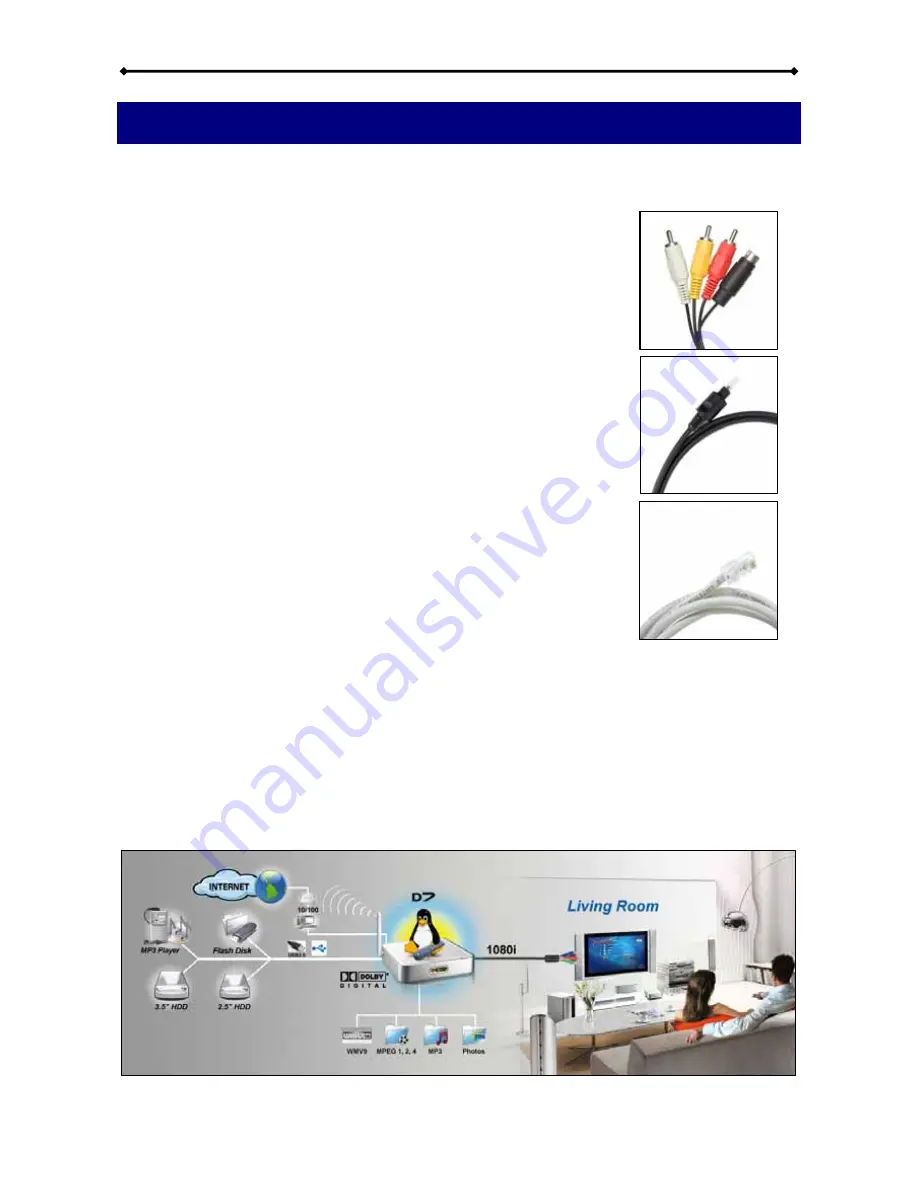
Included with your D7 is a standard AV cable and a YPbPr cable. 
Connect it to the A/V connector on the D7 and plug it into your TV. 
For the video, use either S-Video (better quality) or if not available, 
the yellow RCA connector. For analogue audio, use the white and 
red RCA connectors. If your TV supports it, we recommend using 
the component cable (YPbPr) for optimum video quality (up to 720p 
or 1080i) instead of the standard AV composite cable. 
 
 
For Dolby 5.1 surround and digital audio output, we recommend 
using the SPDIF optical audio cable. Connect this to your amplifier 
or sound system and change the settings for audio output on your 
D7 to RAW format and 5.1 surround output. 
 
For content streaming from your computer and the internet, 
connect the LAN cable to an Ethernet switch or router. For the 
wireless model (D7-WDMA), content streaming is possible 
wirelessly using 802.11b or g. 
 
However, for optimum performance and high definition content with 
high bitrates, we recommend using the wired LAN connection 
option instead of the wireless setup. 
 
 
Having connected all cables, you are now ready to turn on the power and use the remote 
control to turn on the device. Simultaneously, turn on your television set, and set up the 
A/V channel. Wait a few seconds for the system to boot and you should see the D7 
welcome screen. 
 

Note: If everything is setup correctly but you can not see the welcome screen, press the 
TV Mode button until you find the right video signal. 


Page 5  /  Chapter 2 - System Setup 

Содержание D7-DMA

Страница 1: ...D7 DMA Digital Media Adapter User Manual Installation Guide October 15 2007 v1 3...

Страница 2: ...IO 6 BROWSER OPTION 6 SOUND OPTION 6 IP CONFIG 7 MAC ADDRESS 7 IP ADDRESS 7 SUBNET MASK 7 PRIMARY DNS 7 SECONDARY DNS 7 DEFAULT GATEWAY 7 AOL 7 WIFI SETUP 8 PREFERRED 8 AVAILABLE NETWORK 8 SSID 8 CONN...

Страница 3: ...cable Ethernet cable SCART adapter Infrared remote control Manual CD with MyHome application and user guide Note Package content may vary depending on vendor version System Requirements PC Requiremen...

Страница 4: ...e only and show the D7 DMA without the optional 802 11 b g antenna Power switch Power receptacle USB host connectors A V multi interface connector SPDIF audio output Ethernet port Yellow LAN connectio...

Страница 5: ...blank screen but go to setup and save your settings once you have a signal SETUP Press this key to enter the setup menu and change the settings and other configuration options for your D7 VOLUME When...

Страница 6: ...resent mode REPEAT Return to the main screen INFO Go to the setup menu or show file info during playback EDIT PROGRAMM Go to URL or time search during playback SHUFFLE Refresh screen or change repeat...

Страница 7: ...ur amplifier or sound system and change the settings for audio output on your D7 to RAW format and 5 1 surround output For content streaming from your computer and the internet connect the LAN cable t...

Страница 8: ...nternet Options for internet security used to browse the web By default this is set to SSL2 which will work fine for most purposes of the D7 Video Select your video output and the preferred zoom level...

Страница 9: ...unit IP Address Choose an IP address that is different from other computers printers and various devices on your network but is part of the local network Subnet Mask The most common setting for home...

Страница 10: ...nd you can select your home network To scan again for available AP s select WIFI setup and click Enter SSID This field will be populated automatically once an available network has been selected If th...

Страница 11: ...rver should work fine so you only have to choose your time zone turn on daylight saving if required and save the settings Update ROM Displays current firmware version and can be used to check for new...

Страница 12: ...er or a USB memory stick Simply plug in your USB device turn on the power and you will be able to access the device from the main screen Browse the content select the files you like to see and press E...

Страница 13: ...erwise D7 will not recognise the device Media Server To use this mode you need to install the included MyHome application or Windows Media Connect on your computer Connect the computer to the same net...

Страница 14: ...world Sorted by countries you can browse the available TV channels and select the one you like for broadcast For optimum quality high speed internet access with good connection between TV server and...

Страница 15: ...erted from supported MPEG 4 video codec using Dr DivX 2 for Mac OS MP4 MP4V MP4A AAC only support non hinted MP4 AVI audio codec MP3 AC3 PCM WMA Ogg Subtitles SUB MicroDVD format SRT SubRIP format SMI...

Страница 16: ...sure the cables are connected firmly and the TV is set to the proper A V channel Turn on the D7 and wait for about 10 20 seconds If you still do not see anything press the TV Mode button on your remot...

Страница 17: ...by 22 ENTER Enter Select N A 23 RETURN Return to previous screen N A 24 MENU Tab select next menu N A 25 A B Go to home Go to home 26 PREV Photo page MyHome Previous clip 27 PLAY Select icon Play 28 N...

Страница 18: ...manual is believed to be accurate and reliable Macpower Tytech Technology assumes no responsibility for any errors contained in this manual and reserves the right to make changes in the specification...

Отзывы: