D7 User Guide
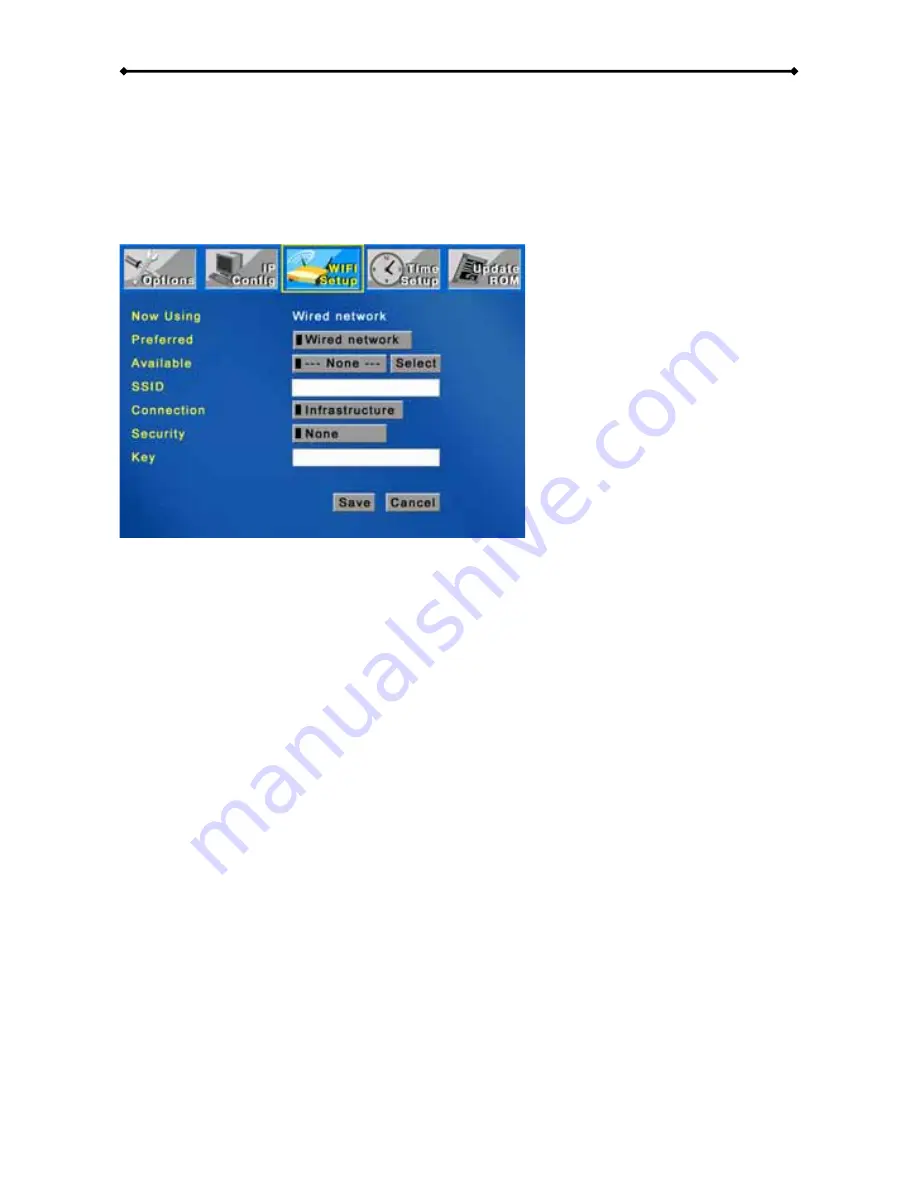
Wireless Setup
To configure and use the wireless function, the optional antenna and mini PCI card have to
be installed first. Set your preferred network to wireless and save the settings. You will be
prompted to reboot. After restarting the system, go back to WIFI Setup, select your
wireless network and configure connection type and security key if required. Save the
settings and reboot once more.
[Preferred]
Set to Wired if you use the Ethernet cable or set to Wireless if you use the
802.11b/g wireless antenna to connect to the network.
[Available Network]
To use the wireless function, first set your preferred network to
wireless, save the settings and reboot. After restart, it will automatically display the
available access points (AP) and you can select your home network. To scan again for
available AP’s, select WIFI setup and click Enter.
[SSID]
This field will be populated automatically once an available network has been
selected. If the SSID is hidden, enter the name of your SSID manually.
[Connection]
Select your connection type. By default and for standard connections, this
will be set to Infrastructure (AP) but if required, you also set it to Ad-Hoc (peer-to-peer).
[Security]
D7 supports WEP 64-bit or 128-bit encryption for additional security. Select the
WEP encryption used in your home network and enter the key or set it to OFF.
[Key]
If you are using WEP encryption for your wireless network, enter the WEP key here,
otherwise leave this field empty. When 64-bit WEP is used, the WEP key should be 10
hexadecimal characters. If 128-bit WEP is used, the WEP key should be 26 hexadecimal
characters. A valid value for a hexadecimal character is 0 to 9 and A to F.
Page 8 / Chapter 2 - System Setup


