Owner’
s Manual
11
Owner’s Manual
DLM12S Subwoofer: Rear Panel Features continued...
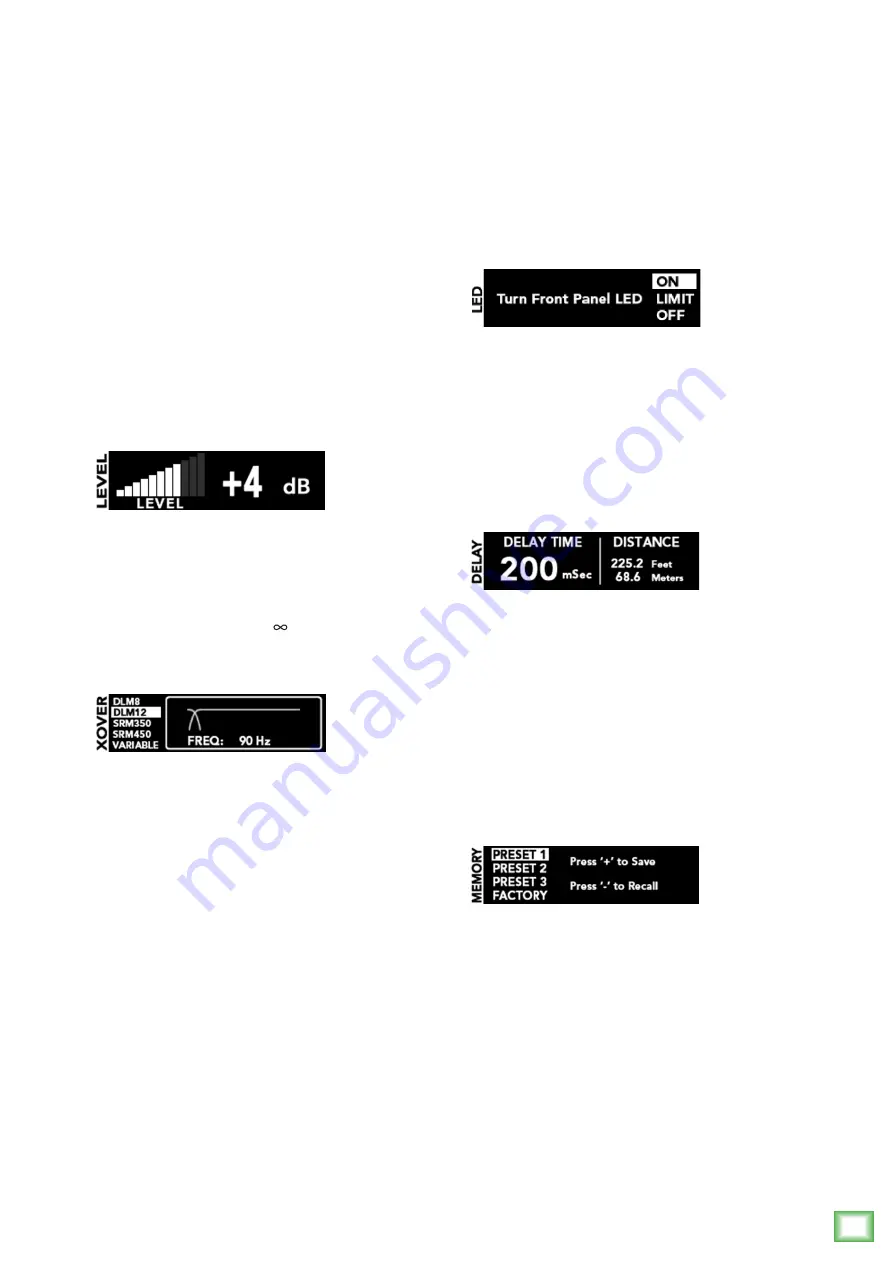
9. OLED Display
The OLED Display is one of the most vital features
of the DLM12S subwoofer. It displays subwoofer
information including (but not limited to) volume,
selected crossover, delay settings and other parameters.
When a DLM12S subwoofer is powered up, the last
state it was in will load up and the OLED Display will
present the volume screen and settings.
DLM12S subwoofers will display a running Running
Man screensaver if parameters haven’t been changed in
awhile. Simply touch one of the DLP buttons to “wake
up” the OLED Display.
10. VOL Button
Volume [VOL] adjusts the overall signal level at the
inputs to the built-in amplifiers. Press the VOL button
to access and update the subwoofer’s volume and
change the volume by pressing the + or – button [16]
repeatedly until you have reached the desired volume.
The volume ranges from off (– dB) to +10 dB.
11. XVR Button
The DLM12S crossover [XVR] allows you to choose
from a list of preset crossover frequencies for Mackie
loudspeakers, as noted below. This optimizes the
subwoofer and loudspeakers connected to the
DLM12S high pass outputs. If not using DLM or SRM
loudspeakers, a variable mode allows you to select
the best crossover frequency suited for your PA system
from 60 Hz to 120 Hz.
Frequencies below the selected crossover frequency
are sent to the subwoofer while frequencies above the
selected crossover frequency are sent to the high pass
outputs [6]. The crossover frequency should be set
to the lowest frequency response rating of the main
loudspeakers. Press the XVR button repeatedly until
the desired crossover setting is highlighted.
• DLM8 : 110 Hz
• DLM12 : 90 Hz
• SRM350 : 100 Hz
• SRM450 : 95 Hz
• Variable : 60 Hz – 120 Hz
The last one listed – variable – may be set to taste.
Simply press the + or – button [16] repeatedly until
you have achieved the crossover point you desire.
It ranges from 60 Hz to 120 Hz.
12. Front LED On / Limit / Off
Pressing the VOL [10] and XVR [11] buttons
simultaneously gives you the option to turn the front
LED on, off or limit. Press the + or – button [16] to
make a choice, followed by any other button to exit the
screen. Choosing limit means the LED is on full-time.
However, it will flicker when the limiter is active
[3 dB of attenuation, averaged].
13. DLY Button
Delay “delays” the audio signal for a set period of
time. With the DLM12S subwoofer, it’s used for aligning
delay stacks, balcony fills, etc, not as an effect.
Press the DLY button to access and update the
subwoofer’s delay. Change the delay by pressing
the + or – button [16] repeatedly until you have
reached the desired delay. Delay times range from
0 ms [0.0 feet / 0.0 meters]to 300 ms [337.8 feet /
102.9 meters].
14. MEM Button
Settings for DLM subwoofers may be saved to memory
and recalled at a later time by utilizing the memory
[MEM] button.
Press this button repeatedly until the preset spot
you want to save settings to (or recall settings from) is
highlighted. There are three user presets and a fourth
to recall the factory default settings.
Once the preset you want to save to (or recall from)
is highlighted, press the “+” button [16] to save the
current settings or press the “–” button to recall a
preset that was previously saved.


