14/21
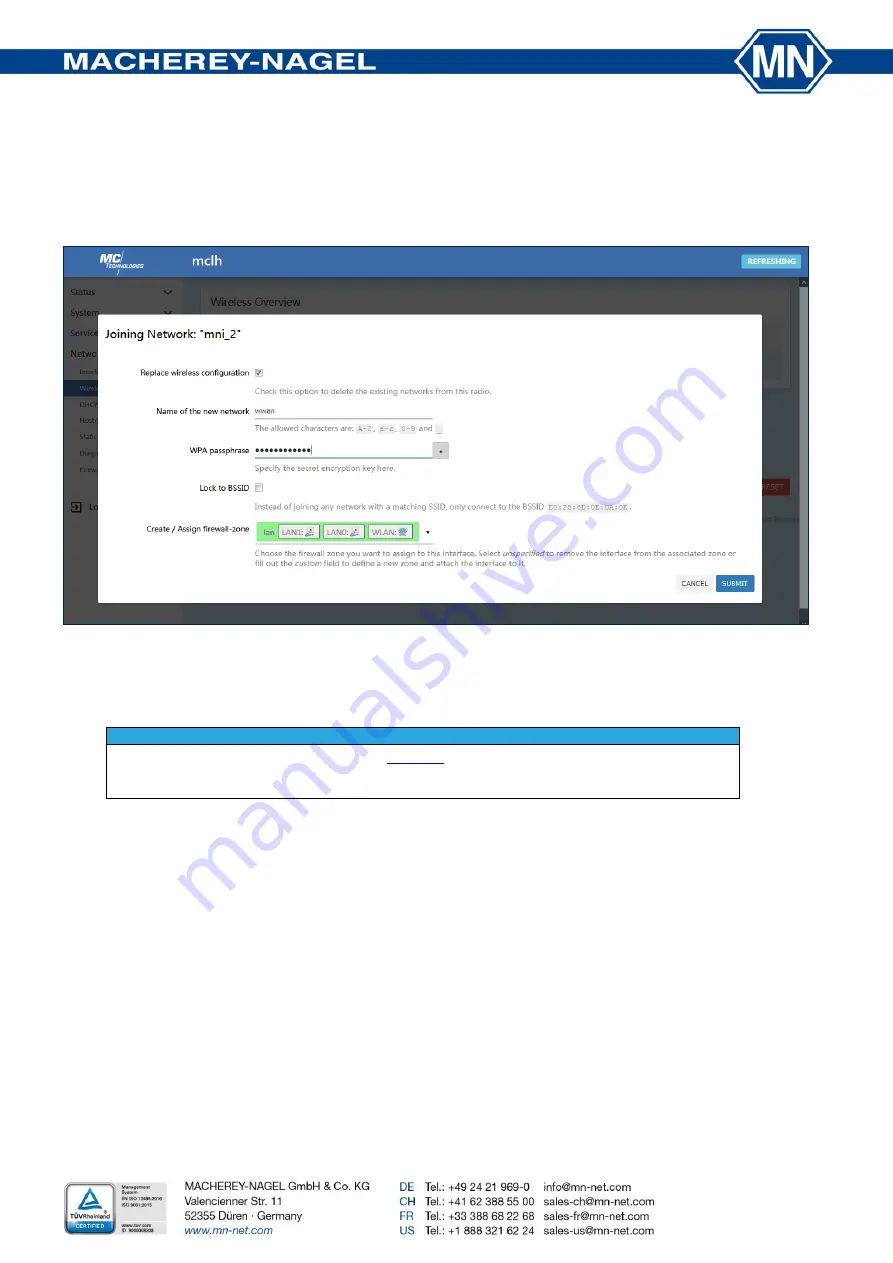
Alternatively, the wireless connection can be set up via a network scan:
Press “Scan” in the Wireless Overview tab and chose the desired WiFi network by selecting join.
Enter the password in the Joining Network tab and confirm by pressing
Submit
(Pic.16). Save the WiFi settings by selecting
SAVE & APPLY
in Associated Stations tab (Pic.15).
Pic.16: Joining WiFi after a network scan
6. Configuration of the
NANOCOLOR
®
spectrophotometer
This chapter describes the configuration and connection of the spectrophotometer.
NOTICE
Make sure to perform the installation steps in
before starting the photometer configu-
ration. A successful connection to the mount should be given before you proceed with this chap-
ter.
6.1 Network configuration
Connect the spectrophotometer to the eth1 interface of the Network Adapter with the help of a LAN cable (CAT 5E).
For the configuration of the
NANOCOLOR
®
VIS II or
UV
/
VIS
II, refer to the manual of the instrument.
The menu to enter the IP addresses can be reached via
Main menu
Connectivity
Network
LAN
.
The following settings and conditions are required:
Software version: ≥ 1.10.1
Operating system: ≥ 7.0.2864.2
IP setting: static (the spectrophotometer will perform an automatic restart after confirming the setting)
IP Address: 192.168.2.200
Subnet Mask: 255.255.255.0


