15
2. Recording
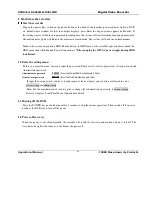
The default recording mode after startup of the DVR is 24 hr continuous recording for each channel. The
User can program customized recording times for each camera. Instructions for the different recording modes are
as follows:
a) Schedule Recording:
? Enter the menu, and set the timing period for the recording. See details at Menu>System setting>Schedule
b) Manual Record Selection
? Press “Record” button on the remote controller or “Rec” on the front panel.
? Check the status of each channel in the recording menu; The Highlighted channels are in record mode.
? To select the channel to be recorded, press the related number key. Selected camera # will highlight on
your screen. When all cameras that need to be recorded are selected, press Enter to begin the recording.
? Repeat above steps and remove the highlight to stop the camera from recording. ress Cancel or ESC to
return without changes.
c) Alarm recording
? Connect the alarm input according to the device connection and the instructions.
rogram the related settings in the menu to start Alarm recording. See details at Menu>System
setting>Alarm setting
d) Motion detection recording
? Record the channel only in need of motion detection. First confirm whether this channel is programmed in
Timing Recording; if it is, please turn off Timing Recording for the selected Camera.
? Program the related settings in the menu to start Motion detection recording. See details at
Menu>System setting>Motion detection.
Содержание DVR-56MR
Страница 1: ...Mace Security Products Inc Presents Digital Video Recorder based on Mpeg4 Technology...
Страница 13: ...13 Chapter 2 Basic System Operations 1 Start Stop the DVR Recording Alarm Input Output Pan tilt Control Network...
Страница 46: ......
Страница 55: ...55 Chapter 5 System Connections DVR Rear View RS 485 Port Connection...
Страница 59: ...59 nstruction of RS485 A B line Used to connect the A and B line of the PTZ units...


