background image

34

1.107

511

Содержание RMI1851XSAB0

Страница 1: ...1 尺寸 16K 36P 2 油墨颜色为黑色 黑白印刷 印刷应清晰 不能有印刷缺陷 3 切边应成直角 不能歪斜 4 样板需送设计部门认可方可生产 g scale 1 1 KE 1 RMI1851XSAB0 RMI1851XSAX0 SO BCD510WE UT 黄志胜 曾磊 王智姝 2018 02 27 80g双胶纸 16131000A29437 ...

Страница 2: ... models RMI1851XSAB0 RMI1851XSAX0 read this instruction manual before installing your new refrigerator PM01 Importer s name and address as below A M A Al Swailem Est OLAYA Street P O Box 544 Riyadh 11421 Kingdom of Saudi Arabia 0006 ...

Страница 3: ...2 ...

Страница 4: ...4 Shift setting 9 4 5 The standby control function 9 4 6 Fault indication 10 4 7 Temperature control operation 10 5 CLEANING 11 5 1 Defrosting 11 5 2 Cleaning the Interior and the Exterior of the Unit 11 5 3 Cleaning Tips 11 6 MAINTENANCE 11 6 1 Changing the Internal Light 11 6 2 Care When Handling Moving Your Unit 11 6 3 Servicing 12 6 4 Switching Off for Long Periods of Time 12 7 Troubleshooting...

Страница 5: ...ervised to ensure that they do not play with the appliance If the supply cord is damaged it must be replaced by the manufac turer its service agent or similarly qualified persons in order to avoid a hazard Please abandon the refrigerator according to local regulators for it use flammable blowing gas and refrigerant Please according to local regulations regarding disposal of the ap pliance for its ...

Страница 6: ...unit is not designed for use in a garage or outdoor installation Do not drape the unit with any covering When installing the unit ensure that 3 inch of free space is left at both sides 1 inch at the rear and 1 inch at the top of the unit This will allow cold air to circulate around the refrigerator and improve the efficiency of the cooling process 2 2 door handle install illumination Note Figures ...

Страница 7: ...e unit To do this adjust the two levelling feet at the front of the unit If the unit is not level the door and magnetic seal alignments will not be covered properly Look down from the top clockwise and coun terclockwise loosening tightening 2 5 cleaning before use Wipe the inside of the unit with a weak solution of bicarbonate soda Then rinse with warm water using a Wrung out sponge or cloth Wash ...

Страница 8: ... freezer to prevent bursts and other losses Before placing any food in your unit turn it on and wait for 24 hours to make sure it is working properly and to allow time to cool down to the correct temperature Your unit should not be overfilled Before plugging in the appliance check that you have an out let which is compatible with the plug supplied with the unit Before turning on the refrigerator D...

Страница 9: ...er to your in dividual unit for details 4 operation HMI and pads operation The pads in HMI and display layout are referred in the following il lustration Levelling Feet Door Shelf Salad Bin Salad Bin Cover Adjustable Glass Shelves Temperature control panel Control Dial Door Shelf Door Shelf Oil Box A ...

Страница 10: ...tor will be on display 4 5 the standby control function When the refrigerator work push the gear SET long SET 3 s effec tive keys to loosen refrigerator into standby function mode standby indicator lights lit all loads stop work When freezer in standby short press gear SET button SET refrigerator into the nor mal working state standby indicator lights put out return to nor mal working condition 4 ...

Страница 11: ...than 10 C in a long time fresh compartment control panel shall be placed in 4 or 5 posi tion freezer compartment air shutter shall be placed in COLDER position 3 If the ambient temperature is higher than 43 C in a long time fresh compartment control panel shall be placed in 4 or 5 posi tion freezer compartment air shutter shall be placed in Mid COLDER position Tips When the freezer compartment air...

Страница 12: ...ion may appear on the outside of the unit This may be due to a change in room temperature Wipe of any moisture resi due If the problem continues please contact a qualified technician for assistance 6 maintenance Illuminating lamp specifications MAX 40 W 1 Unplug the refrigerator from the power supply 2 The bulb is located at the top of the compartment near the open ing 3 Replace with an appliance ...

Страница 13: ...an be handled by the user Please call the after sales service department if the issues are not solved No operation Make sure that the refrigerator is plugged and connected to the power supply Low voltage Power failure or tripped circuit breaker Odor Odorous foods should be closely wrapped Rotten food items The interior of the refrigerator should be cleaned Long term op eration of com pressor It is...

Страница 14: ...or your retailer where you purchased the product 8 energy saving tips Try not to open the door too often especially when the weather is wet and hot Once you open the door close it as soon as possible Every now and then check that the appliance is sufficiently venti lated adequate air circulation behind the appliance During normal temperature conditions please place the thermo stat at the middle se...

Страница 15: ... The refrigerant used in your unit and in sulation materials require special disposal procedures Ensure that none of the pipes on the back of the unit are damaged prior to dis posal Up to date information concerning options of disposing of your old unit and packaging from the new one can be obtained from your lo cal council office When disposing of an old unit break of any old locks or latches and...

Страница 16: ...d a socket head wrench 2 Disengage the top hinge hinge stopple top hinge sub assembly and fixed hinge screws for later use 3 Disengage the freezer com partment door 4 Disengage the middle hinge subassembly with the cross screwdriver and fixed hinge screws for later use Disengage the top hinge hinge stopple top hinge ...

Страница 17: ...the bottom hinge from the left side of the chamber with the cross screwdriver install it on the left side of the cham ber and screw off the hinge screw bolt to install into the left stopple of the hinge Fresh food compartment door Hinge screw bolt Bottom hinge ...

Страница 18: ...or naturally Install the middle hinge on the left side of chamber and fasten it with three screws 7 Disengage the bushing and limit stop from the right side of the fresh food compartment door respectively and install them on the left side of the door use two screws to fasten the door limit stop Bushing Door limit stop Middle hinge subassembly Fresh food compartment door ...

Страница 19: ... of left top hinge onto the axle center on the left side of the door and fasten the left top hinge with 3 screws after the freezer compartment door is fastened 11 Install the left hinge guard and hinge stopple cover onto the chamber 12 Take off the handle caps and handle stopples Left top hinge Freezer compart ment door Top hinge bushing Left hinge guard Hinge stopple cover Handle cap Handle stopp...

Страница 20: ...e in the opening posi tions 15 Install 2 handles onto the right side of the door with the socket head wrench 14 Use the cross screwdriver to move the handle fastening screw bolts from the left side to the right side by way of piercing 4 stopples Socket head wrench Handle fastening screw bolts Handle stopple Handle cap ...

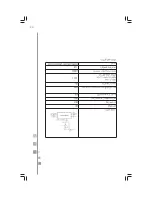
Страница 21: ...quency Hz 230 Voltage V 180 Defrosting power W 0 8 Current A N A Ice quantity produced per 24 hour run g 45 Percentage running time 1 107 Electric power consumption in kw h per 24 hour run kW h 10887 Rated shelf area cm2 511 Rated net volume L ...

Страница 22: ...21 ...

Страница 23: ...22 ...

Страница 24: ...23 ...

Страница 25: ...24 ...

Страница 26: ...25 ...

Страница 27: ...26 ...

Страница 28: ...27 A ...

Страница 29: ...28 ...

Страница 30: ...29 ...

Страница 31: ...30 ...

Страница 32: ...31 ...

Страница 33: ...32 ...

Страница 34: ...33 ...

Страница 35: ...34 1 107 511 ...

Страница 36: ...35 ...

Страница 37: ...36 ...

Отзывы: