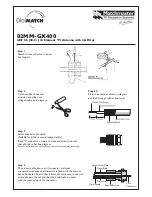
start the keeper onto the rod by applying pressure with the push tube. Push the Shaft Retainer
until up tight against the button insulator (Locking pliers,
lightly
clamped up against opposite button
insulator will help maintain center reference and keep you from pushing the first Shaft Retainer too
far). Repeat for the opposite side. Continue installing Shaft Retainers until all elements are locked
in place.
6. Mount the DRIVEN ELEMENT T-MATCH BLOCK to the underside of the boom using a single 8-32
X 1-1/4" screw and lockwasher. Orient the block with feed connector facing to center and balun
connectors facing to rear. Block orientation may be reversed if you wish feedline to exit from rear
of boom.
7. Coil the balun so it will not extend beyond the reflector when installed. Attach balun to the Block
and tighten the connectors
gently
using a 7/16" end wrench. A lot of torque is unnecessary.
Squeeze the balun coil across the middle until it is close to the boom and secure to boom with a
nylon cable tie. Tie should be snug but not crushing or kinking the coax.
8. Install the 8-32 x 1/4” set screws (internal Allen head - tool supplied) into the SHORTING BARS.
Slide the bars onto the 3/16” rod driven element tips and then onto the Driven Element Block
Rods. Position the Shorting Bars as specified on the DIMENSION SHEET: the distance given is
between the outer edge of the Driven Element Block and the inner edge of the Shorting Bar. Align
the bars and rods with each other and tighten the setscrews.
9. The boom to mast plate is normally mounted at the balance point, about 70” from rear of boom.
Use two 1" U-bolts and the stainless nuts and lock washers provided. DO NOT OVER TIGHTEN.
2” U-bolts and cradles are provided for mounting the antenna, other sizes are available upon
request. Since the feed line represents significant weight it is best to have it attached and fastened
along the boom with cable ties before final mounting the plate.
THIS COMPLETES THE ANTENNA ASSEMBLY
MOUNTING AND STACKING INFORMATION
2M9SSB:
FOR HORIZONTAL POLARIZATION, the 2M9SSB may be mounted to a metallic
vertical mast or a horizontal NON-METALLIC crossboom (no conductive material in element
plane). If mounted to a horizontal crossboom, route the feedline forward to the boom-to-mast plate,
loop down, and bring back to crossboom at least 6” beyond element tips. Two 2M9SSB antennas
are ideal for stacking, one above the other in horizontal polarity.
Stacking distance (between H
planes) is 9’6”.
Be sure both antennas are oriented so the driven element blocks are on the
SAME SIDE of the boom and NOT MIRROR IMAGE to each other. “E” plane stacking (side by
side, horizontal) distance is 10’.
2M9FM:
FOR VERTICAL POLARIZATION, the 2M9FM SHOULD be mounted to a NON METALLIC
VERTICAL MAST (no conductive material in element plane) or a horizontal metallic crossboom.
If mounted to a NON METALLIC vertical mast, route the feed line forward to the boom-to-mast
plate, loop out at a right angle to the boom, and bring down THE FEEDLIINE to the mast at least 6
inches BELOW THE ELEMENT TIPS. Two 2M9FM antennas can be stacked side by side ,
vertically polarized on a METALIC horizontal crossboom.
Stacking distance (between H planes)
is 9’6”.
Be sure both antennas are oriented so the driven element blocks are on the SAME
SIDE of the boom and NOT MIRROR IMAGE to each other.
2M9SSB/FM ASSEMBLY MANUAL
Содержание 2M9SSB/FM
Страница 2: ...2M9SSB DIMENSION SHEET ...
Страница 3: ...2M9FM DIMENSION SHEET ...


