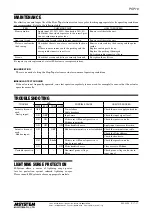
M-system PSP10 Скачать руководство пользователя страница 7

PSP10

5-2-55, Minamitsumori, Nishinari-ku, Osaka 557-0063 JAPAN
Phone: +81(6)6659-8201  Fax: +81(6)6659-8510  E-mail: [email protected]

EM-4890  P. 7 / 17

COMBINATION WITH VALVE


OPERATION DISTANCE WHEN COMBINED WITH VALVE

When setting the upper-stop position and the lower-stop position, it is preferable that the operation distance becomes 80% 
or less with respect to the maximum stroke of the actuator.
That is, when the valve is closed at the lower-end side of the actuator, if the maximum stroke is 40 mm and the lower-stop 
position is set at the 40.0 mm position, there will be no margin for the actuator to further go down to close the valve when 
valve leakage occurs.  In such a case, Auto-setup may not be successfully completed.
In order to avoid such a situation, select an appropriate combination of an actuator and a valve to secure an enough opera-
tion distance.  In the example below, the maximum stroke is 40 mm and thus the preferable operation distance is 32.0 mm. 
Set so that the distance between the upper-stop position and the lower-stop position are within the operation distance of 
32.0 mm.


EXAMPLE OF PROPER OPERATION DISTANCE

When connecting the output stem of the actuator with the valve stem, determine their mounting position so that a proper 
operation distance can be secured.

Max. Stroke: 40.0mm

32 to 36 

mm (rough indication of the maximum operation distance)

Auto-setup stop position

Auto-setup stop position

Upper stop position

Valve seat surface (seating position)

Valve seat surface (seating position)

Left approx.

2 mm

Default lower stop position

Default upper stop position

When leakage occurs

When leakage occurs

(Contraction approx. 0.1 mm)

(Contraction approx. 0.1 mm)

(Left for adjusting leakage while using.)

(Left for adjusting leakage while using.)

Left approx.

2 mm

Upper-End of Max Stroke

Lower-End of Max. Stroke

Lower stop position

Содержание PSP10

Страница 1: ...kdown M System is not liable for any malfunction or inconven ience caused by unauthorized changes made by the user INSTRUCTION MANUAL This manual describes necessary points of caution for han dling this product and specifically for installation wiring hardware setting and basic maintenance of the product This unit is factory adjusted and calibrated according to the Ordering Information Sheet Refer...

Страница 2: ...nt margin in strength When this unit is used in an application such as temper ature control of a steam line the temperature can rise higher than the ambient temperature due to heat con ducted through or radiated from the piping Use a longer yoke for effective heat dissipation and apply insulation material HEATER FUNCTION AT LOW TEMPERATURE Apply power voltage when the temperature is 0 C or un der ...

Страница 3: ...Stem Potentiometer Cover Packing Cover Manual Operation Stem Disc Springs Temp Sensor Stepping Motor Figure 1 Component identification PSP10 PU 2x modular jack DIP Switch Manual Operation Buttons Configuration Type C UP CCW DOWN CW POWER INPUT AUTO SETUP MOVING UP CCW MOVING DOWN CW COM ALARM Modbus CONFIG TypeC a b a b a b INPUT OUTPUT UP CCW SIG DOWN CW SIG ALARM SIG FE U V DA DB DG POWER ON 1234...

Страница 4: ... UP SW1 3 OFF Reverse Output stem goes UP with 20 mA DC input ON Direct Output stem goes DOWN with 20 mA DC input SW1 4 OFF Output signal is same as input signal ON Output signal is reversed input signal SW1 5 The output stem position when the switch is turned OFF is recorded as the upper end position SW1 6 The output stem position when the switch is turned OFF is recorded as the lower end positio...

Страница 5: ...connected Also wire retract UP extend DOWN alarm and or output signals as necessary Modbus communication allows operation without analog input and monitoring of the operation status of the unit INPUT OUTPUT a b UP CCW SIG a b DOWN CW SIG a b ALARM SIG FE U V POWER DA DB Modbus DG COMMUNICATION CABLE CONNECTIONS Master Unit DA DB DG PSP10 PSP10 DA DB DG I O Unit Terminating resistor Terminating res...

Страница 6: ...ximum stroke N L Max stroke Lower end position Maximum Upper end position Ex factory position Stroke mm MODEL N L MAX STROKE MIN STROKE PSP10 66 106 40 20 CHANGES OF SEAL SPRING CONTRACTION AND THRUST SPRING THRUST DURING AUTO SETUP SETTING OF CONTRACTION THRUST WHEN VALVE IS SEATED AUTO SETUP 0 5 mm 1 0 mm 1500N 800N 1400N 1600 1900N 3000N 2320N 2400N 2700N 3100N The value of the thrust is rough ...

Страница 7: ...to secure an enough opera tion distance In the example below the maximum stroke is 40 mm and thus the preferable operation distance is 32 0 mm Set so that the distance between the upper stop position and the lower stop position are within the operation distance of 32 0 mm EXAMPLE OF PROPER OPERATION DISTANCE When connecting the output stem of the actuator with the valve stem determine their mounti...

Страница 8: ...output stem and its vicinity as it may cause serious injury to your hand or finger 6 When Auto setup has failed ALARM LED blinks at 5 Hz clear error by any of the following methods then revise the settings Turn ON and OFF SW1 7 Enter a clear error command on PU 2x ITEM 54 DATA 2 Enter or via Modbus Turn OFF and ON the power supply to the actuator unit PROCESS STEPS OF AUTO SETUP ACCORDING TO AUTO ...

Страница 9: ... operation Turn ON to enable the Auto setup by Manual operation Press UP CCW DOWN CW button slightly to move the output stem upward downward Stop pressing the button to stop the output stem at the position Press the button to move the output stem approx 2 mm in the middle direction from upper lower end side The moving distance is no problem with approximate Turn SW 7 ON and OFF to move to Auto set...

Страница 10: ... HOW TO USE PU 2x 1 Turn SW1 8 ON to enable configuration or Auto setup execution 2 Connect the connection cable of PU 2x to the modular jack on the actuator unit The display of PU 2x comes on by power supplied to the actuator unit 3 To display a target item press ITEM then N N N represents numerical number 0 to 9 Alternatively use UP or DOWN button to shift to the next item from the currently dis...

Страница 11: ... advance to enable writing ADDRESS MAP Refer to PARAMETER ITEMS COMMON TO MODBUS CONFIGURATOR SOFTWARE AND PU 2x for Modbus address map DATA VALUE When Value Range of the data is specified as numbers with one digit after the decimal point the data is multiplied by 10 and handled as an integer That is 25 8 is handled as 258 for example When the data is specified as numbers with two digit after the ...

Страница 12: ...nput 25 0 to 125 0 04 Inp x R 18 I16 Position setpoint 1 5 0 to 105 0 05 Tar x R 19 I16 Position 1 5 0 to 105 0 06 Pos x R 1 The ratio to the operation distance i e a distance between the lower stop position and the upper stop position 1 3 Diagnostics MODBUS ITEM VALUE RANGE INITIAL VALUE PU 2x R W SAVE CFG ADDRESS TYPE ITEM DISPLAY 21 I32 Total power on time hour 0 to 596523 0 07 PowTm x R 23 I32...

Страница 13: ...0 1 0 26 LockRelease x R W 52 I16 Time ratio of respective positions 1 Clear 0 1 0 27 PosRClr x R W 1 5 Modbus input MODBUS ITEM VALUE RANGE INITIAL VALUE PU 2x R W SAVE CFG ADDRESS TYPE ITEM DISPLAY 101 I16 Modbus position setpoint input 5 0 to 105 0 0 R W 1 6 Modbus operation mode MODBUS ITEM VALUE RANGE INITIAL VALUE PU 2x R W SAVE CFG ADDRESS TYPE ITEM DISPLAY 111 I16 Modbus operation mode For...

Страница 14: ...Parity 0 None 1 Odd 2 Even 0 to 2 0 33 Parity x R W 125 I16 Stop bit length 1 2 1 34 Stopbit x R W 126 I16 Incorporated terminating resistor 0 OFF 1 ON 0 1 0 35 Term x R W 127 I16 Loss of Modbus communication detection time sec 0 to 300 0 36 Timeout x R W Description of Modbus setting Input select Set whether analog input or position output command via Modbus communication Loss of Modbus communica...

Страница 15: ...tract UP extend DOWN signal is turned ON with the stroke at the set upper lower stop position as 100 Operation speed Set the operation speed on a scale of 1 to 10 The higher the number the faster the speed Operation speed at the shipment is set as following by the code CODE 1 OPERATION TIME THRUST THRUST AT LOCK OPERATION SPEED AT SHIPMENT A 4 B 3 C 2 D 1 E 4 F 3 G 2 H 1 1 9 Setting executing Auto...

Страница 16: ...ut 5 Modbus input mode Stops Configuration mode Stops Modbus input Monitor mode Stops Modbus input mode Follows Modbus input Address 101 6 Configuration mode Stops ON N A 2 Monitor mode 4 Moves by button operation 1 Configurable on PU 2x ITEM 30 or via Modbus Address 121 2 No difference between Analog input and Modbus input 3 The mode is switched via Modbus address 111 4 Turn SW1 8 ON to forcibly ...

Страница 17: ...ent contact M System or our representatives LUBRICATION There is no need of oiling the Step Top electronic actuator in normal operating conditions REGULAR TEST RUNNING If the valve is not frequently operated run a test operation regularly once a week for example to ensure that the actuator operates normally TROUBLESHOOTING TROUBLE LED POSSIBLE CAUSE HOW TO PROCEED POWER INPUT COM ALARM Actuator do...

Отзывы: