5
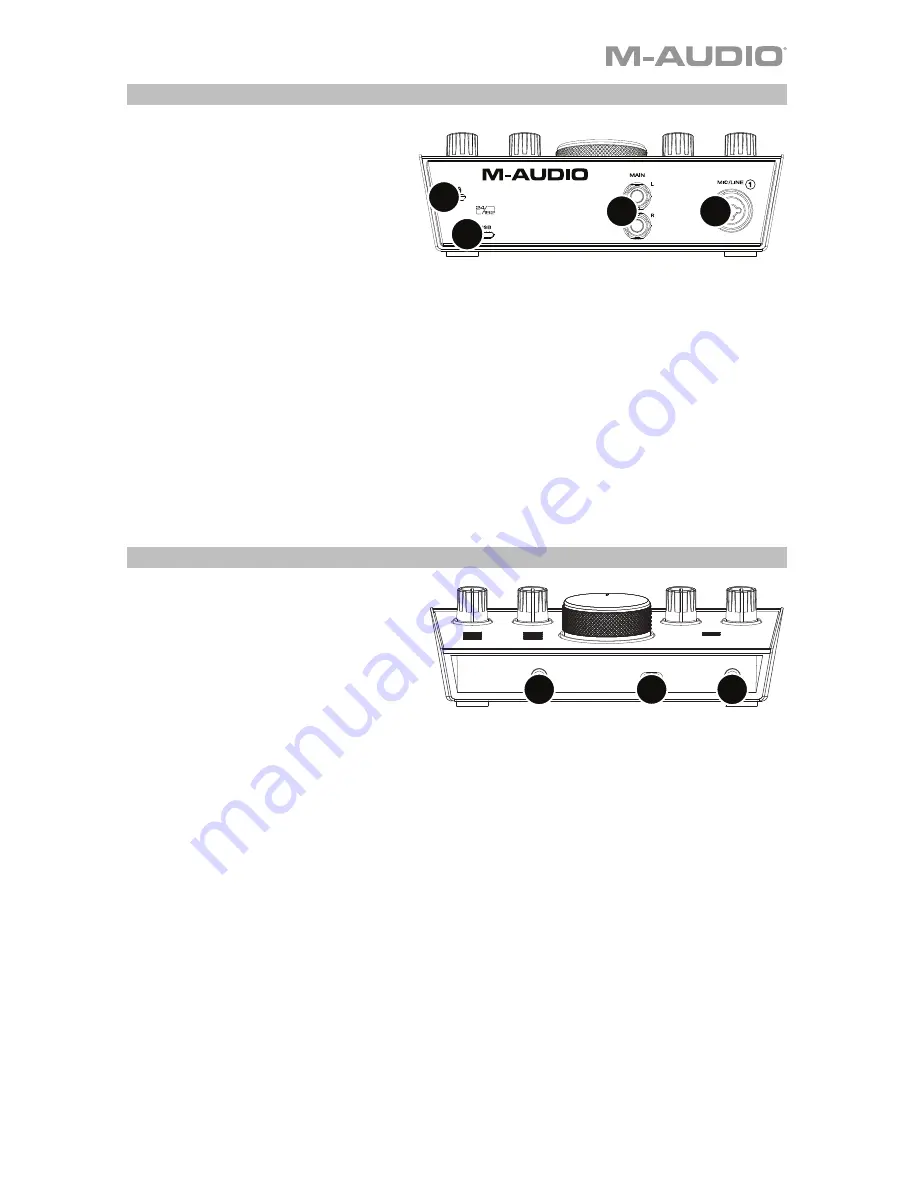
Rear Panel
1.
USB Port (Type C):
This
connection will allow you to send
audio and MIDI data to and from
a computer. Use the included
USB-C-to-USB-C or USB-C-to-
USB-A cables to connect the M-
Track 2X2 to a computer. The M-
Track 2X2 requires a USB 2.0
connection (or higher).
2.
Combo Input:
Connect a microphone, a guitar or bass with an active pickup, or a line-
level device to this input. For microphones, use an XLR or 1/4” (6.35 mm) TRS cable. For
a guitar or bass with an active pickup, use a standard 1/4” (6.35 mm) TS cable. For line-
level signals, use a 1/4" (6.35 mm) TRS cable. View the input signal level with the
LED
Meters
.
3.
Main Outputs:
Use standard 1/4" (6.35 mm) TRS cables to connect these outputs to
your powered monitors, amplifier system, etc. The mix you hear from these outputs will
be determined by the
USB / Direct Blend
knob. The level of these outputs is controlled
by the
Monitor Level
knob.
4.
Kensington Lock Slot:
You can use this Kensington lock slot to secure M-Track 2X2 to a
table or other surface.
Front Panel
1.
Headphone Output:
Connect 1/4"
(6.35 mm) TRS headphones to this
output. The mix you hear from this
output will be determined by the
USB / Direct Blend
knob. The level
of this output is controlled by the
Headphone Level
knob.
2.
Instrument Input:
Connect a guitar with a passive pickup or other high-impedance signal
to this input with a 1/4" (6.35 mm) TS cable. View the input signal level with the
LED
Meters
.
3.
+48V (Phantom Power) Switch:
This switch activates and deactivates phantom power.
When activated (lit), phantom power su48 volts to the
Combo Input
. Please note
that most dynamic microphones and ribbon microphones do not require phantom power,
while most condenser microphones do. Consult your microphone's documentation to
find out whether it needs phantom power.
1
2
3
M-TRACK 2X2
C -SERIES
4
1
2
3
Содержание M-TRACK 2X2
Страница 2: ......
Страница 20: ...m audio com Manual Version 1 0...


