


FinishLynx Scholastic System Quick Start Guide
Page 3
Step 1.
Go to the track
Bring your FinishLynx system (and an assistant) to the track.
Make sure there is
power
available for your computers and
for the Power over Ethernet switch. The EtherLynx Vision
camera and the IdentiLynx camera will receive their power
via the Ethernet data cables.
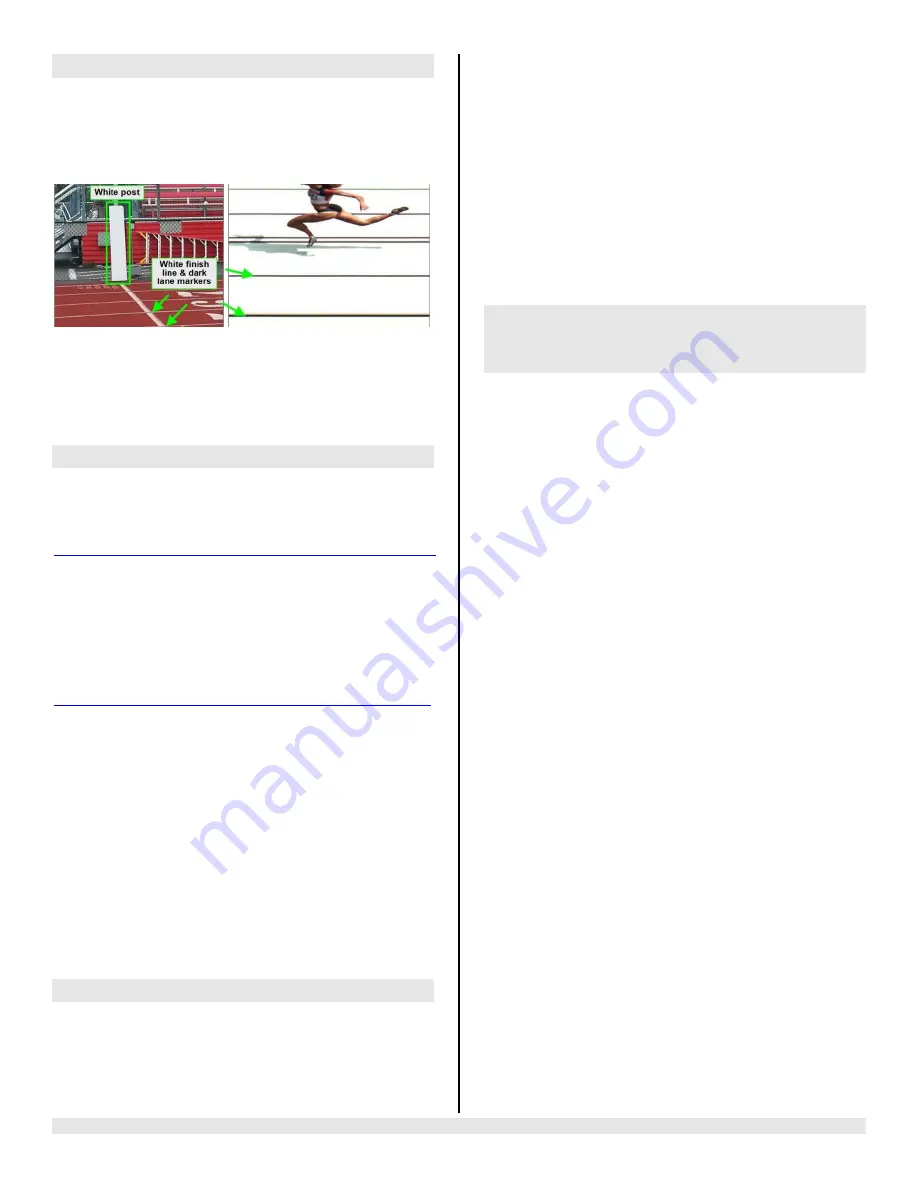
Set up a table near the finish line, ideally on the infield if
power is available. The finish line should have black lane
markers painted or taped on the finish. If not, we suggest you
use black matte tape to designate lane lines. This will help
you align the camera and get clearer images.
Step 2.
Install the Software
A. FinishLynx LITE (Scholastic Package)
Install
FinishLynx LITE
from the USB thumb drive provided with
your system or download the latest version at:
www.finishlynx.com/product/software/finishlynx-results-software/
When prompted, enter the serial number(s) provided on the
flash drive. Please note that your
FinishLynx LITE
serial number
will
not
work with the regular version of FinishLynx.
B. LynxPad
Install using the Lynx flash drive or download the latest
version of LynxPad at:
http://www.finishlynx.com/product/event-management/lynxpad/
Follow the instructions on your screen to install LynxPad.
When prompted, enter the serial number found inside the
Lynx flash drive.
Note:
You should
Right
Click
on the installer and select
Run
as
Administrator
to install LynxPad, if you do not, you will not
be able to print from LynxPad.
C. USB/Serial adapter
1.
Install using the Lynx flash drive by navigating to the
USB-to-Serial Adapter folder.
2.
Insert the USB adaptor into an available USB port on
your computer. Allow Windows to run through its
recognition process for the device and driver.
Step 3.
Evaluate a sample image
1.
Start FinishLynx LITE. Click
File
-
Open…
.
2.
Double-click
Sprint.evn
to open the sample event.
Note:
This sample is a two-camera image. Your Scholastic
System uses only 1 line-scan camera and produces single-
camera images.
3.
Click the mouse once on the torso of a competitor on the
left side of the screen. A red hairline appears. You can
click and hold the red crosshair and drag it up or down to
the correct lane number on the left side of your screen.
4.
Press the
Enter
key on your computer. The finisher’s
time appears in the start list above the image.
5.
Repeat these steps for all of the competitors on the
screen. You have just successfully evaluated a race in
FinishLynx.
6.
Click
File
|
Close window
. If you want to reuse the image
later for practice evaluation, click
No
when asked to save
your changes. Close FinishLynx.
Step 4.
Configure the network for Windows
OS prior to Windows 7
(See Step 5 below for
Windows 7, 8 and higher)
1.
Click the Microsoft Windows
Start
button and select
Control Panel
,
or
click
Start
|
Settings
|
Control Panel
.
2.
Double-click
Network Connections
.
3.
Right-click the
Local Area Connection
associated with the
network interface card (NIC) in use and select
Properties
.
The
Local Area Connection Properties
dialog appears.
4.
Make sure you see a line that reads,
Internet Protocol
(TCP/IP)
. You may have to scroll down to see it.
a.
Click
Install
and select
Protocol
.
b.
Click
Add....
c.
Click to select the
Microsoft
TCP/IP
option and then
click
OK
.
5.
Check the box next to
Internet Protocol (TCP/IP)
.
6.
Click to select
Internet Protocol (TCP/IP)
and then click
Properties
. The
Internet Protocol (TCP/IP) Properties
dialog appears.
7.
Click the
Use the following IP Address:
button and then
type the following numbers:
IP address:
192.168.0.5
Subnet mask:
255.255.255.0.
Click
Ok
and then click
Ok
again.
8.
If you are running Windows XP, follow these steps to
disable the firewall. Otherwise continue Step 6 below
a.
Open the Windows
Network & Sharing Center
.
b.
Right-click the
Local Area Connection
associated
with your system, and select
Properties
. The Local
Area Connection dialog appears.
c.
Click the
Advanced
tab.
d.
Make sure the box
under Internet Connection
Firewall
is unchecked.
e.
Click
Ok
and then exit the Network Connections
screen.
Restart your
computer.


