Lyngdorf Audio RoomPerfect RP-1 Скачать руководство пользователя страница 17

1 7

Introduction to RoomPerfect™

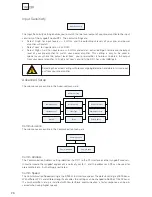
Once the guided set-up has been successfully completed you have the option to listen to music through 

two listening settings; Focus and Global room correction fi lters. To toggle between the two fi lters and 

‘Bypass’ you simply press the Up/Down buttons on the front panel or remote control.They can also be 

selected directly with the numerical buttons on the remote, 0 for bypass, 1 for Focus or 9 for Global.

Global Listening

The Global fi lter improves the sound quality across the whole room. When you are listening to music in 

a room but are not sat in any particular listening position, the global fi lter gives the best result.

Focus Listening 

The Focus fi lter improves the sound quality at a listening position by exploiting the 3-dimensional acous-

tic properties gained through the room measurements. This makes the Focus fi lter the best solution for 

optimal sound quality at a specifi c listening position.
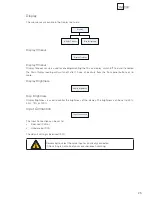
Voicing

When using RoomPerfect™ you will experience a much more precise and detailed sound reproduction 

– which could also be described as more analytical. 

The Voicing setting is an EQ fi lter that can be used to gently amplify or attenuate certain frequencies ac-

cording to your personal preferences and/or to compensate if a given recording sounds too ‘bright’ or too 

‘dark’. The standard voicing settings, and their numerical value on the remote control, are:  

• 

Neutral (0), Music 1 (1), Music 2 (2), Relaxed (3), Open (4), Open Air (5), Soft (6). 

The frequency curves of the different voicing settings can be viewed in the appendix. Neutral is a bypass 

setting.

You can toggle between neutral and the available voicings by pressing the Left/Right buttons on the re-

mote or front panel. The can also be selected directly by pressing “info” followed by the voicing number 

on the remote control.

Содержание RoomPerfect RP-1

Страница 1: ...Owner s manual RP 1 RoomPerfect MENU MENU ENTER ENTER RP 1 Room Processor...

Страница 2: ...2...

Страница 3: ...easurements 21 Calculation of Focus and Global Filters 22 Advanced Options 23 Change Focus Pos 23 Measure Room Pos 23 RoomKnowledge 24 RoomCorrection 24 Display 25 Display Timeout 25 Display Brightnes...

Страница 4: ...icroprocessor is active ON 3 All circuits active Unpacking the RP 1 Carefully remove the unit and accessory kit from the carton visually check for shipping damage Contact both the shipper and your Lyn...

Страница 5: ...We leave nothing to chance in the fully automated calibration process However for the advanced user there are plenty of challenges since the RP 1 is also a complete Control Centre that allows you to b...

Страница 6: ...eat 9 Do not defeat the safety purpose of the grounding type plug A grounding type plug has two pins and a third grounding prong The third prong is provided for your safety If the provided plug does n...

Страница 7: ...conds will set the RP 1 in stand by mode and turns On the RP 1 from stand by mode with a short press In normal operation mode the Up Down toggles between the Focus and Global filter and Bypass where a...

Страница 8: ...btained by using the balanced output Also it is possible to mix balanced and unbalanced connections i e to connect e g the main channel via the balanced output and the line chan nel via the unbalanced...

Страница 9: ...outputs Main and Line out Never connect balanced and unbalanced Output at the same time 6 Mic In Mic in for connection of RoomPerfect microphone 7 RS232 Input Aux RS232 communication connectors for c...

Страница 10: ...n 1 Select focus listening mode 3 Numerical Buttons 2 8 No function 4 Numerical Button 9 Selects global listening mode 5 Digital No function 6 Numerical Button 0 Selects bypass listening mode no room...

Страница 11: ...lobal filter and the Left Right toggles between Neutral and the available voicings In menu mode they are used for navigation in the menu system Pressing and holding down the Up Down Right Left keys ch...

Страница 12: ...1 is very simple to hook up There are three basic ways to connect the RP 1 to your system 1 Connect all sources to your preamplifier and connect it to the RP 1 input Then connect the RP 1 output sign...

Страница 13: ...tiple audio sources without switching source and or cables since the tape 2 loop Pre in out is always active and not depending on other used inputs and outputs Source s DPA 1 Digital Pre Amplifier RP...

Страница 14: ...A poweramp is connected to the Main Outputs Left and Right and the highpass crossover is set at 80Hz The Subwoofer is connected to the Line Output and the lowpass crossover is set at 80Hz Remember to...

Страница 15: ...on the front panel or the remote enters the menu or steps back one level in the menu system Use the left right arrows keys to navigate the Menu system To access a sub menu setting press the Enter but...

Страница 16: ...p Brightness RoomPerfect Guided setup Advanced options Measure Room Pos Change Focus Pos RoomKnowledge RoomCorrection Input Connection Input Sensitivity Advanced setup Communication Comm Address Comm...

Страница 17: ...ed through the room measurements This makes the Focus filter the best solution for optimal sound quality at a specific listening position Voicing When using RoomPerfect you will experience a much more...

Страница 18: ...procedure are Setting the measurement volume level Taking one Focus listening position measurement Taking at least three room position measurements Finally automatic calculation of Focus and Global fi...

Страница 19: ...signals sound very artificial and disharmonic due to the fact that they are composed of pure tones at different frequencies Press Enter to confirm and to commence the calibration process If the RP 1...

Страница 20: ...and Retry focus measurement press Enter is displayed If the error needs correcting this should be done at this point see RoomPerfect troubleshooting thereafter press Enter to retry the measurement The...

Страница 21: ...ok This process is repeated at least three times and until the RoomKnowledge reaches 90 Adding more Room Measurements If you have performed successful measurements and RoomKnowledge has reached 90 th...

Страница 22: ...s Please wait The filter calculation process can be expected to take anywhere between 5 seconds and a minute de pending on the specific task When RoomPerfect has calculated the room correction filters...

Страница 23: ...measurement process can commence as described in the Guided Setup chapter After a successful measurement the message RoomKnowledge XX Measurement ok is displayed Press Enter to continue The message Re...

Страница 24: ...ting we recommend to delete the filter and start over RoomKnowledge The RoomKnowledge index is a parameter that tells how much of the room s acoustical properties have been learned A high RoomKnowledg...

Страница 25: ...off after 10 sec of inactivity from the front panel buttons or re mote Display Brightness Display Brightness Disp Brightness Display Brightness is used to control the brightness of the display The bri...

Страница 26: ...tortion and obtain full scale out put from your pre amplifier Advanced Setup The sub menus accessible in the Advanced menu are Advanced setup Routing Line Out Level Crossover freq Delay Firmware versi...

Страница 27: ...ed to the Main and Line outputs when you want to connect an additional amplifier or subwoofer along with your main amplifier A Mono setting is also available for the Line output this is used when conn...

Страница 28: ...00 Hz You might experiment with turning the subwoofer so the driver faces the wall in a distance of 5 to 10 cm This will increase the bandwidth of the subwoofer However due to the limited bandwidth fr...

Страница 29: ...delays are then automatically calculated and applied to each channel 1 centimeter 0 3937 in The fault message Values for delay exceed limits is displayed when the difference between the distance from...

Страница 30: ...d the Room Perfect module as well as the RoomPerfect serial number Factory Reset The Factory Reset setting is used to restore all settings including RoomPerfect in the RP 1 to the fac tory settings If...

Страница 31: ...oudspeakers Low signal The error message Fault Low signal is displayed when the measurement has taken more than 5 minutes for the low frequency signal or 2 minutes for the high frequency signal This h...

Страница 32: ...rs are humming when the RP 1 is turned on Balanced and unbalanced for Line out connections are used at the same time Solution Disconnect the interfering connection Speakers are humming when the RP 1 i...

Страница 33: ...g The RP 1 firmware can be upgraded using the Lyngdorf Audio Serial Load software This is in the PC package available from www Lyngdorf com Press the Enter button while powering On to bring the produc...

Страница 34: ...any connections to its inputs or outputs Balanced Inputs The balanced XLR inputs are wired in accordance with IEC268 Pin 1 Chassis and ground Pin 2 Hot Pin 3 Cold Shell Chassis and ground Unbalanced...

Страница 35: ...dB Neutral voicing ref 4 4V Dynamic Range Analog to Analog 113dB Neutral voicing ref 4 4V Channel Separation 114dB AC Sweep from 125 16KHz All audio measurements except frequency response are measured...

Страница 36: ...stions and Answers please check the Support section on the Lyngdorf Audio website If you have any problems with or questions regarding your Lyngdorf Audio product please contact your nearest Lyngdorf...

Страница 37: ...Hz 100 Hz 1kHz 10kHz 6 4 2 0 2 4 6 Frequency Hz Magnitude dB Magnitude Response Music 2 10 Hz 100 Hz 1kHz 10kHz 6 4 2 0 2 4 6 Frequency Hz Magnitude dB Magnitude Response Open 10 Hz 100 Hz 1kHz 10kHz...

Страница 38: ...38...

Страница 39: ...39...

Страница 40: ...40 www lyngdorf com...

Отзывы: